> ## Documentation Index
> Fetch the complete documentation index at: https://docs.macstadium.com/llms.txt
> Use this file to discover all available pages before exploring further.
# Network Firewalls Cloud Connect VPN
> Connect to your MacStadium Orka cluster via Cisco ASAv VPN with OpenConnect or Cisco AnyConnect. Requires server address and credentials from your IP Plan.
**Requirements:**
* The server address from **Step 1: VPN** in the [IP Plan](/macstadium/macstadium-overview/ip-plan).
* The username and password from **Step 1: VPN** in the [IP Plan](/macstadium/macstadium-overview/ip-plan).
## About
To protect the environment, MacStadium deploys the Orka cluster with a dedicated [Cisco Adaptive Security Virtual Appliance](https://www.cisco.com/c/en/us/products/collateral/security/adaptive-security-virtual-appliance-asav/datasheet-c78-733399.html) (ASAv) firewall. Cisco ASAv runs the same software as physical Cisco ASAs and delivers full ASA firewall and VPN capabilities to the cloud.
The Orka cluster sits behind its dedicated Cisco ASAv firewall, which must be connected to the cluster via VPN to do any of the following tasks:
* Manage the Orka VMs and K8s pods.
* Log in to the firewall and manage connectivity between the cluster and the outside world (for example, enterprise networks, other private and public clouds).
MacStadium has pre-configured the firewall and has enabled VPN access. Simply run a VPN client and provide the server address and credentials for the connection.
## Overview
**(Open-source option) OpenConnect**
For users who are comfortable working with a Command Line Interface (CLI) or in a Terminal, consider using OpenConnect - an open-source VPN client available from the command line.
**Download and Install OpenConnect**
* If [Homebrew](https://brew.sh/) is enabled on the system, then run `brew install openconnect` from the command line.
* Windows users, can [download](https://www.infradead.org/openconnect/download.html) and [build](https://www.infradead.org/openconnect/building.html) the OpenConnect package or use [Cisco AnyConnect](/iaas/cisco-firewalls/network-firewalls-cloud-connect-vpn) instead.
**Configure OpenConnect to Access Orka via Custom Domain**
To be able to reach the custom Orka domain API endpoint, add a DNS server to the network configuration.
The DNS server address is the `.251` address for the `Private-1` network from the [IP Plan](/macstadium/macstadium-overview/ip-plan). For example: `10.10.10.251` or `10.221.188.251`.
**macOS**
1. Go to **System Settings > Network**.
2. From the list of network connections, select the current Internet connection, locate and click the Advanced... button at the right bottom corner of the dialog.
3. Go to the DNS tab.
4. At the bottom of the DNS Servers list, click **+**.
5. Type the Orka DNS address and press Enter.
6. If not already at the top, drag and drop the Orka DNS server to the top. It must be the first item in the list.
7. Click **OK.**
8. Click **Apply.**
9. Exit **System Settings**.
**Linux**
1. Use a text editor to open `/etc/resolv.conf`.
2. Locate the nameserver section and add the Orka DNS address:
```
nameserver
```
3. Make sure that this is the first nameserver entry in the list.
**Windows**
1. Go to **Control Panel > Network and Internet**.
2. Under Network and Sharing Center, select View network and status.
3. In the Network and Sharing Center, in the sidebar, select Change adapter settings.
4. In the Network Connections window, right-click the current Internet connection and select Properties.
5. Go to the Networking tab, scroll down and click Internet Protocol Version 4 (TCP/IPv4).
6. With Internet Protocol Version 4 (TCP/IPv4) highlighted, click Properties.
7. Go to the General tab and select Use the following DNS server addresses.
8. Add the Orka DNS server as the Preferred DNS server. Add any other name server as the Alternate DNS server (for example, 8.8.8.8).
9. Click **OK**.
10. Click **Close**.
### Use OpenConnect
1. From the command line, run the following command. Replace `` with the server address from Step 1: VPN in the IP Plan.
```
sudo openconnect --protocol=anyconnect
// OR if running on Windows
openconnect --protocol=anyconnect
```
2. Follow the prompts.
* On the immediate Password prompt, provide the sudo password (the password for the current computer user) and press Enter.
* On the Enter 'yes' to accept, 'no' to abort; anything else to view: prompt, type yes and press Enter.
* On the Username prompt, provide the username from Step 1: VPN in the IP Plan and press Enter.
* On the Password prompt, provide the password from Step 1: VPN in the IP Plan and press Enter.
When the connection is established, a similar output (show below) appears:
 **Want to terminate the VPN connection?**
At any time press `Ctrl+C` on the command line.
## Cisco AnyConnect Secure Mobility Client
Cisco firewalls are designed to work with the [Cisco AnyConnect Secure Mobility Client](https://www.cisco.com/c/en/us/support/security/anyconnect-secure-mobility-client/tsd-products-support-series-home.html) as a VPN client. For a GUI VPN client or that is running on Windows, use Cisco AnyConnect.
### Download and install Cisco AnyConnect
1. In the browser, navigate to the server address from Step 1: VPN of the [IP Plan](/macstadium/macstadium-overview/ip-plan). Use https\://.
2. Ignore the certificate warning and proceed to the address.
3. When prompted, enter the credentials from Step 1: VPN in the IP Plan.\\
**Want to terminate the VPN connection?**
At any time press `Ctrl+C` on the command line.
## Cisco AnyConnect Secure Mobility Client
Cisco firewalls are designed to work with the [Cisco AnyConnect Secure Mobility Client](https://www.cisco.com/c/en/us/support/security/anyconnect-secure-mobility-client/tsd-products-support-series-home.html) as a VPN client. For a GUI VPN client or that is running on Windows, use Cisco AnyConnect.
### Download and install Cisco AnyConnect
1. In the browser, navigate to the server address from Step 1: VPN of the [IP Plan](/macstadium/macstadium-overview/ip-plan). Use https\://.
2. Ignore the certificate warning and proceed to the address.
3. When prompted, enter the credentials from Step 1: VPN in the IP Plan.\\
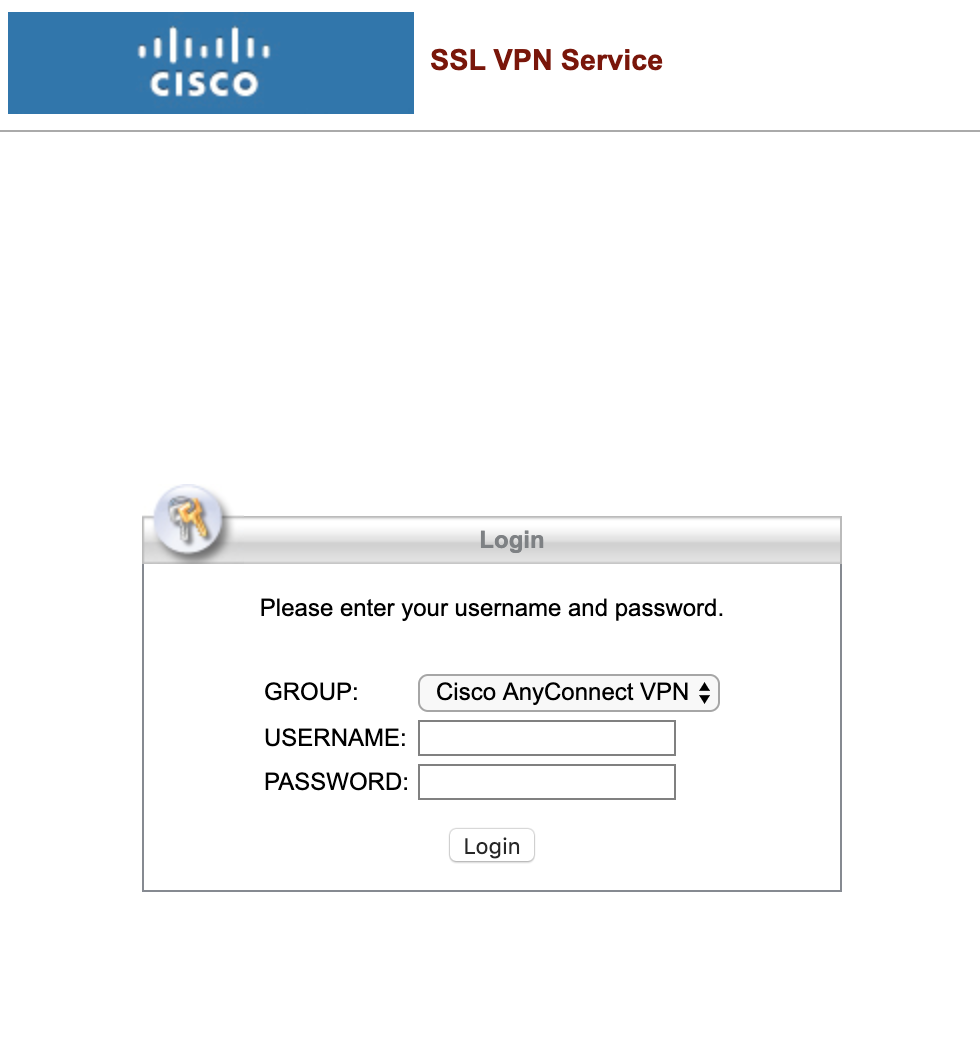 4. When prompted, download, install, and run the Cisco AnyConnect desktop client.\\
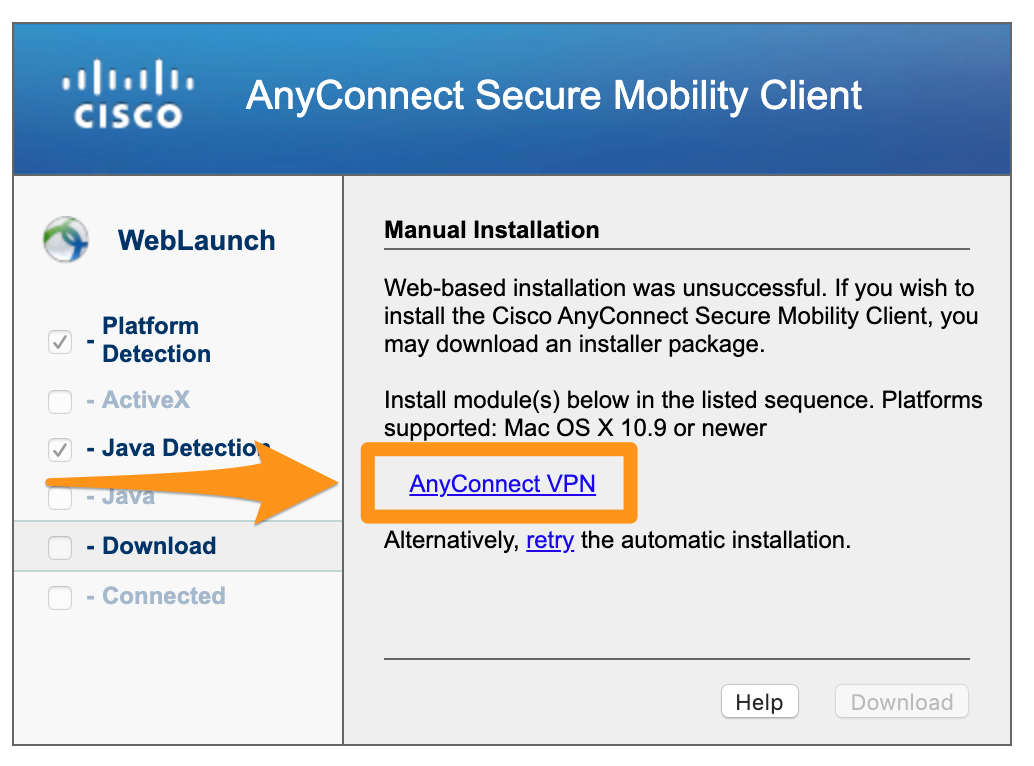 ### Configure AnyConnect to access Orka via custom domain
On Windows, to be able to reach the custom Orka domain with AnyConnect, add a DNS server to the network configuration.
On macOS and Linux, no changes are required.
The DNS server address is the `.251` address for the `Private-1` network from the [IP Plan](/macstadium/macstadium-overview/ip-plan). For example: `10.10.10.251` or `10.221.188.251`.
**Windows**
With Cisco AnyConnect already connected to your cluster:
1. Go to **Control Panel > Network and Internet**.
2. Under Network and Sharing Center, select View network and status.
3. In the Network and Sharing Center, in the sidebar, select Change adapter settings.
4. In the Network Connections window, right-click Cisco AnyConnect Secure Mobility Client Connection and select Properties.
5. Go to the Networking tab, scroll down and click Internet Protocol Version 4 (TCP/IPv4).
6. With Internet Protocol Version 4 (TCP/IPv4) highlighted, click Properties.
7. Go to the General tab and select Use the following DNS server addresses.
8. Add the Orka DNS server as the Preferred DNS server. You can add any other name server as the Alternate DNS server (for example, 8.8.8.8).
9. Click **OK**.
10. Click **Close**.
### Use Cisco AnyConnect
1. Run Cisco AnyConnect Secure Mobility Client.
2. When prompted, enter the server address from Step 1: VPN of your IP Plan and click Connect.
### Configure AnyConnect to access Orka via custom domain
On Windows, to be able to reach the custom Orka domain with AnyConnect, add a DNS server to the network configuration.
On macOS and Linux, no changes are required.
The DNS server address is the `.251` address for the `Private-1` network from the [IP Plan](/macstadium/macstadium-overview/ip-plan). For example: `10.10.10.251` or `10.221.188.251`.
**Windows**
With Cisco AnyConnect already connected to your cluster:
1. Go to **Control Panel > Network and Internet**.
2. Under Network and Sharing Center, select View network and status.
3. In the Network and Sharing Center, in the sidebar, select Change adapter settings.
4. In the Network Connections window, right-click Cisco AnyConnect Secure Mobility Client Connection and select Properties.
5. Go to the Networking tab, scroll down and click Internet Protocol Version 4 (TCP/IPv4).
6. With Internet Protocol Version 4 (TCP/IPv4) highlighted, click Properties.
7. Go to the General tab and select Use the following DNS server addresses.
8. Add the Orka DNS server as the Preferred DNS server. You can add any other name server as the Alternate DNS server (for example, 8.8.8.8).
9. Click **OK**.
10. Click **Close**.
### Use Cisco AnyConnect
1. Run Cisco AnyConnect Secure Mobility Client.
2. When prompted, enter the server address from Step 1: VPN of your IP Plan and click Connect.
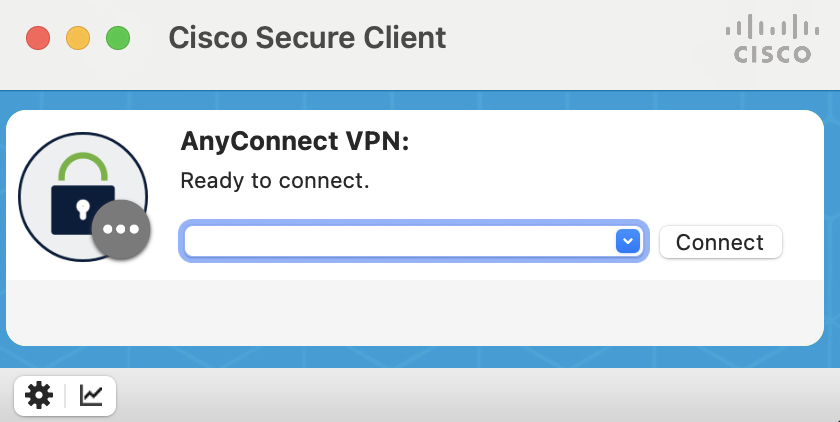 3. If prompted that an untrusted server was blocked, perform the following steps:
* Click Change Setting... and deselect Block connections to untrusted servers.
* Close the Preferences - VPN window.
* Click Connect again.
3. If prompted that an untrusted server was blocked, perform the following steps:
* Click Change Setting... and deselect Block connections to untrusted servers.
* Close the Preferences - VPN window.
* Click Connect again.
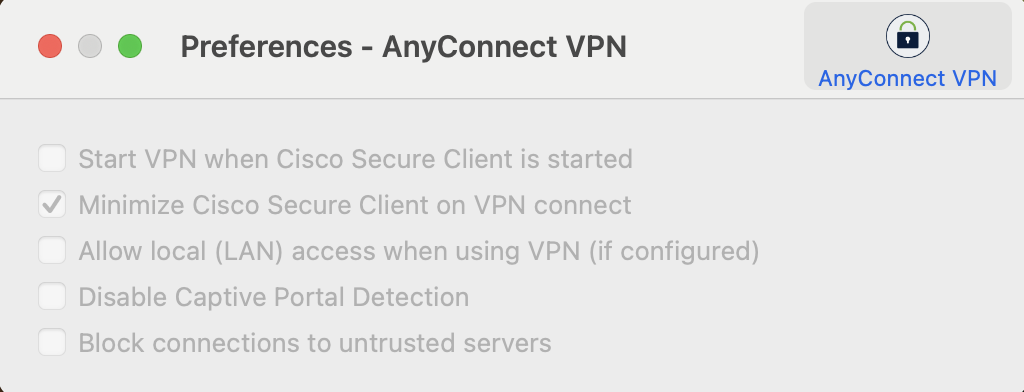 4. If prompted that the server certificate is untrusted, click Connect Anyway.
5. When prompted, provide login credentials and click **OK**.
4. If prompted that the server certificate is untrusted, click Connect Anyway.
5. When prompted, provide login credentials and click **OK**.