> ## Documentation Index
> Fetch the complete documentation index at: https://docs.macstadium.com/llms.txt
> Use this file to discover all available pages before exploring further.
# Creating a New VM Manually
> Create a Private Cloud VM manually using an uploaded ISO. Used for OS versions not available as recipes. More effort than recipe-based deployment.
In addition to deploying VMs using recipes, virtual machines may also be created manually. This is primarily done when specific versions of OSes are required (for instance, desktop versions of Windows). Manually deployed VMs take additional effort to configure when compared to deployments from recipe. MacStadium recommends the use of recipes for VM deployment whenever possible.
## Uploading Images
For manually created VMs, guest operating systems are installed by adding a CD-ROM device with media file set to a bootable install ISO. Install ISOs are stored in the Media Images repository.
To upload an ISO for installation:
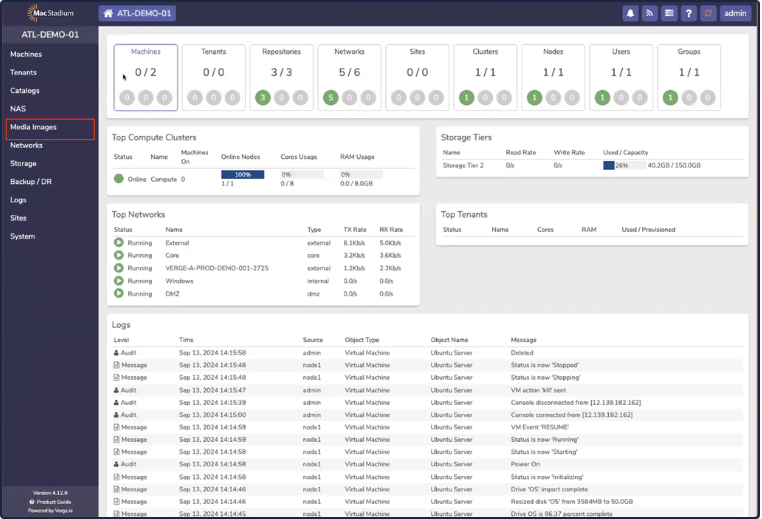
1. Select **Machines → Media Images**.
 *Media Images*
2. The **Media Images** page shows stored install disk and uploaded VM images. There are two ways to upload images for install:
* Upload from URL - Private Cloud downloads the image from a remote URL
* Upload - The image is uploaded from the connected desktop
In this example, we will use Ubuntu Server as the install image.
## Upload from URL
Upload from URL is the recommended approach, as Private Cloud can often download images faster directly from the repository.
3. Find a direct link for the install media for the desired OS. In this case, Ubuntu only offers direct links through their mirror, so we'll select Alternative downloads, and get the URL from a mirror.
*Media Images*
2. The **Media Images** page shows stored install disk and uploaded VM images. There are two ways to upload images for install:
* Upload from URL - Private Cloud downloads the image from a remote URL
* Upload - The image is uploaded from the connected desktop
In this example, we will use Ubuntu Server as the install image.
## Upload from URL
Upload from URL is the recommended approach, as Private Cloud can often download images faster directly from the repository.
3. Find a direct link for the install media for the desired OS. In this case, Ubuntu only offers direct links through their mirror, so we'll select Alternative downloads, and get the URL from a mirror.
 *Example: Ubuntu Server Download*
 *Direct Download links from Mirror*
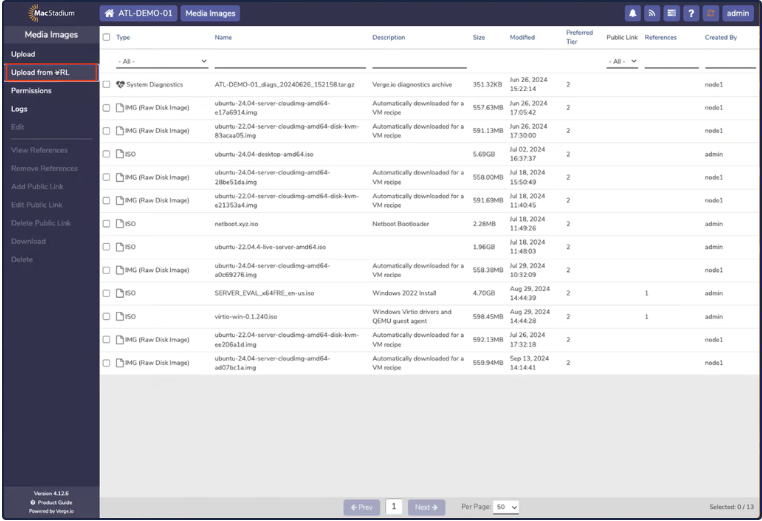
4. Upload the image to Private Cloud from the mirror. Return to the **Media Images** pages.
5. Select **Upload from URL**.
*Direct Download links from Mirror*
4. Upload the image to Private Cloud from the mirror. Return to the **Media Images** pages.
5. Select **Upload from URL**.
 *Upload from URL*
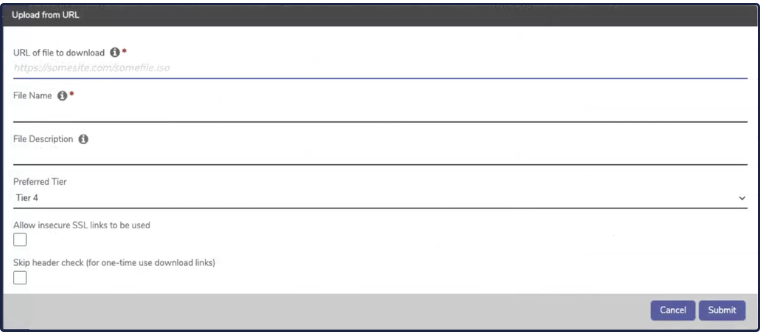
6. The **Upload from URL** dialog box opens.
*Upload from URL*
6. The **Upload from URL** dialog box opens.
 *Upload from URL*
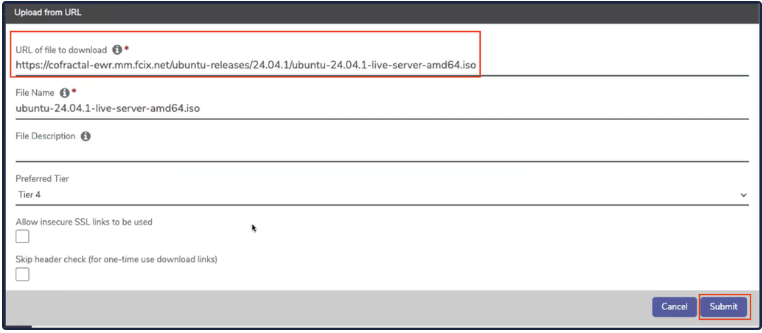
7. Paste the download link into the **Upload from URL** page.
*Upload from URL*
7. Paste the download link into the **Upload from URL** page.
 Copy Link
8. Click **Submit**, and the **Upload Process** begins.
Copy Link
8. Click **Submit**, and the **Upload Process** begins.
 *Upload Process*
## Upload Directly
1. To upload an ISO from the connected computer, choose Upload on the Media Images screen. The **Upload Files** screen appears.
*Upload Process*
## Upload Directly
1. To upload an ISO from the connected computer, choose Upload on the Media Images screen. The **Upload Files** screen appears.
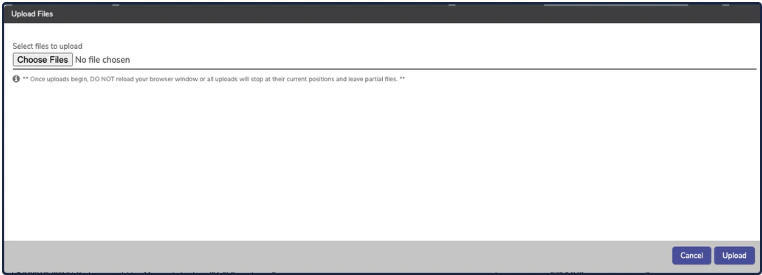 Upload Files Screen
2. Click **Upload**, and the **Upload Process** begins.
Upload Files Screen
2. Click **Upload**, and the **Upload Process** begins.
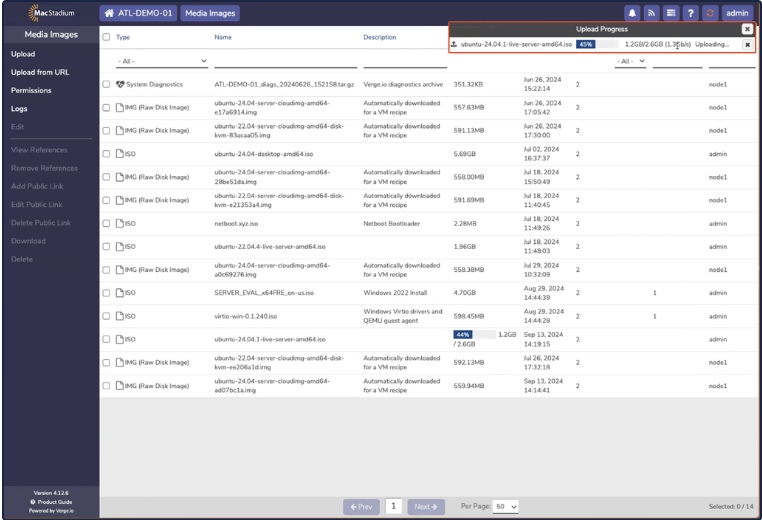 Upload Process