> ## Documentation Index
> Fetch the complete documentation index at: https://docs.macstadium.com/llms.txt
> Use this file to discover all available pages before exploring further.
# Manual Windows Installation
> Windows does not include Virtio drivers by default. These drivers need to be installed from a mounted disk during Windows installation.
Windows does not include Virtio drivers by default. These drivers need to be installed from a mounted disk during Windows installation.
For Windows Server installation, MacStadium highly recommends the use of the Windows Server recipe.
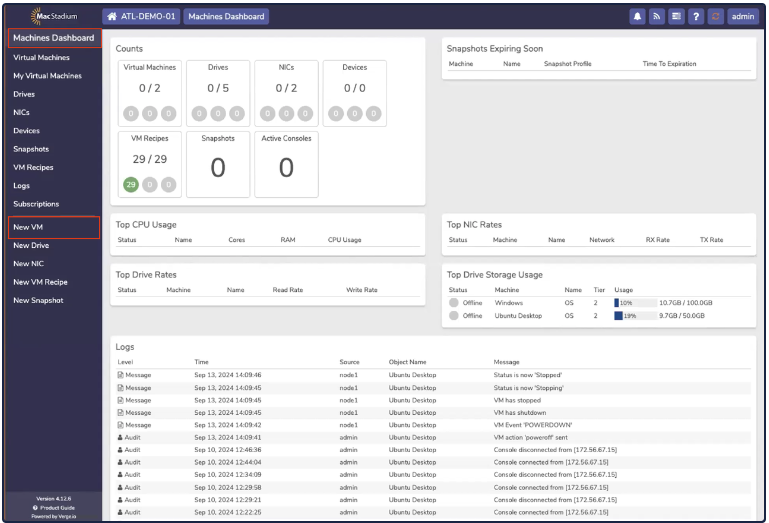
1. Windows requires additional drivers in order to access Private Cloud's virtualized storage and network hardware. To install a Windows VM manually, select **Machines Dashboard → Virtual Machines.**
2. Click **New VM**.
 New VM
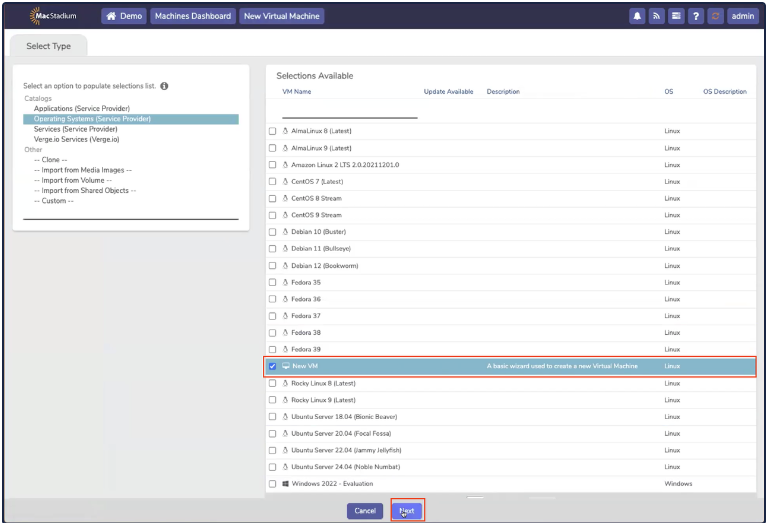
3. The *Select Type* tab opens. The left-hand side of the screen contains a list of options (Operating Systems, Services, and so on.) The right-hand side of the screen contains a list of recipes. Select **New VM** and click **Next**.
New VM
3. The *Select Type* tab opens. The left-hand side of the screen contains a list of options (Operating Systems, Services, and so on.) The right-hand side of the screen contains a list of recipes. Select **New VM** and click **Next**.
 Next
4. The *Virtual Machine Setting* tab opens.
Next
4. The *Virtual Machine Setting* tab opens.
 Virtual Settings Tab
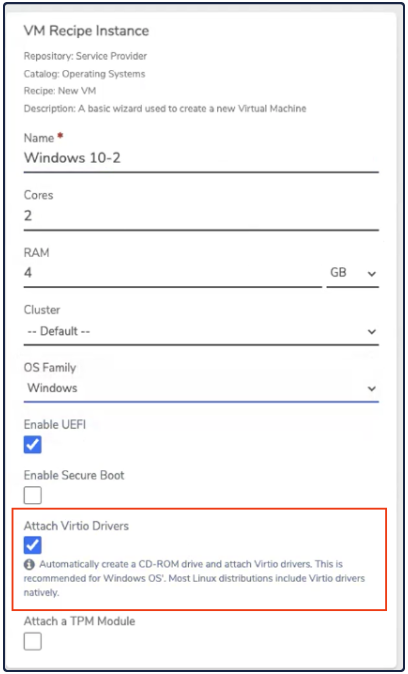
5. In the *VM Recipe Instance* box, complete the following fields:
* **Name**
* **Cores**
* **RAM**
* **Cluster** (can be left as *Default*)
* **OS Family** = Windows
* **Attach Virtio Drives** = checked
Virtual Settings Tab
5. In the *VM Recipe Instance* box, complete the following fields:
* **Name**
* **Cores**
* **RAM**
* **Cluster** (can be left as *Default*)
* **OS Family** = Windows
* **Attach Virtio Drives** = checked
 VM Recipe Instance
Make sure the **Attach Virtio Drivers** checkbox is selected. This is required to install the Windows operating system.
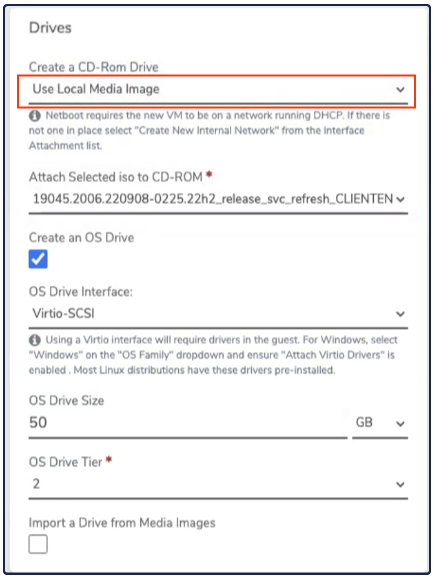
A Windows Install ISO must be uploaded to Media Images before installation.
6. In the Drives box, make sure the **Create CD-ROM Drive** is set to **Use Local Media Image**. Select an uploaded Windows install ISO.
VM Recipe Instance
Make sure the **Attach Virtio Drivers** checkbox is selected. This is required to install the Windows operating system.
A Windows Install ISO must be uploaded to Media Images before installation.
6. In the Drives box, make sure the **Create CD-ROM Drive** is set to **Use Local Media Image**. Select an uploaded Windows install ISO.
 *Drives*
7. In the Network box, set the **NIC Interface** to **Virtio**, and the **Attach Network Interface** to **Internal**.
*Drives*
7. In the Network box, set the **NIC Interface** to **Virtio**, and the **Attach Network Interface** to **Internal**.
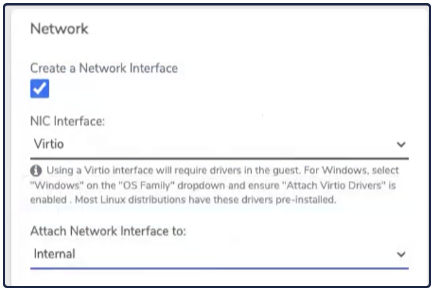 Network
8. Click **Submit**.
Network
8. Click **Submit**.
 Virtual Machine Settings
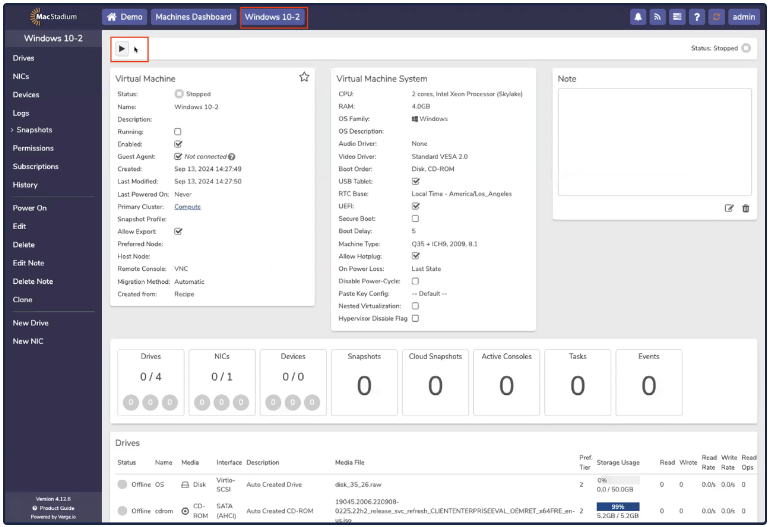
9. In the **New VM (Windows)** page, click **Power**.
Virtual Machine Settings
9. In the **New VM (Windows)** page, click **Power**.
 10. In the **Confirmation** box, click Power On.
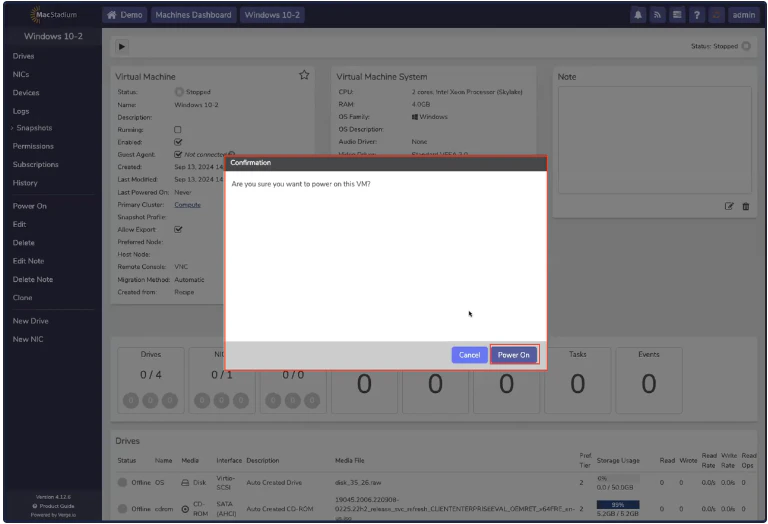 *Power On*
11. Open the **Console** by clicking the **Console** button.
*Power On*
11. Open the **Console** by clicking the **Console** button.
 *Console Button*
12. When prompted, press any key to begin installation.
13. The **Windows** screen opens, click **Next**.
*Console Button*
12. When prompted, press any key to begin installation.
13. The **Windows** screen opens, click **Next**.
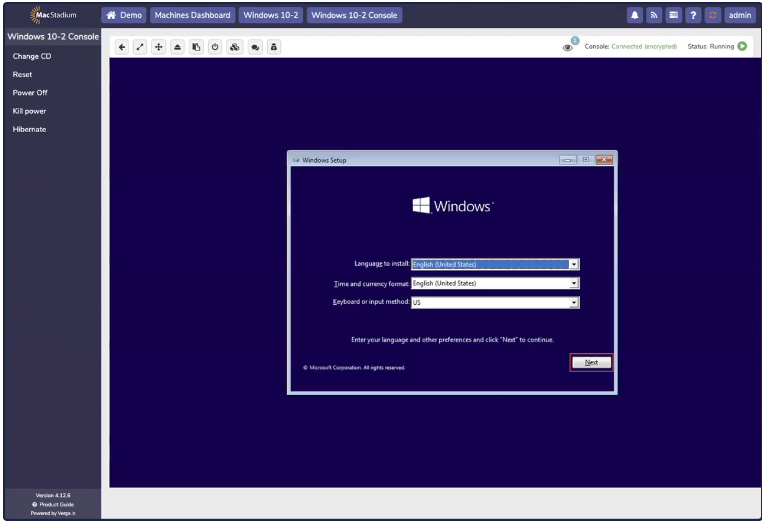 *Windows*
14. Click **Install Now**.
*Windows*
14. Click **Install Now**.
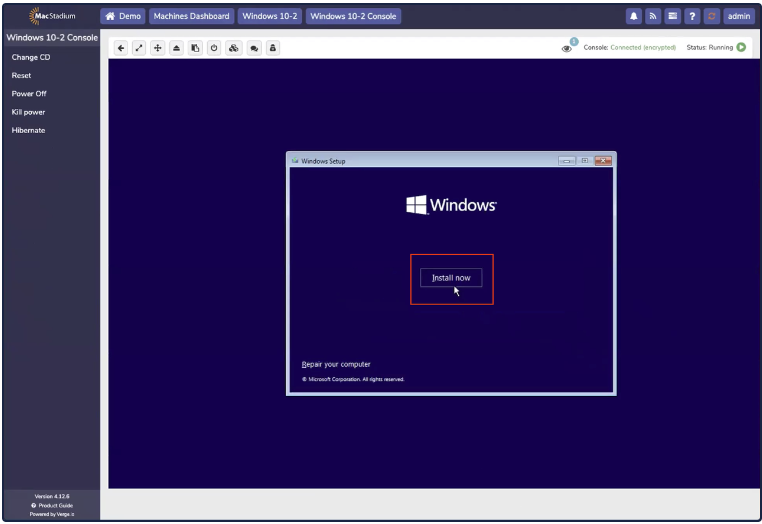 *Install Now*
15. Accept the license terms and click **Next.**
*Install Now*
15. Accept the license terms and click **Next.**
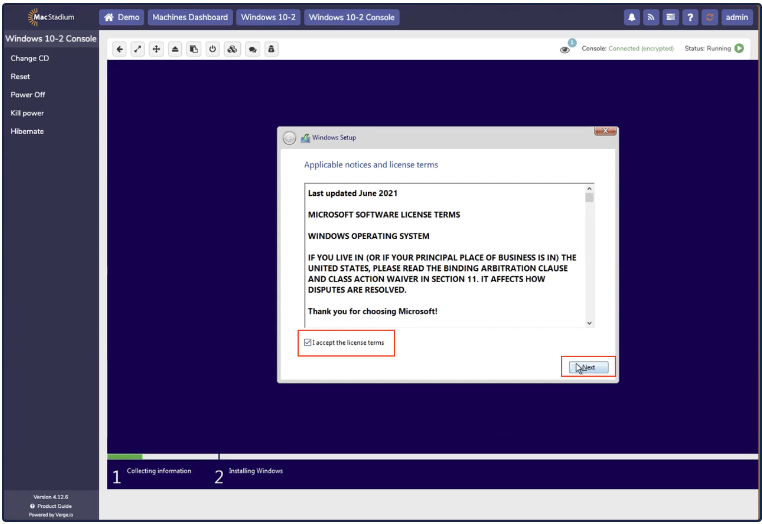 *Advanced*
16. Select **Custom: Install Windows Only (advanced)**.
*Advanced*
16. Select **Custom: Install Windows Only (advanced)**.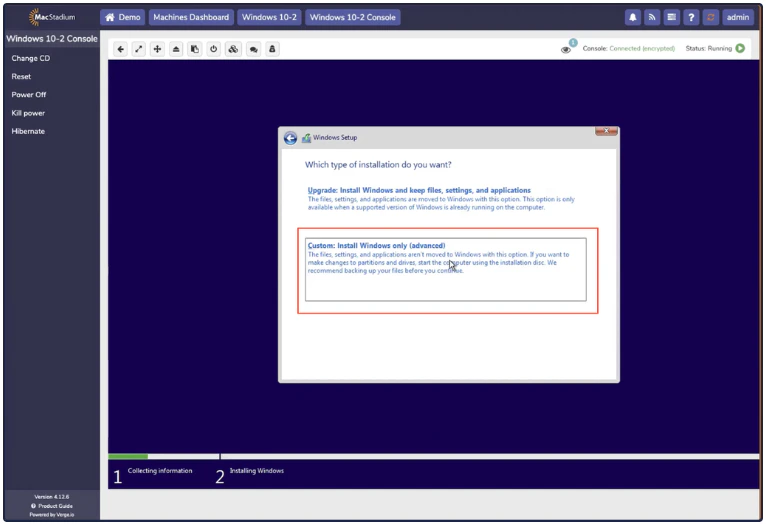 *Custom*
17. The installation will fail to find any drives. At this point, the virtio storage drivers need to be loaded to continue the install. Click **Load Driver**.
*Custom*
17. The installation will fail to find any drives. At this point, the virtio storage drivers need to be loaded to continue the install. Click **Load Driver**.
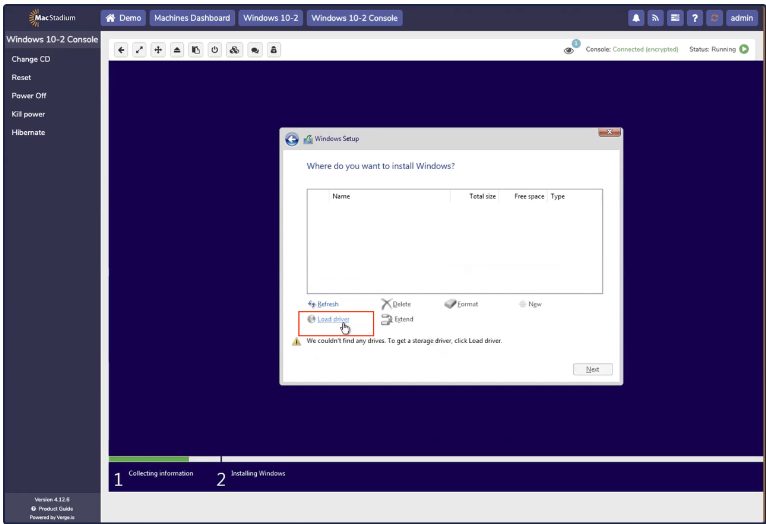 *Load Driver*
18. Click **OK**.
*Load Driver*
18. Click **OK**.
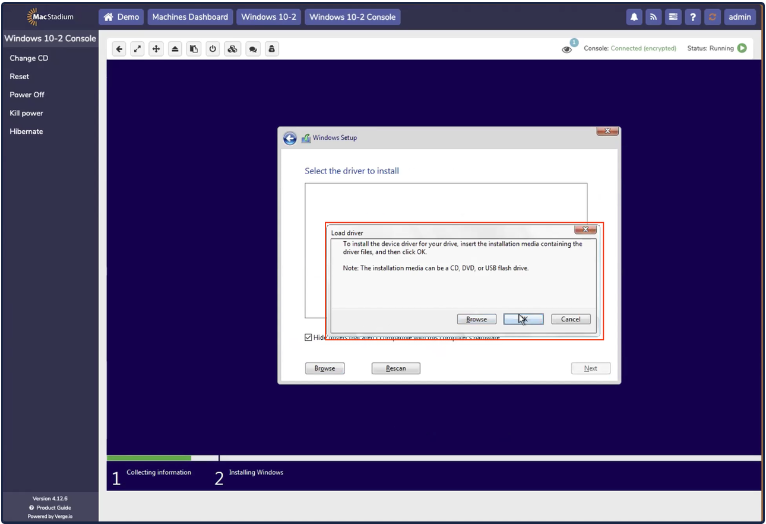 OK
19. Select the driver for the corresponding Windows version, according to the folder name. For example, the Windows 10 driver is located in E:\amd64\w10\\.
OK
19. Select the driver for the corresponding Windows version, according to the folder name. For example, the Windows 10 driver is located in E:\amd64\w10\\.
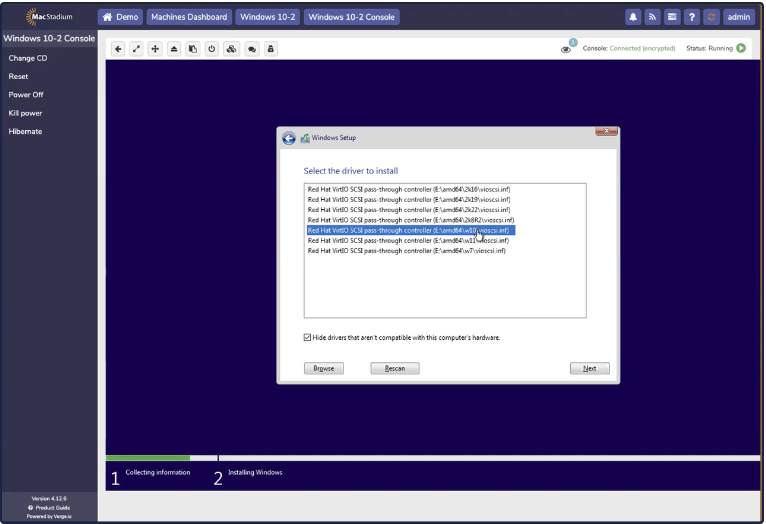 Windows 10 Driver
20. Windows begins to install. Allow the installation to finish. Network connectivity does not work during the install, this is expected, as Windows does not come with Virtio network drivers.
Windows 10 Driver
20. Windows begins to install. Allow the installation to finish. Network connectivity does not work during the install, this is expected, as Windows does not come with Virtio network drivers.
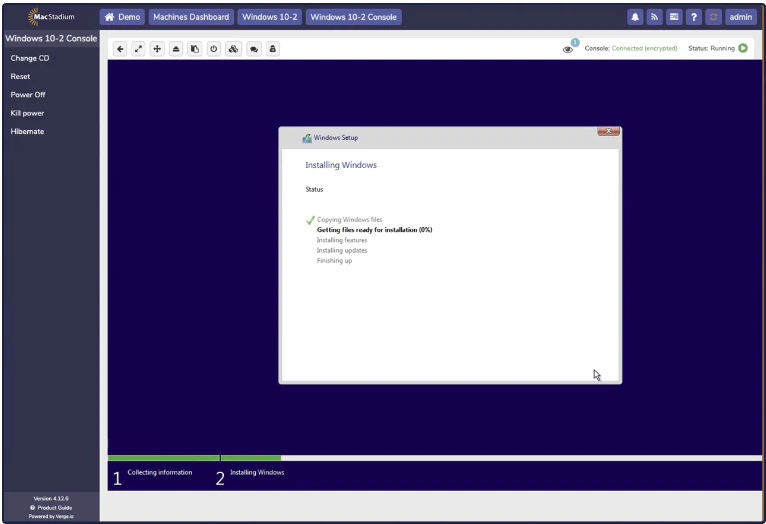 Installing Windows
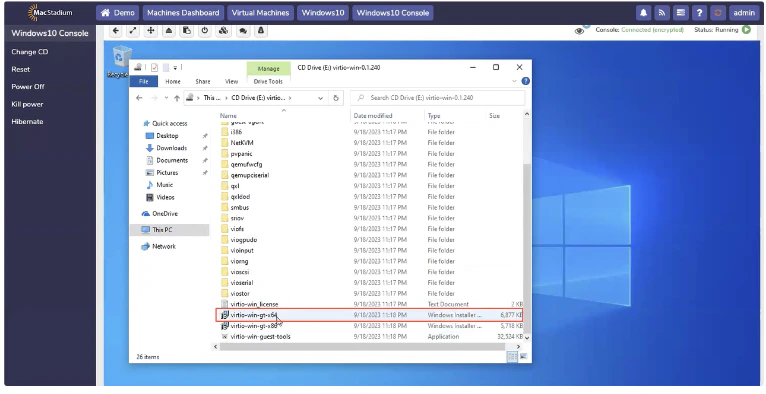
21. Once installed, additional drivers need to be installed to allow network connectivity. To do this, open Explorer, and navigate to This PC. A CD drive with Virtio drivers should be accessible.
Installing Windows
21. Once installed, additional drivers need to be installed to allow network connectivity. To do this, open Explorer, and navigate to This PC. A CD drive with Virtio drivers should be accessible.
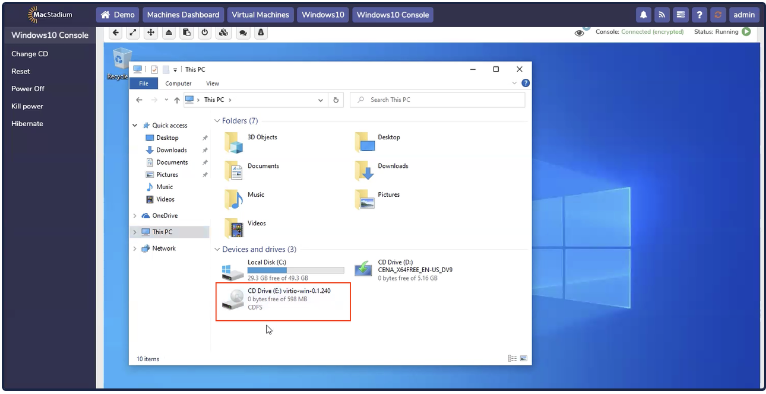 *CD*
22. **Double click** on **virtio-win-gt-x64**.
*CD*
22. **Double click** on **virtio-win-gt-x64**.
 *File Name*
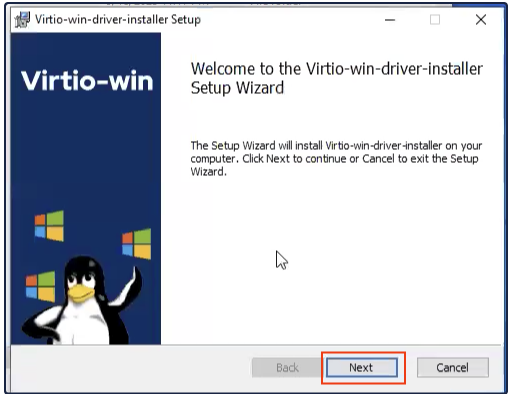
23. When the **Setup Wizard** opens, click **Next**.
*File Name*
23. When the **Setup Wizard** opens, click **Next**.
 *Wizard*
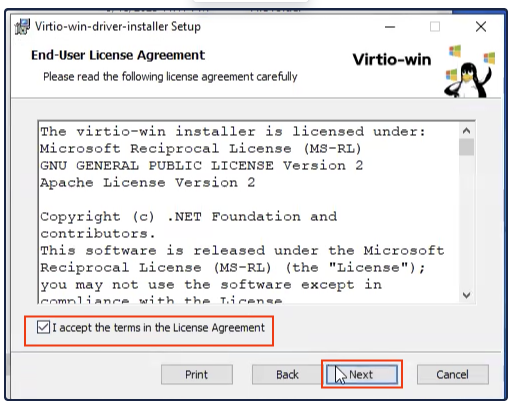
24. Accept the **terms** and click **Next**.
*Wizard*
24. Accept the **terms** and click **Next**.
 *Terms*
25\. Choose all and click **Next**.
*
*Terms*
25\. Choose all and click **Next**.
* *
*Select All*
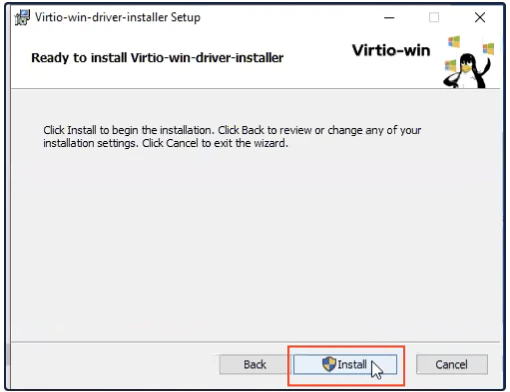
26. Click **Install** to begin the installation.
*
*Select All*
26. Click **Install** to begin the installation.
 *Install*
27. The progress bar appears.
*Install*
27. The progress bar appears.
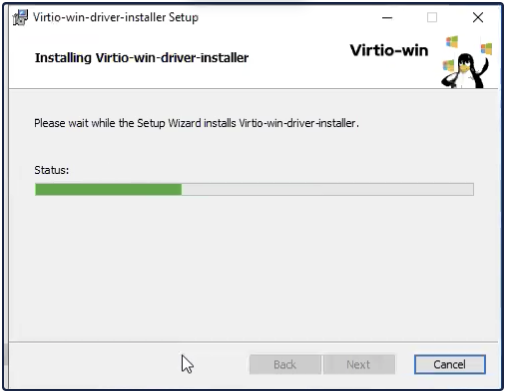 *Progress Bar*
28. Click **Finish** to complete the Setup Wizard.
*Progress Bar*
28. Click **Finish** to complete the Setup Wizard.
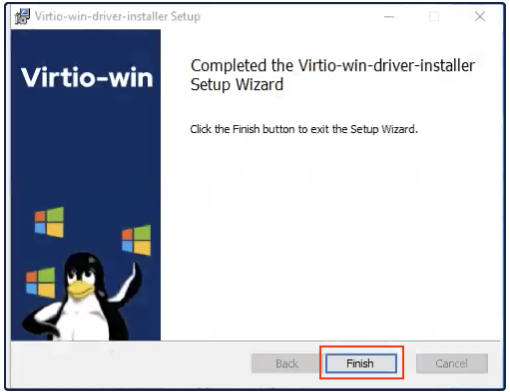 Finish
29. Install **Guest tools** by clicking on the file **virtio-win-guest-tools**. Then accept the **license terms** and click **Install**.
Finish
29. Install **Guest tools** by clicking on the file **virtio-win-guest-tools**. Then accept the **license terms** and click **Install**.
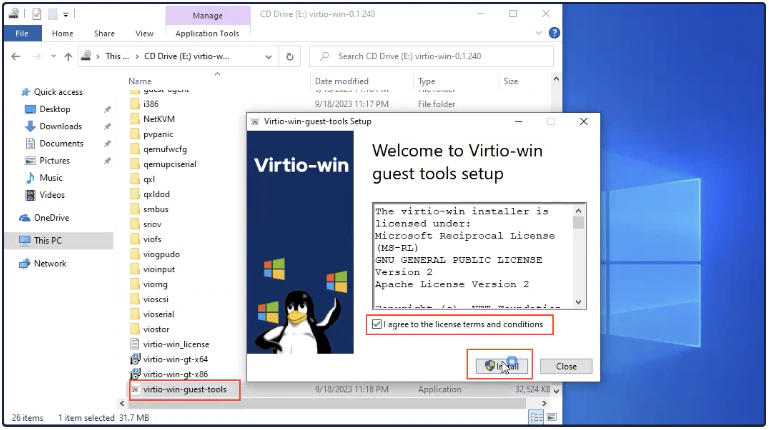 *Install*
30. The progress bar appears.
*Install*
30. The progress bar appears.
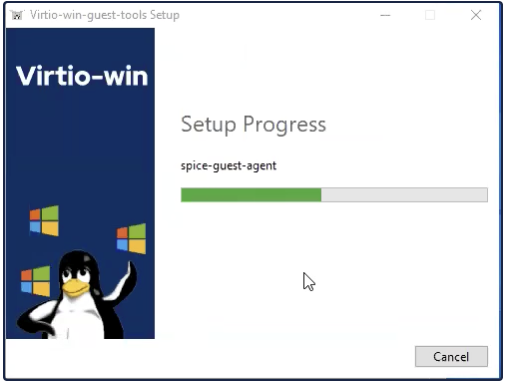 Progress Bar
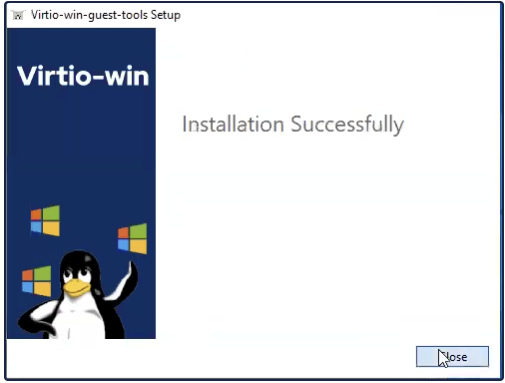
31. Click **Close** to complete the installation. Windows is now ready for use.
Progress Bar
31. Click **Close** to complete the installation. Windows is now ready for use.
 *Close*