> ## Documentation Index
> Fetch the complete documentation index at: https://docs.macstadium.com/llms.txt
> Use this file to discover all available pages before exploring further.
# VM Creation and OS Installation
> How to create a new VM manually in MacStadium Private Cloud: configure VM settings, attach an ISO, set a static IP, and install the OS via console.
Before following these steps, you need a bootable ISO uploaded to your cluster's Media Images repository. If you haven't done that yet, follow the steps in [Creating a New VM Manually](/iaas/x86-vms-private-cloud-vms/creating-a-new-vm-manually) under the **Uploading Images** section, then return here.
1. Once the file completes the download process and the files appear in the **Media Images** page, Navigate to the **Machines Dashboard**.
2. Click **New VM**.
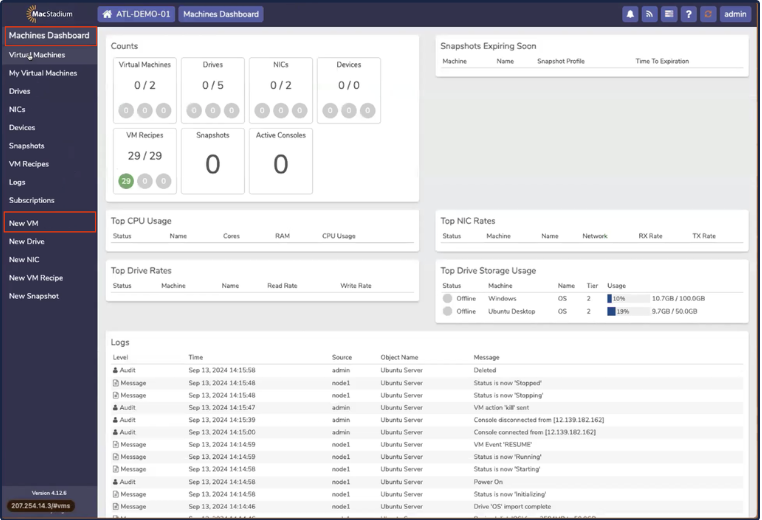 *New VM*
3. On the *Select Type* tab, select **New VM** and click **Next.**
New VM is a blank recipe that allows for manual OS installation.
*New VM*
3. On the *Select Type* tab, select **New VM** and click **Next.**
New VM is a blank recipe that allows for manual OS installation.
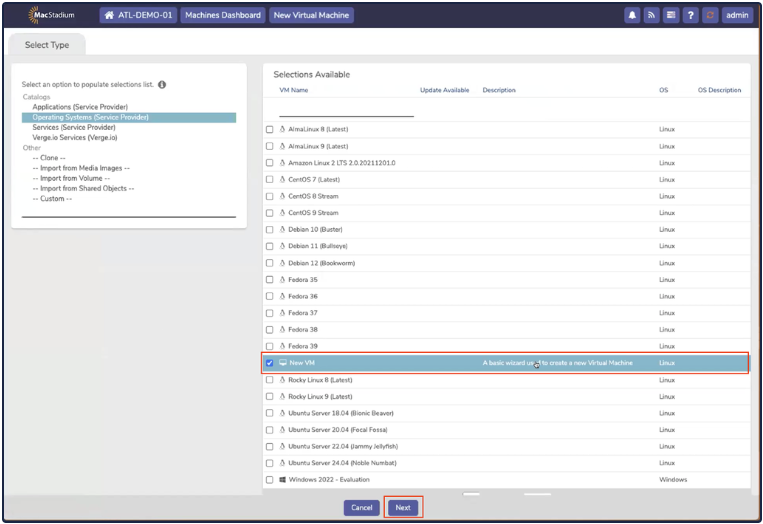 Select Type Tab
4. The *Virtual Machine Settings* tab opens.
Select Type Tab
4. The *Virtual Machine Settings* tab opens.
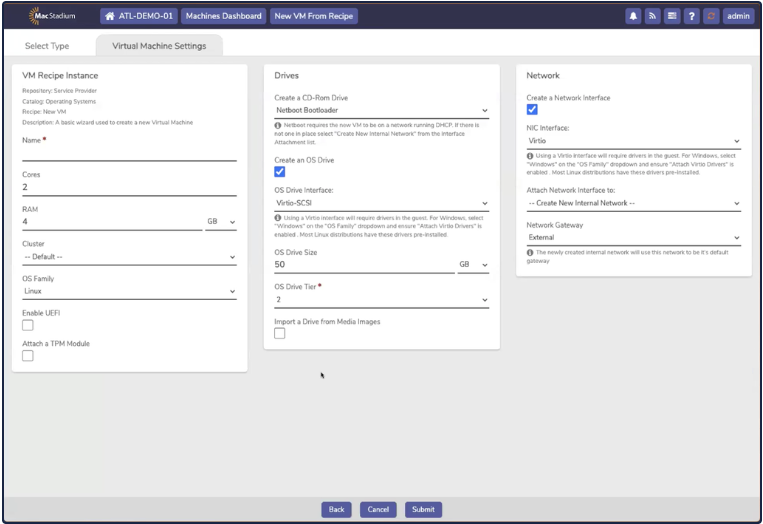 *Virtual Machine Settings Tab*
5. In the *VM Recipe Instance* box, complete the following fields:
* **Name**
* **Cores**
* **RAM**
* **Cluster** (can be left as *Default*)
* **OS Family**
*Virtual Machine Settings Tab*
5. In the *VM Recipe Instance* box, complete the following fields:
* **Name**
* **Cores**
* **RAM**
* **Cluster** (can be left as *Default*)
* **OS Family**
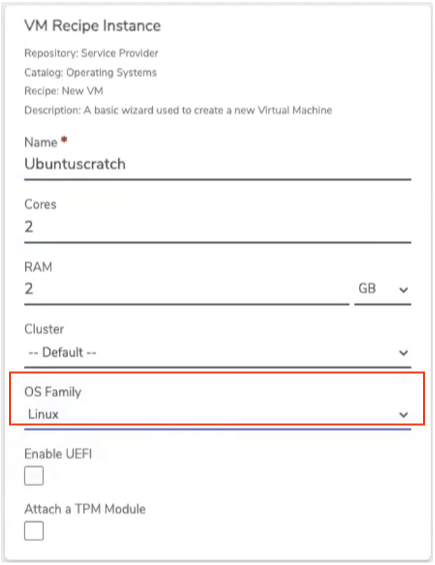 *VM Recipe Instance*
It is important that the OS Family matches the OS type installed.
6. In the Drives box:
* **Create a CD-Rom Drive**, select *Use Local Media Image*
* **Attach Selected iso to CD-ROM**, select the file that was previously uploaded into Media Images
* **OS Drive Interface**, select *Virtio-SCSI*
*
*VM Recipe Instance*
It is important that the OS Family matches the OS type installed.
6. In the Drives box:
* **Create a CD-Rom Drive**, select *Use Local Media Image*
* **Attach Selected iso to CD-ROM**, select the file that was previously uploaded into Media Images
* **OS Drive Interface**, select *Virtio-SCSI*
* *
*Drives*
7. In the Network box, make sure the Create Network Interface is checked and select the interface from the dropdown.
*
*Drives*
7. In the Network box, make sure the Create Network Interface is checked and select the interface from the dropdown.
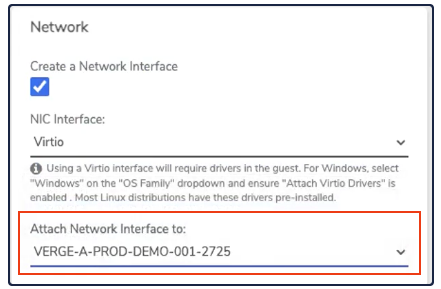 *Network*
Unlike OS Recipe templates, manually created VMs require that IP configuration be done at the OS level, and cannot be configured when deploying the VM.
8. Click **Submit**.
*Network*
Unlike OS Recipe templates, manually created VMs require that IP configuration be done at the OS level, and cannot be configured when deploying the VM.
8. Click **Submit**.
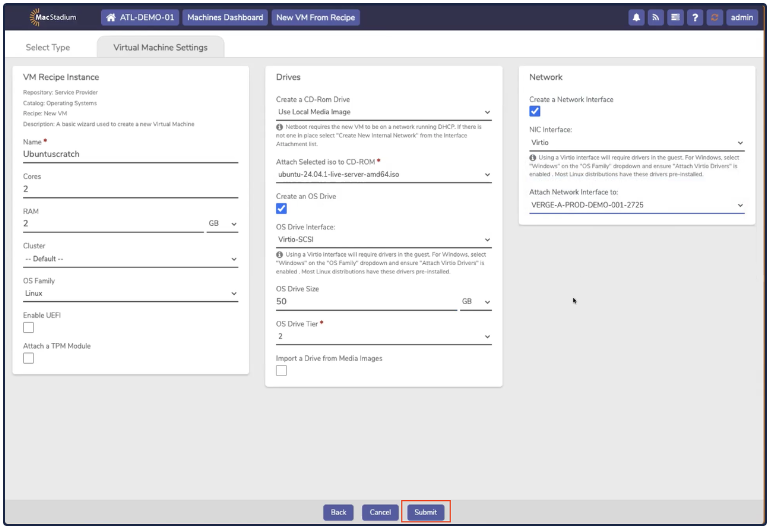 *Submit*
9. The new VM screen opens. Click the **Power** button and the *Confirmation box* opens.
10. Click **Power On**.
*Submit*
9. The new VM screen opens. Click the **Power** button and the *Confirmation box* opens.
10. Click **Power On**.
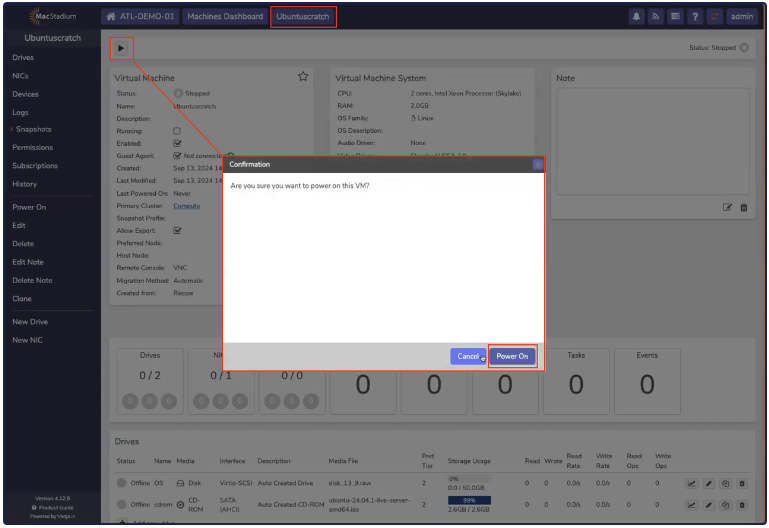 *Power On*
11. Next, the OS must be installed and configured. To access the machine, click **Console**.
*Power On*
11. Next, the OS must be installed and configured. To access the machine, click **Console**.
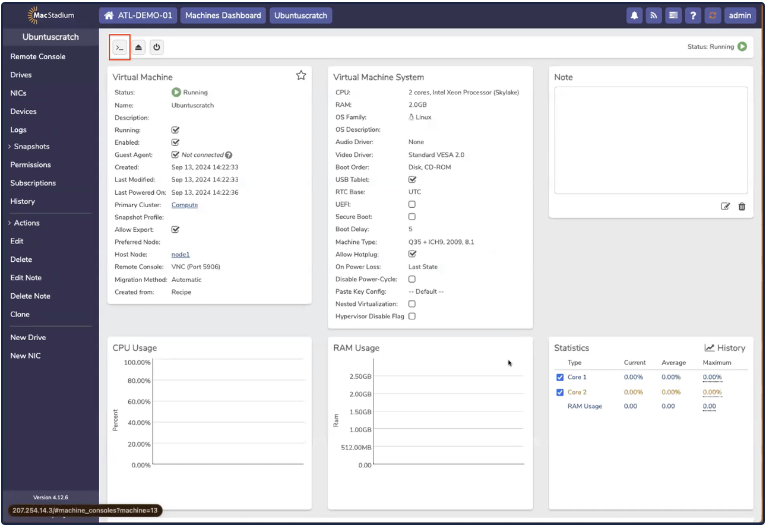 *Console Button*
12. The **Console** opens.
*Console Button*
12. The **Console** opens.
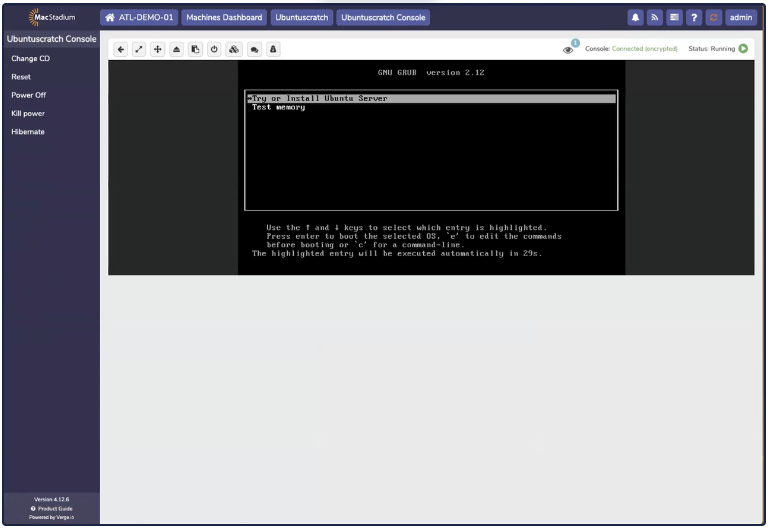 *Console*
Manually deployed VMs use a virtual screen, rather than a virtual terminal, meaning that text cannot be copied from the terminal.
13. Use the console to install the OS as usual.
14. The IP address configuration must be set manually as a part of installation. The process for this can differ, depending on the OS installed. In this example, we are setting a manual IP address for Ubuntu Server 24.04:
*Console*
Manually deployed VMs use a virtual screen, rather than a virtual terminal, meaning that text cannot be copied from the terminal.
13. Use the console to install the OS as usual.
14. The IP address configuration must be set manually as a part of installation. The process for this can differ, depending on the OS installed. In this example, we are setting a manual IP address for Ubuntu Server 24.04:
 *Manual IP Address Assignment*
DHCP is not supported. An IP address must be manually assigned, using a free IP address on the IP plan. All fields must be completed to ensure network connectivity.
15. Complete the installation as usual. Most Linux distributions include drivers for Virtio, which is required for optimal performance when virtualizing hardware.
*Manual IP Address Assignment*
DHCP is not supported. An IP address must be manually assigned, using a free IP address on the IP plan. All fields must be completed to ensure network connectivity.
15. Complete the installation as usual. Most Linux distributions include drivers for Virtio, which is required for optimal performance when virtualizing hardware.