> ## Documentation Index
> Fetch the complete documentation index at: https://docs.macstadium.com/llms.txt
> Use this file to discover all available pages before exploring further.
# 1. AWS Side of the VPN Tunnel
> Configure the AWS side of an IPsec site-to-site VPN: create a customer gateway, virtual private gateway, and VPN connection in Amazon VPC.
How to configure the AWS side of your VPN tunnel between AWS and Orka.
**Before you begin:** You need the IP address for `FW1-Outside` and the CIDR range for `Private-1` (most likely `10.221.188.0/24`) from your [IP Plan](/macstadium/macstadium-overview/ip-plan).
To establish a stable, persistent connection between an Amazon Virtual Private Cloud (Amazon VPC) and your Orka cluster, you need to configure an IPsec site-to-site VPN (VPN tunnel) between the two.
Routing from Amazon to Orka is static.
## Step 1: Log in to your VPC service
1. Log in to your AWS Management Console and access your VPC service. In the top right corner of the screen, make sure that you're working in the correct region.
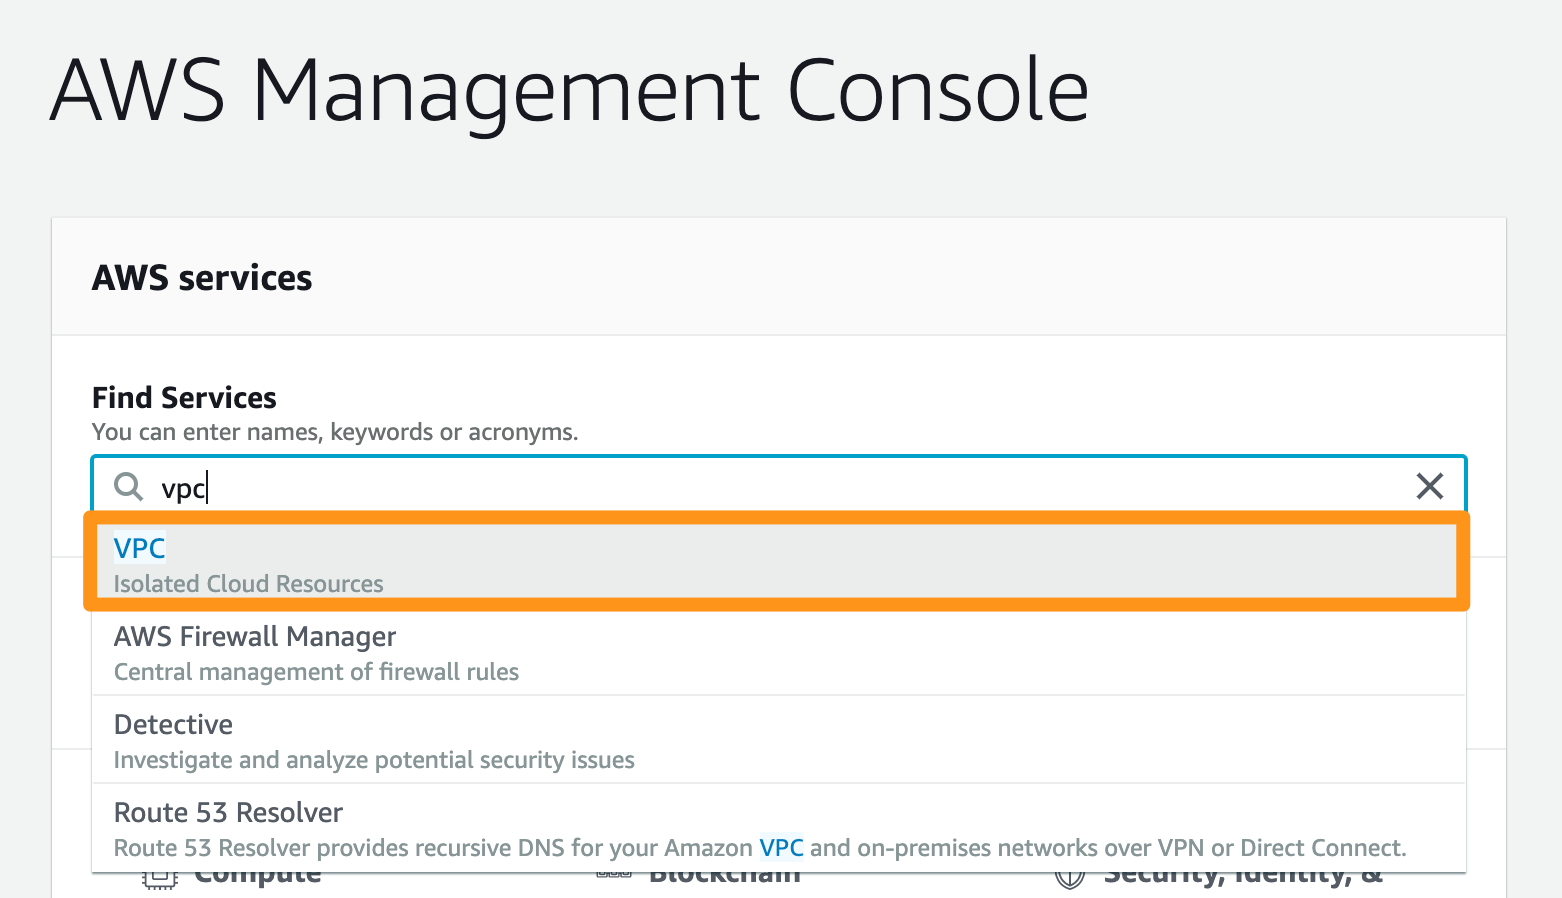
2. In the **Find Services** bar, type `VPC` and navigate to the service.
 ## Step 2: Create a customer gateway
In Amazon, the [customer gateway](https://docs.aws.amazon.com/vpn/latest/s2svpn/VPC_VPN.html#VPN) represents the Orka end of the tunnel.
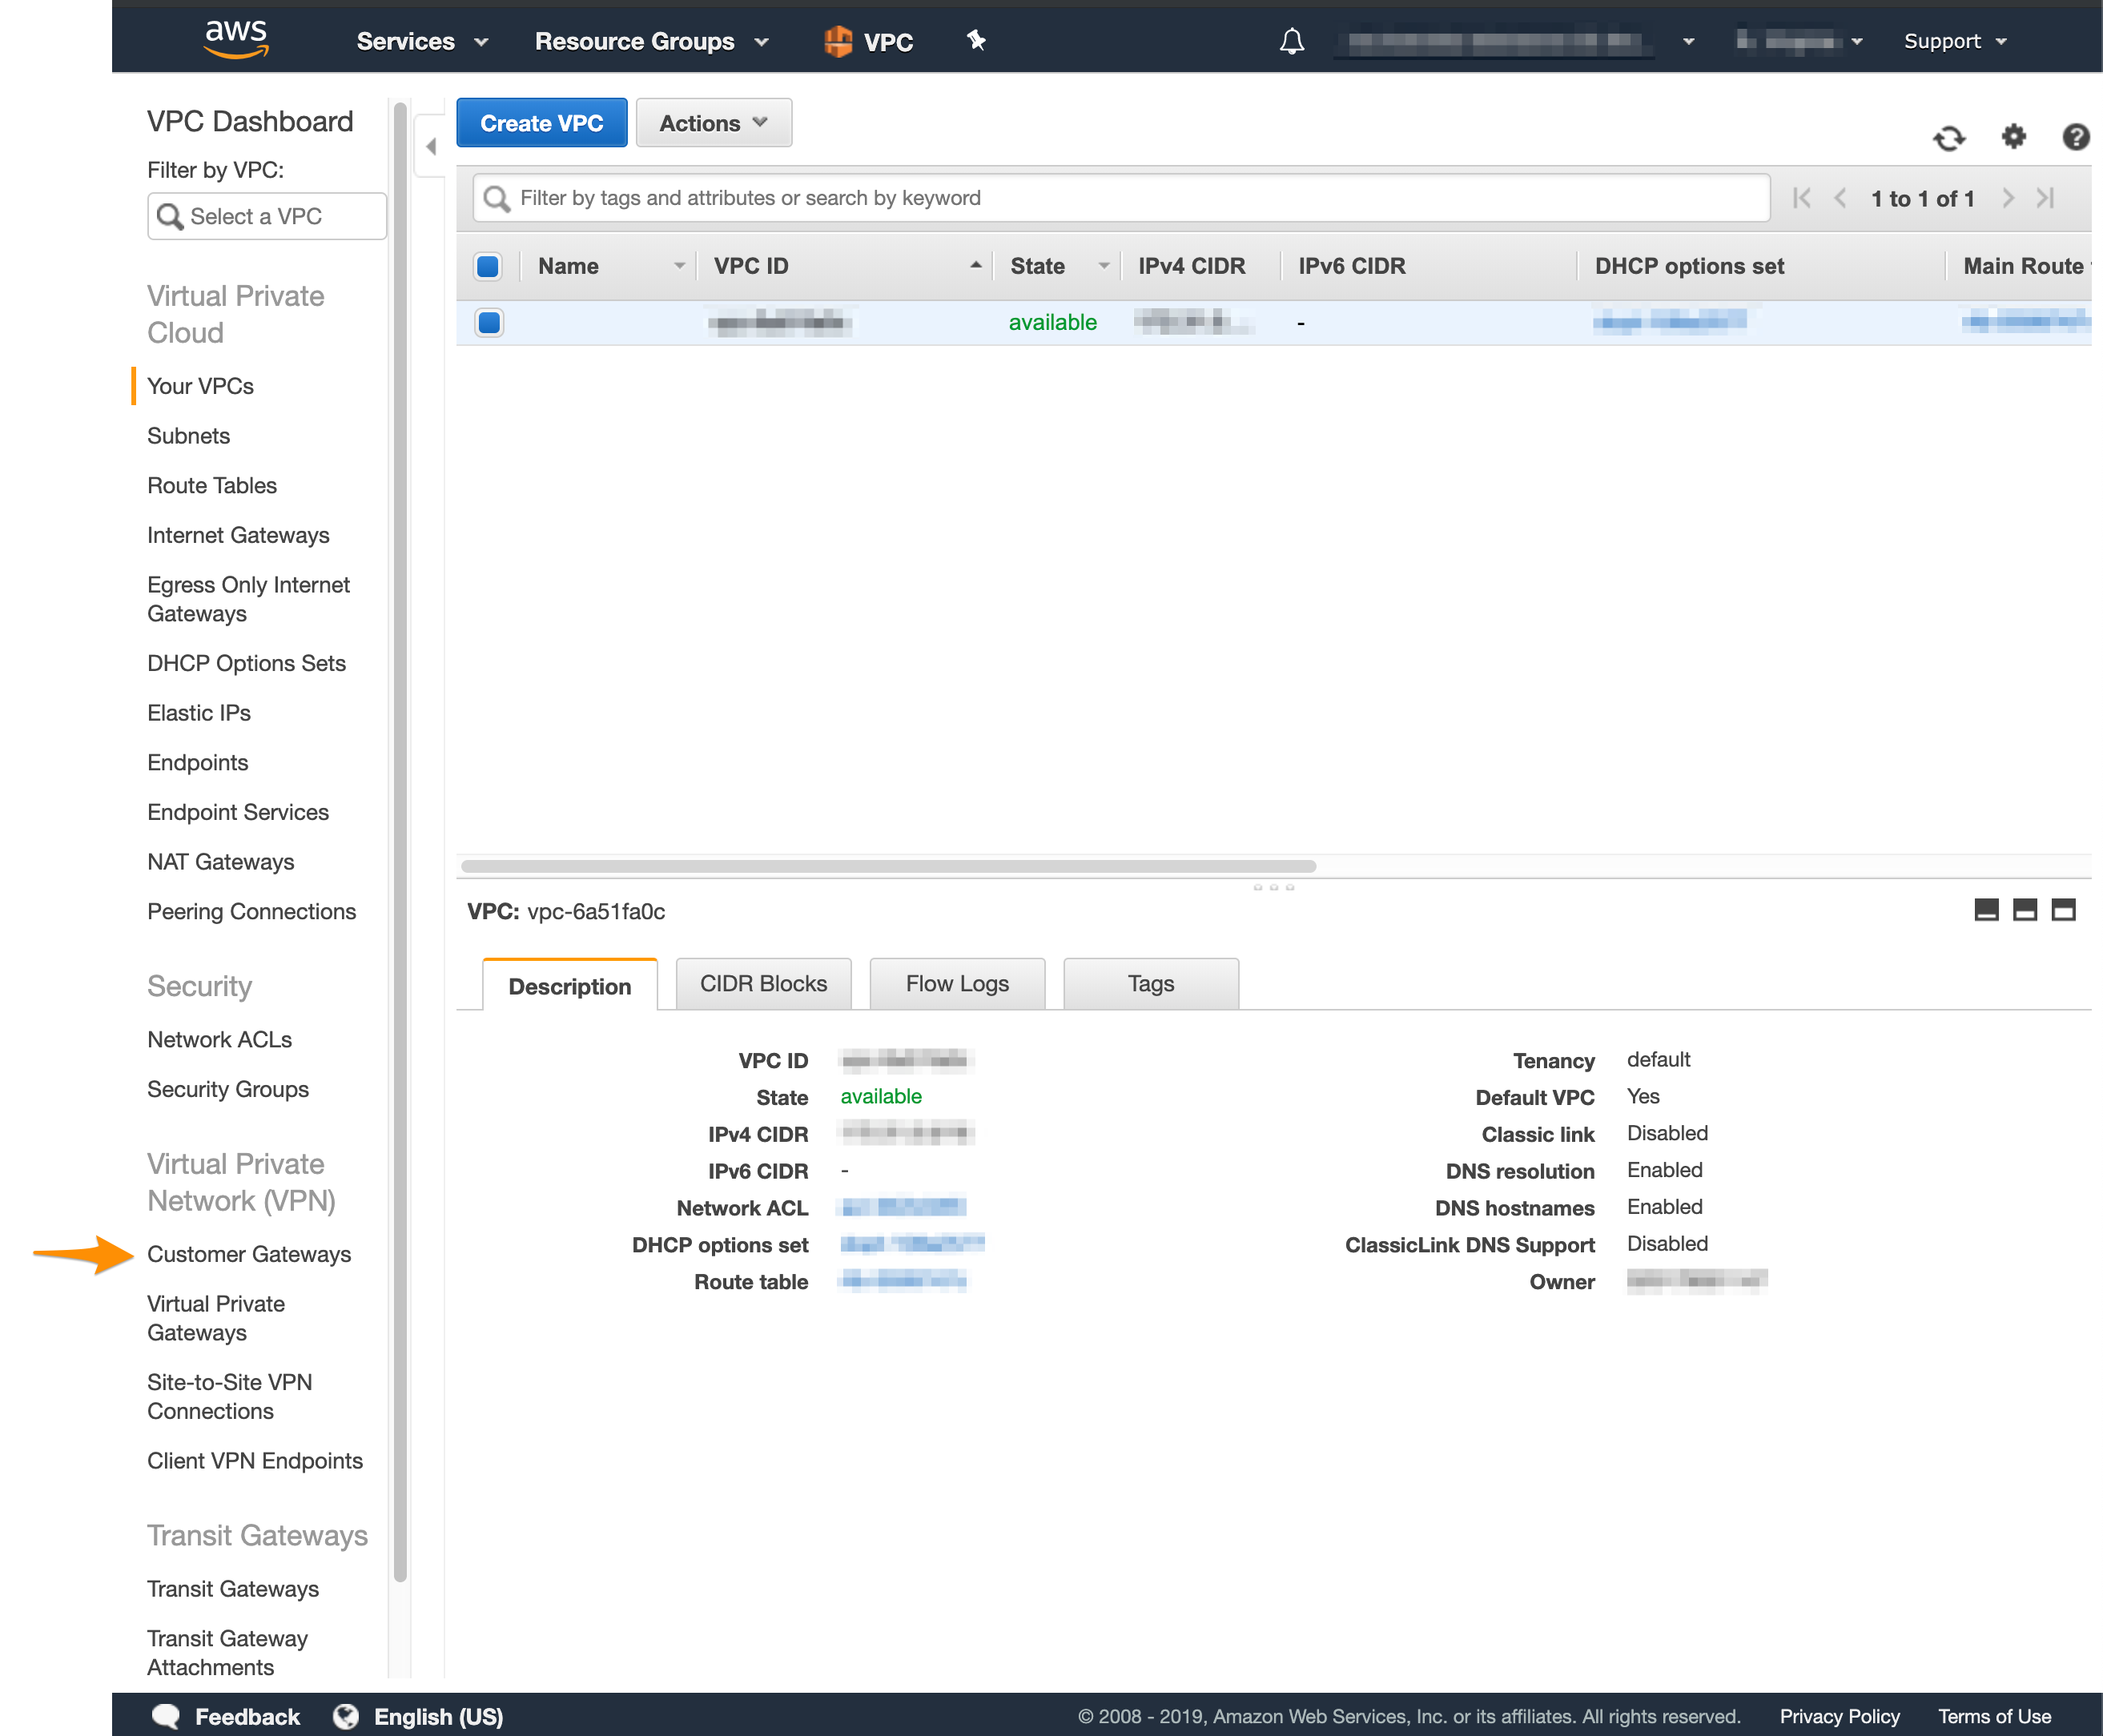
1. In the VPC service sidebar, locate the **Virtual Private Network** menu and select **Customer Gateways**.
## Step 2: Create a customer gateway
In Amazon, the [customer gateway](https://docs.aws.amazon.com/vpn/latest/s2svpn/VPC_VPN.html#VPN) represents the Orka end of the tunnel.
1. In the VPC service sidebar, locate the **Virtual Private Network** menu and select **Customer Gateways**.
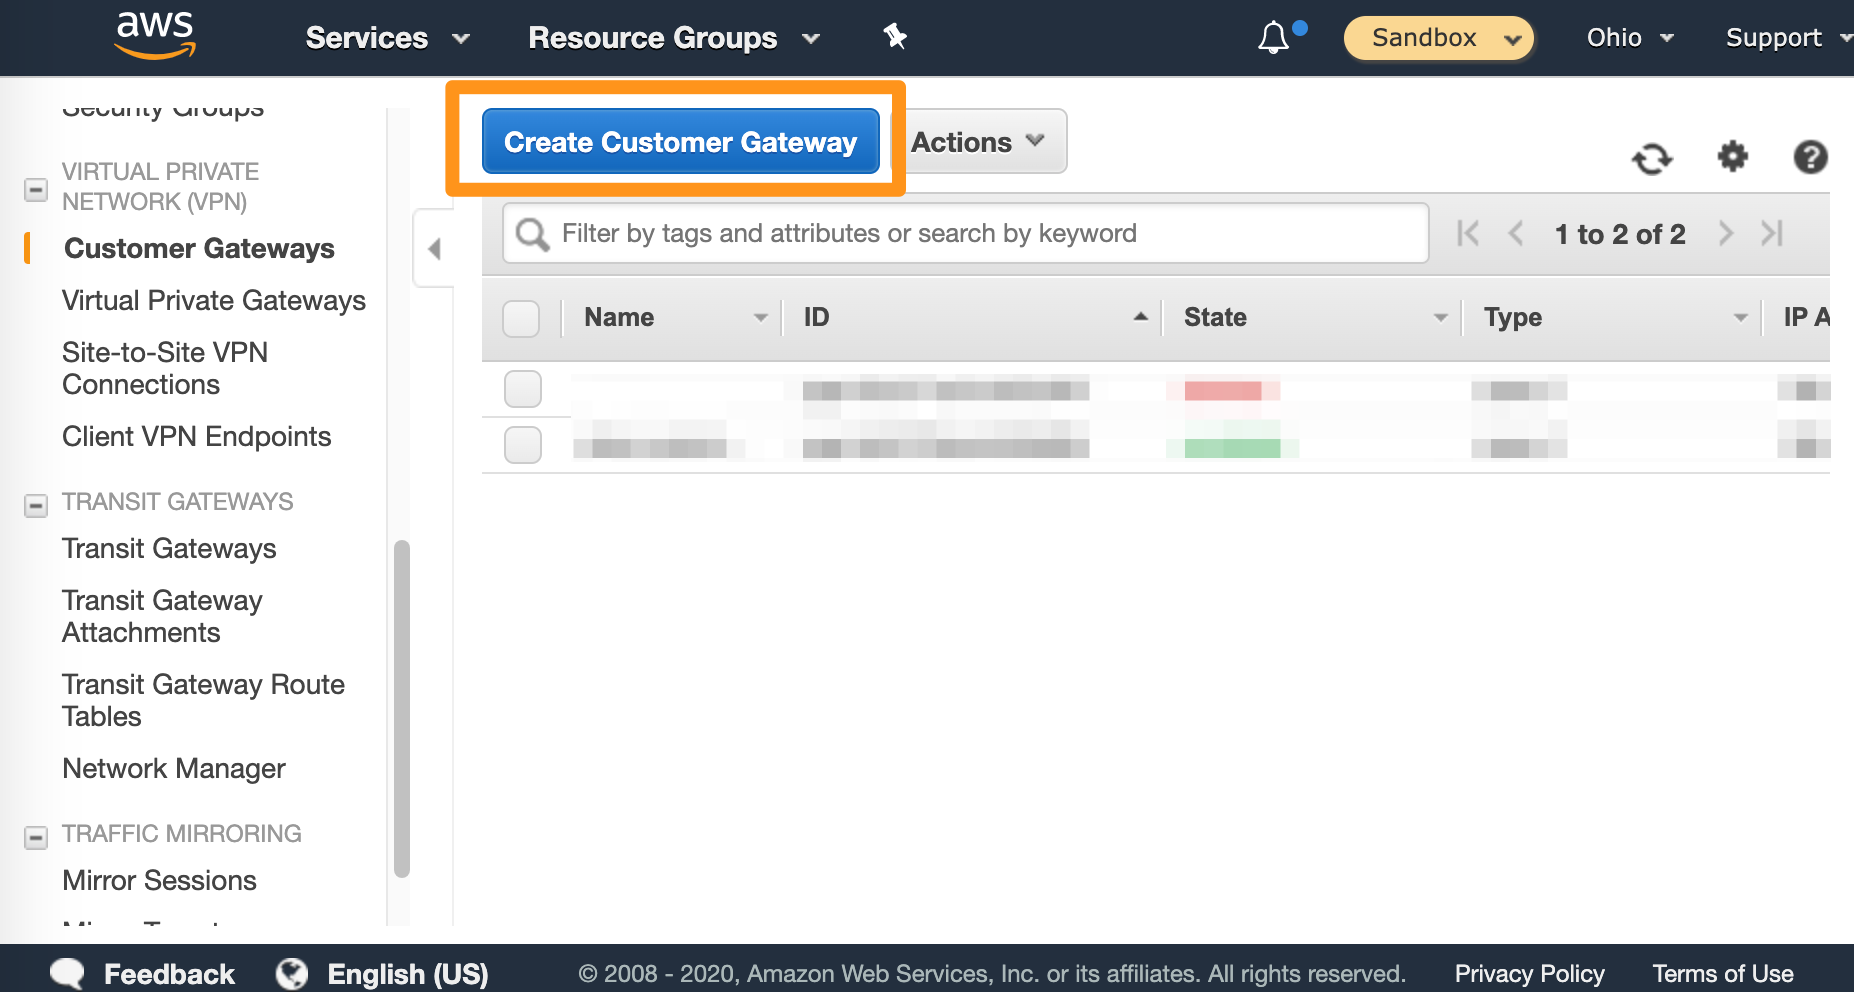
 2. Click **Create Customer Gateway**.
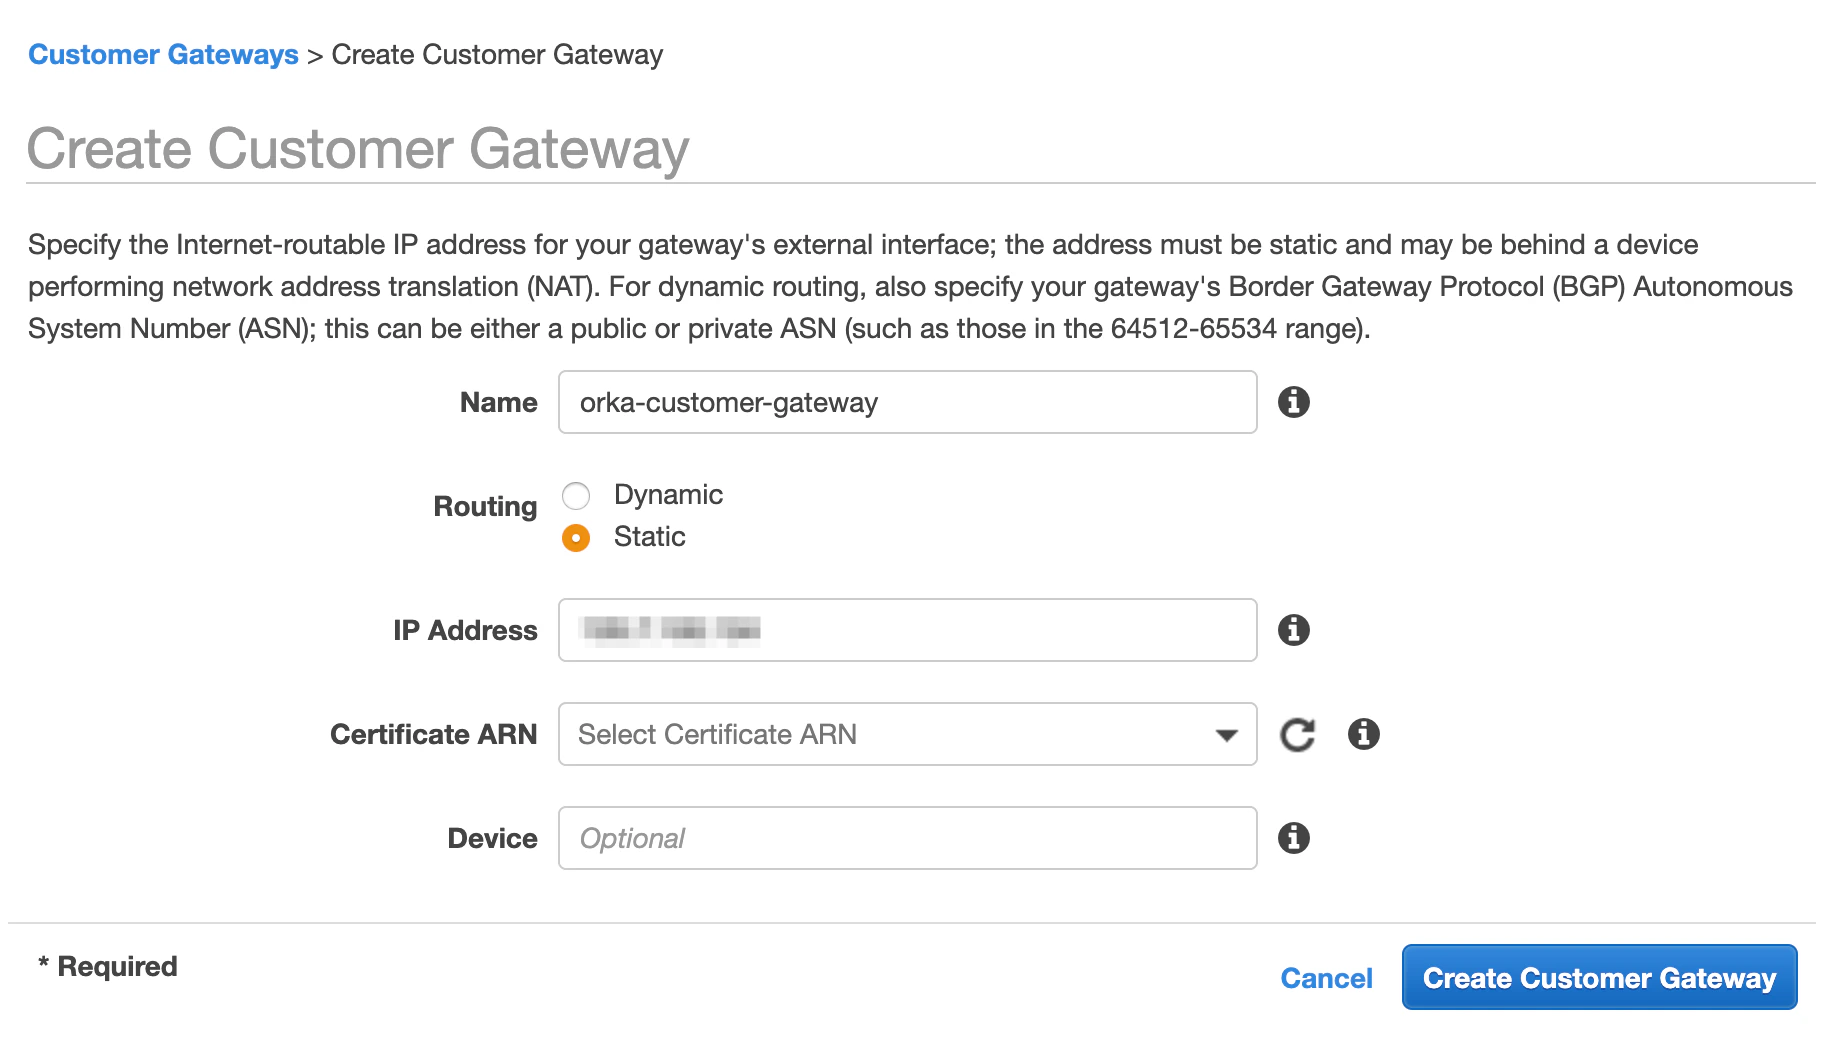
 3. Fill in the form.
1. Provide a **Name**. Set a name that helps you identify the gateway easily.
2. Select **Static** routing.
3. In the **IP Address** text box, provide the IP address for the `FW1-Outside` network from your [IP Plan](/macstadium/macstadium-overview/ip-plan).
4. Ignore the remaining settings.
3. Fill in the form.
1. Provide a **Name**. Set a name that helps you identify the gateway easily.
2. Select **Static** routing.
3. In the **IP Address** text box, provide the IP address for the `FW1-Outside` network from your [IP Plan](/macstadium/macstadium-overview/ip-plan).
4. Ignore the remaining settings.
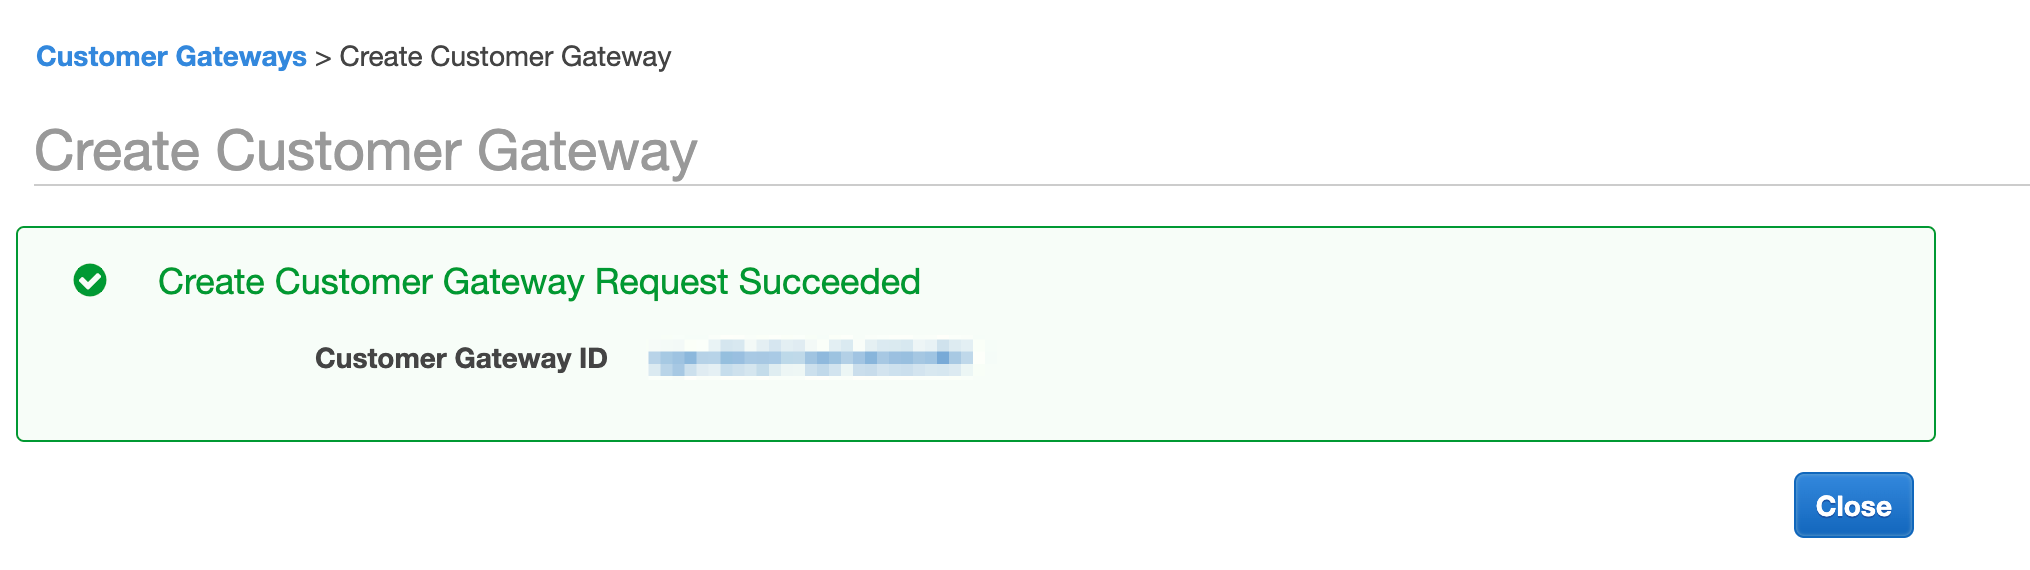
 4. Click **Create Customer Gateway**.
 ## Step 3: Set up a virtual private gateway
In Amazon, the [virtual private gateway](https://docs.aws.amazon.com/vpn/latest/s2svpn/VPC_VPN.html#VPN) represents the Amazon end of the tunnel.
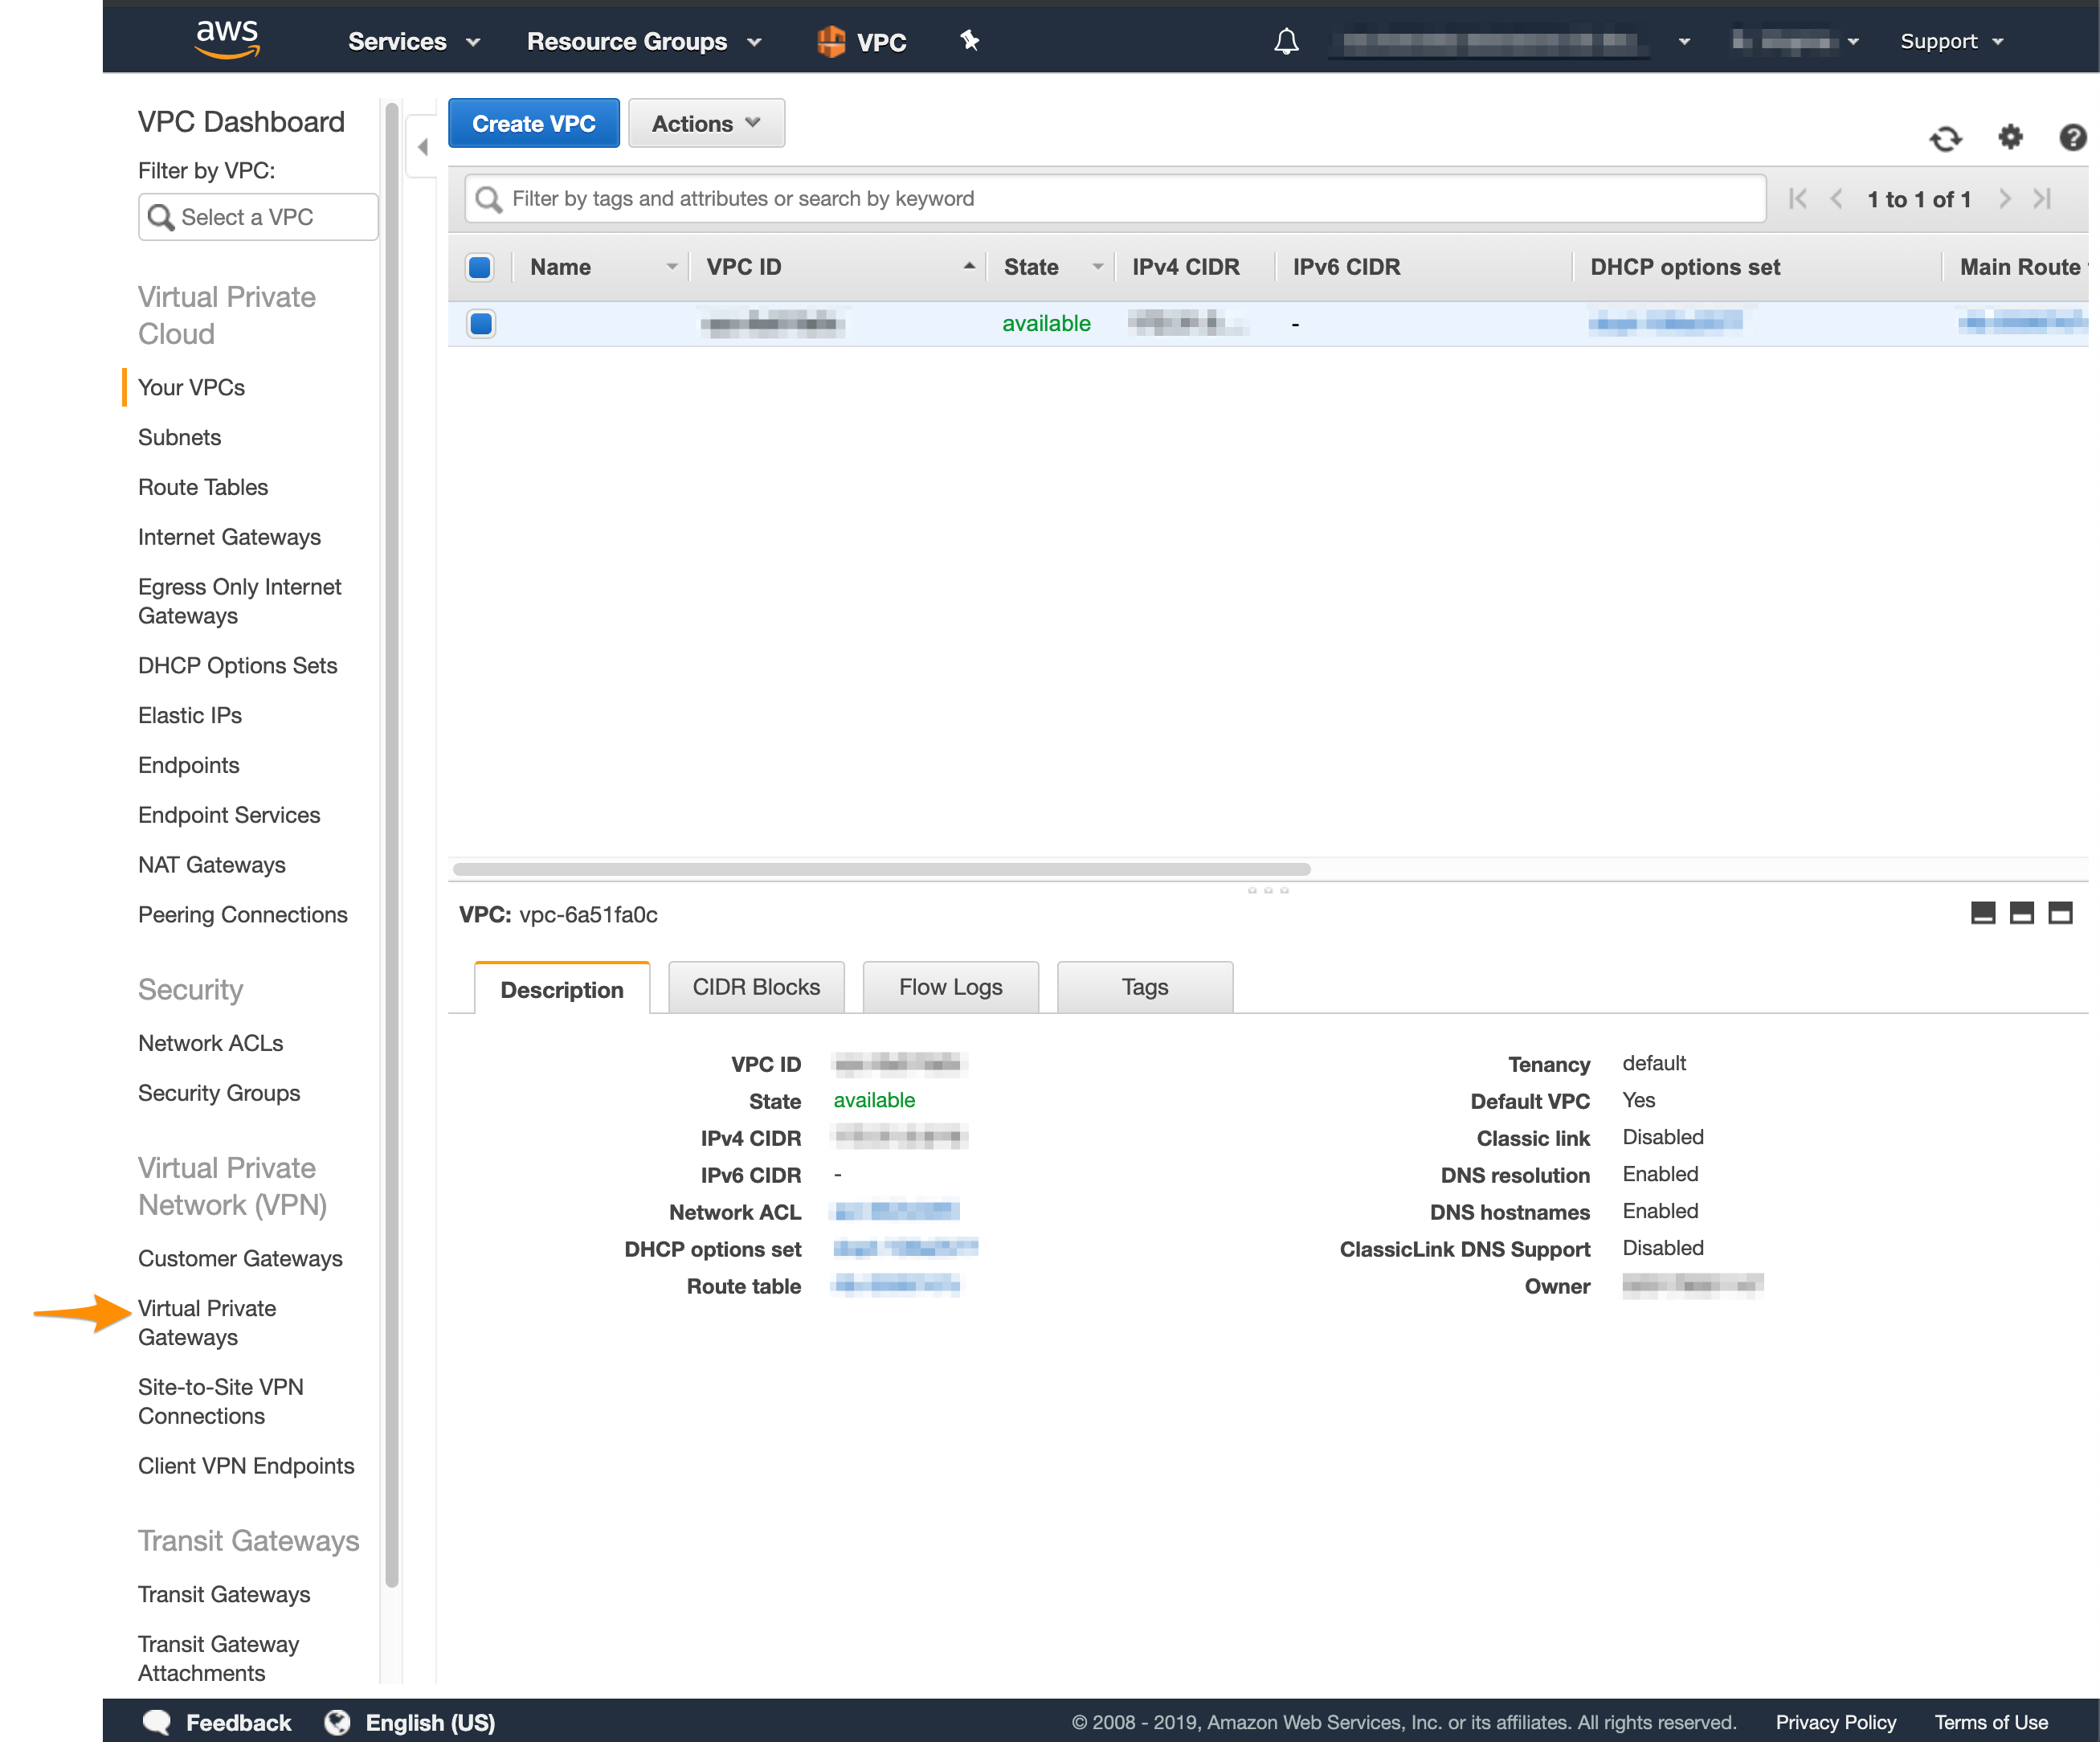
1. In the VPC service sidebar, locate the **Virtual Private Network** menu and select **Virtual Private Gateways**.
## Step 3: Set up a virtual private gateway
In Amazon, the [virtual private gateway](https://docs.aws.amazon.com/vpn/latest/s2svpn/VPC_VPN.html#VPN) represents the Amazon end of the tunnel.
1. In the VPC service sidebar, locate the **Virtual Private Network** menu and select **Virtual Private Gateways**.
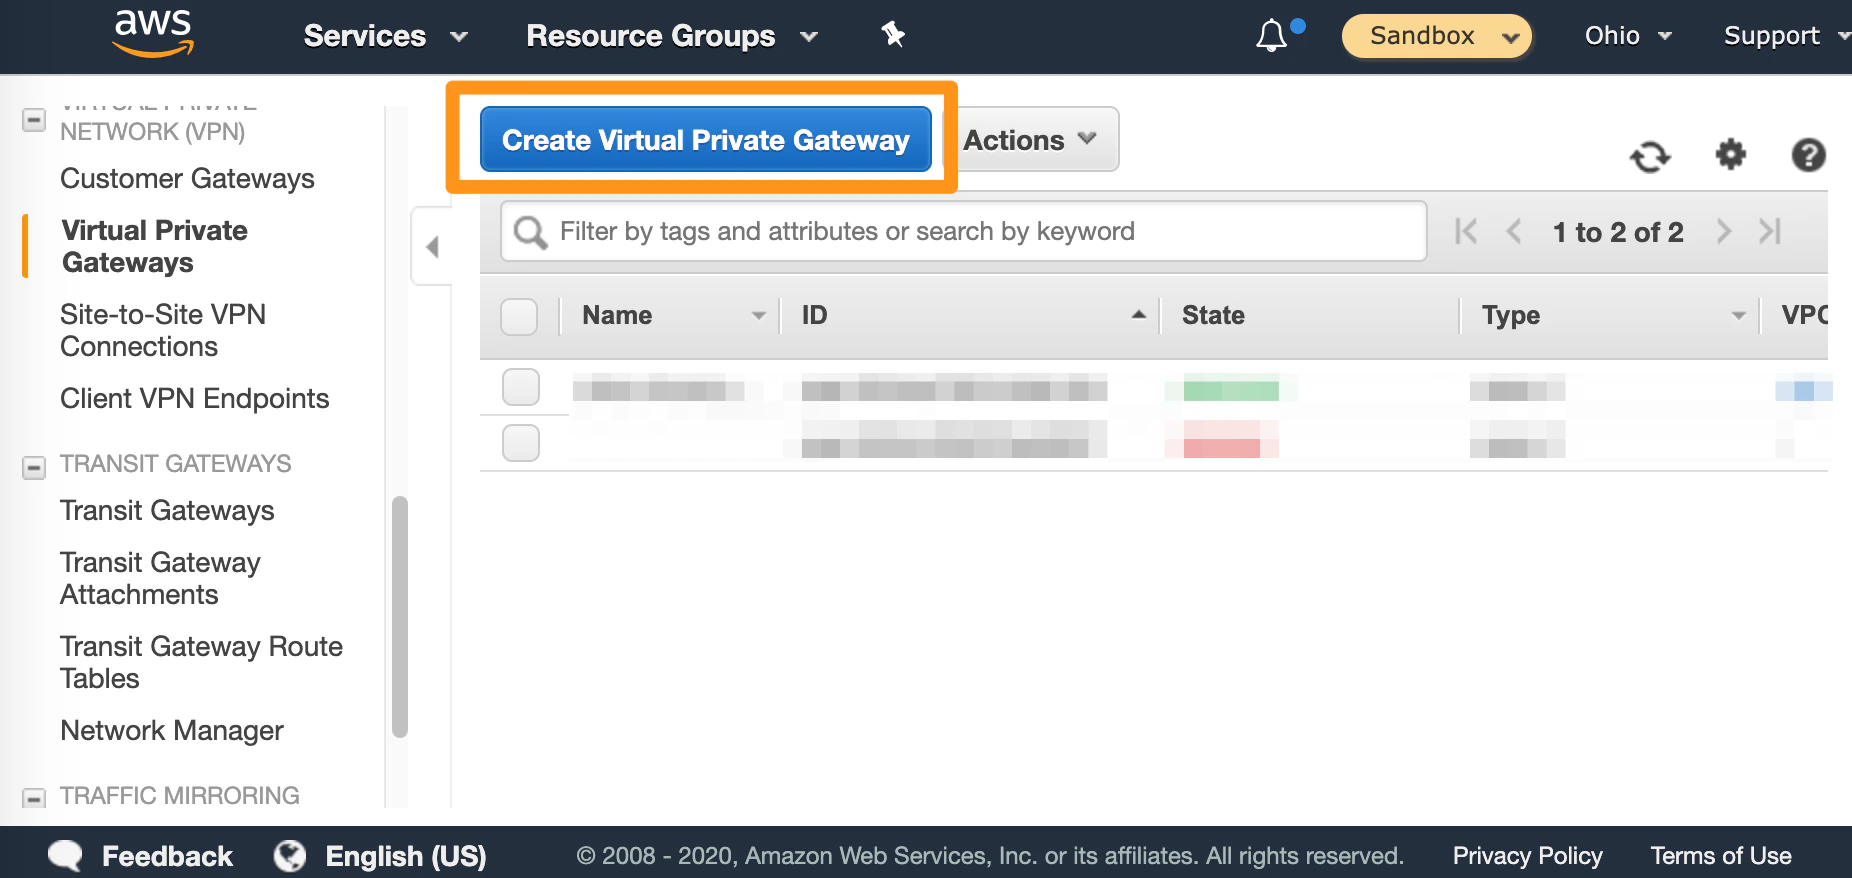
 2. Click **Create Virtual Private Gateway**.
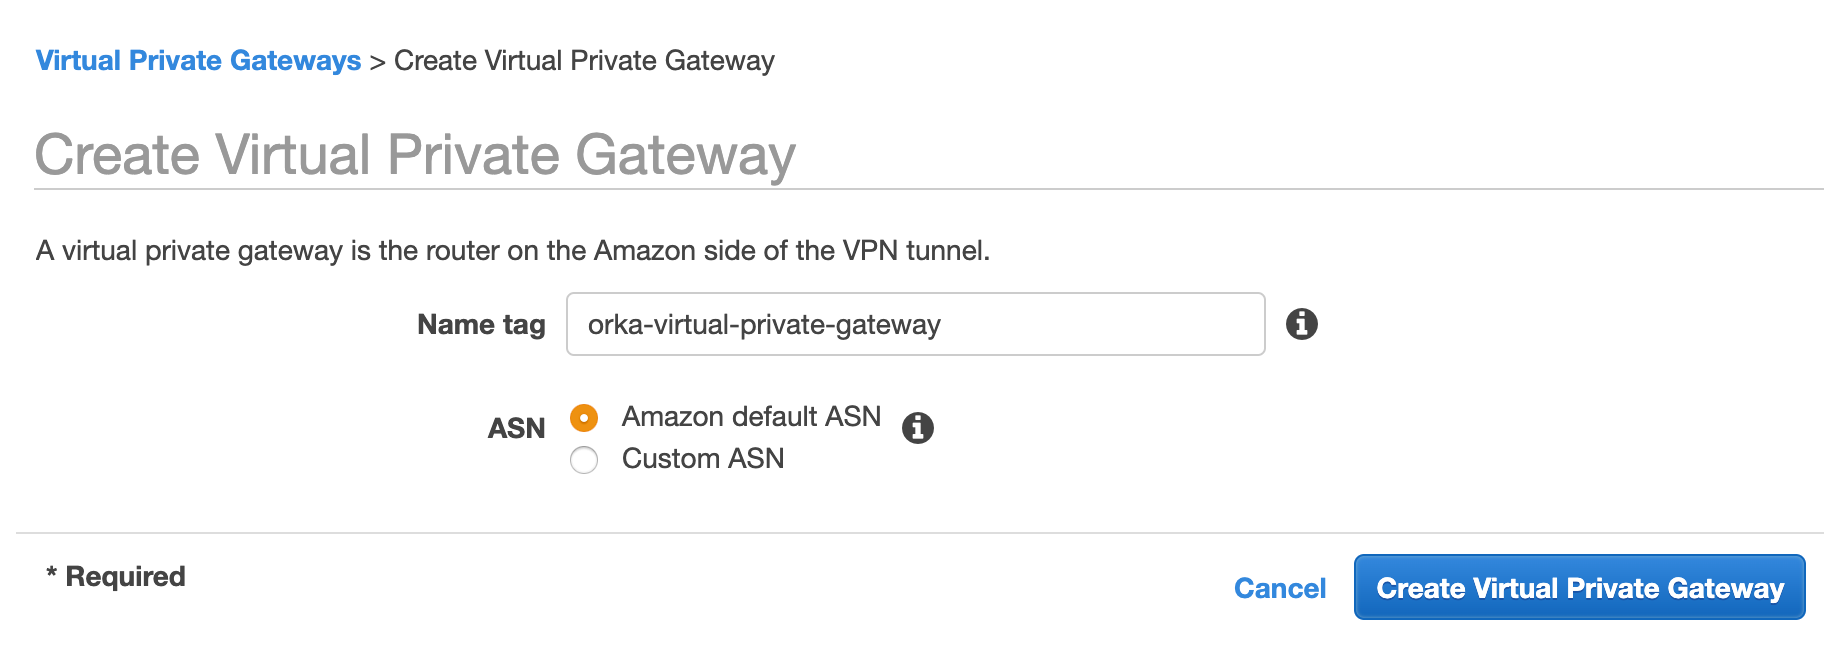
 3. Fill in the form.
1. Provide a **Name tag**. Set a name that helps you identify the gateway easily.
2. Select **Amazon default ASN**
3. Click **Create Virtual Private Gateway**.
3. Fill in the form.
1. Provide a **Name tag**. Set a name that helps you identify the gateway easily.
2. Select **Amazon default ASN**
3. Click **Create Virtual Private Gateway**.
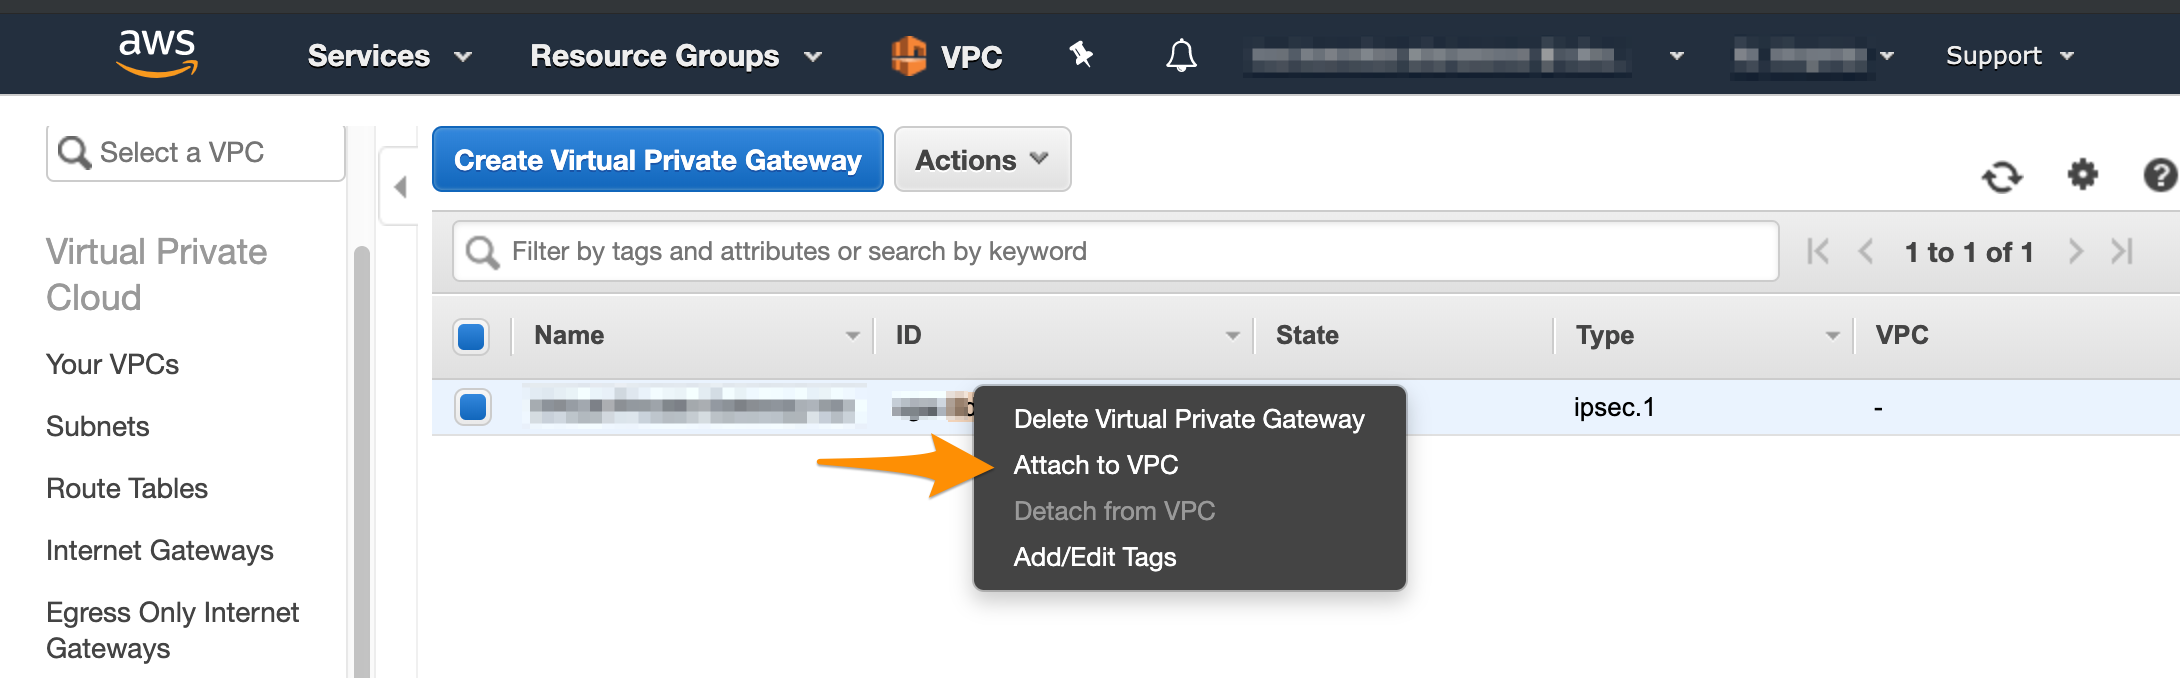
 4. On the **Virtual Private Gateways** dashboard, right-click the newly created virtual private gateway and select **Attach to VPC**.
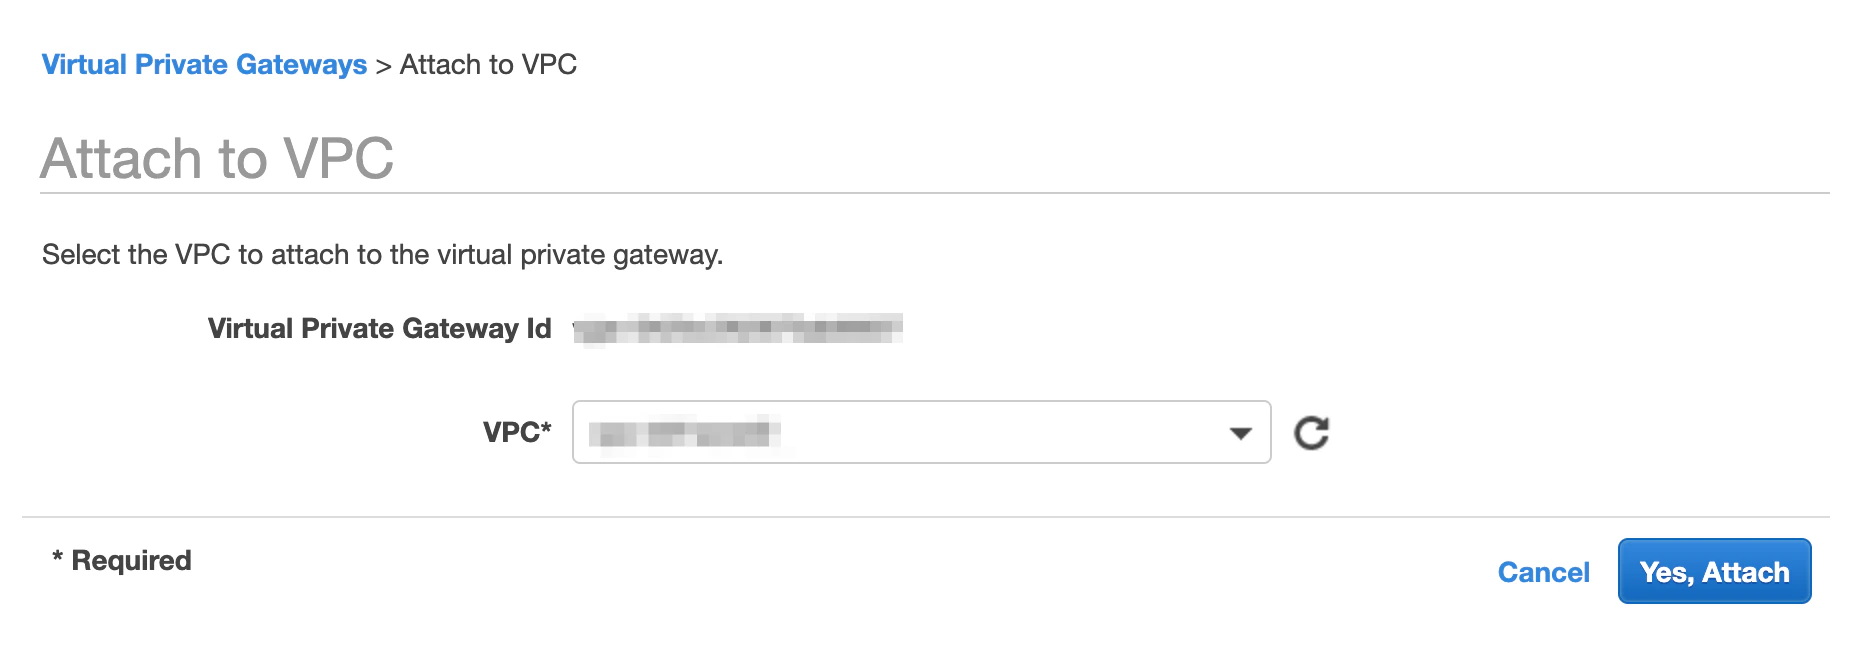
 5. Select your VPC from the drop-down menu and click **Yes, Attach**.
 Next, you need to manually enable [route propagation](https://docs.aws.amazon.com/vpn/latest/s2svpn/VPNRoutingTypes.html) for the virtual private gateway.
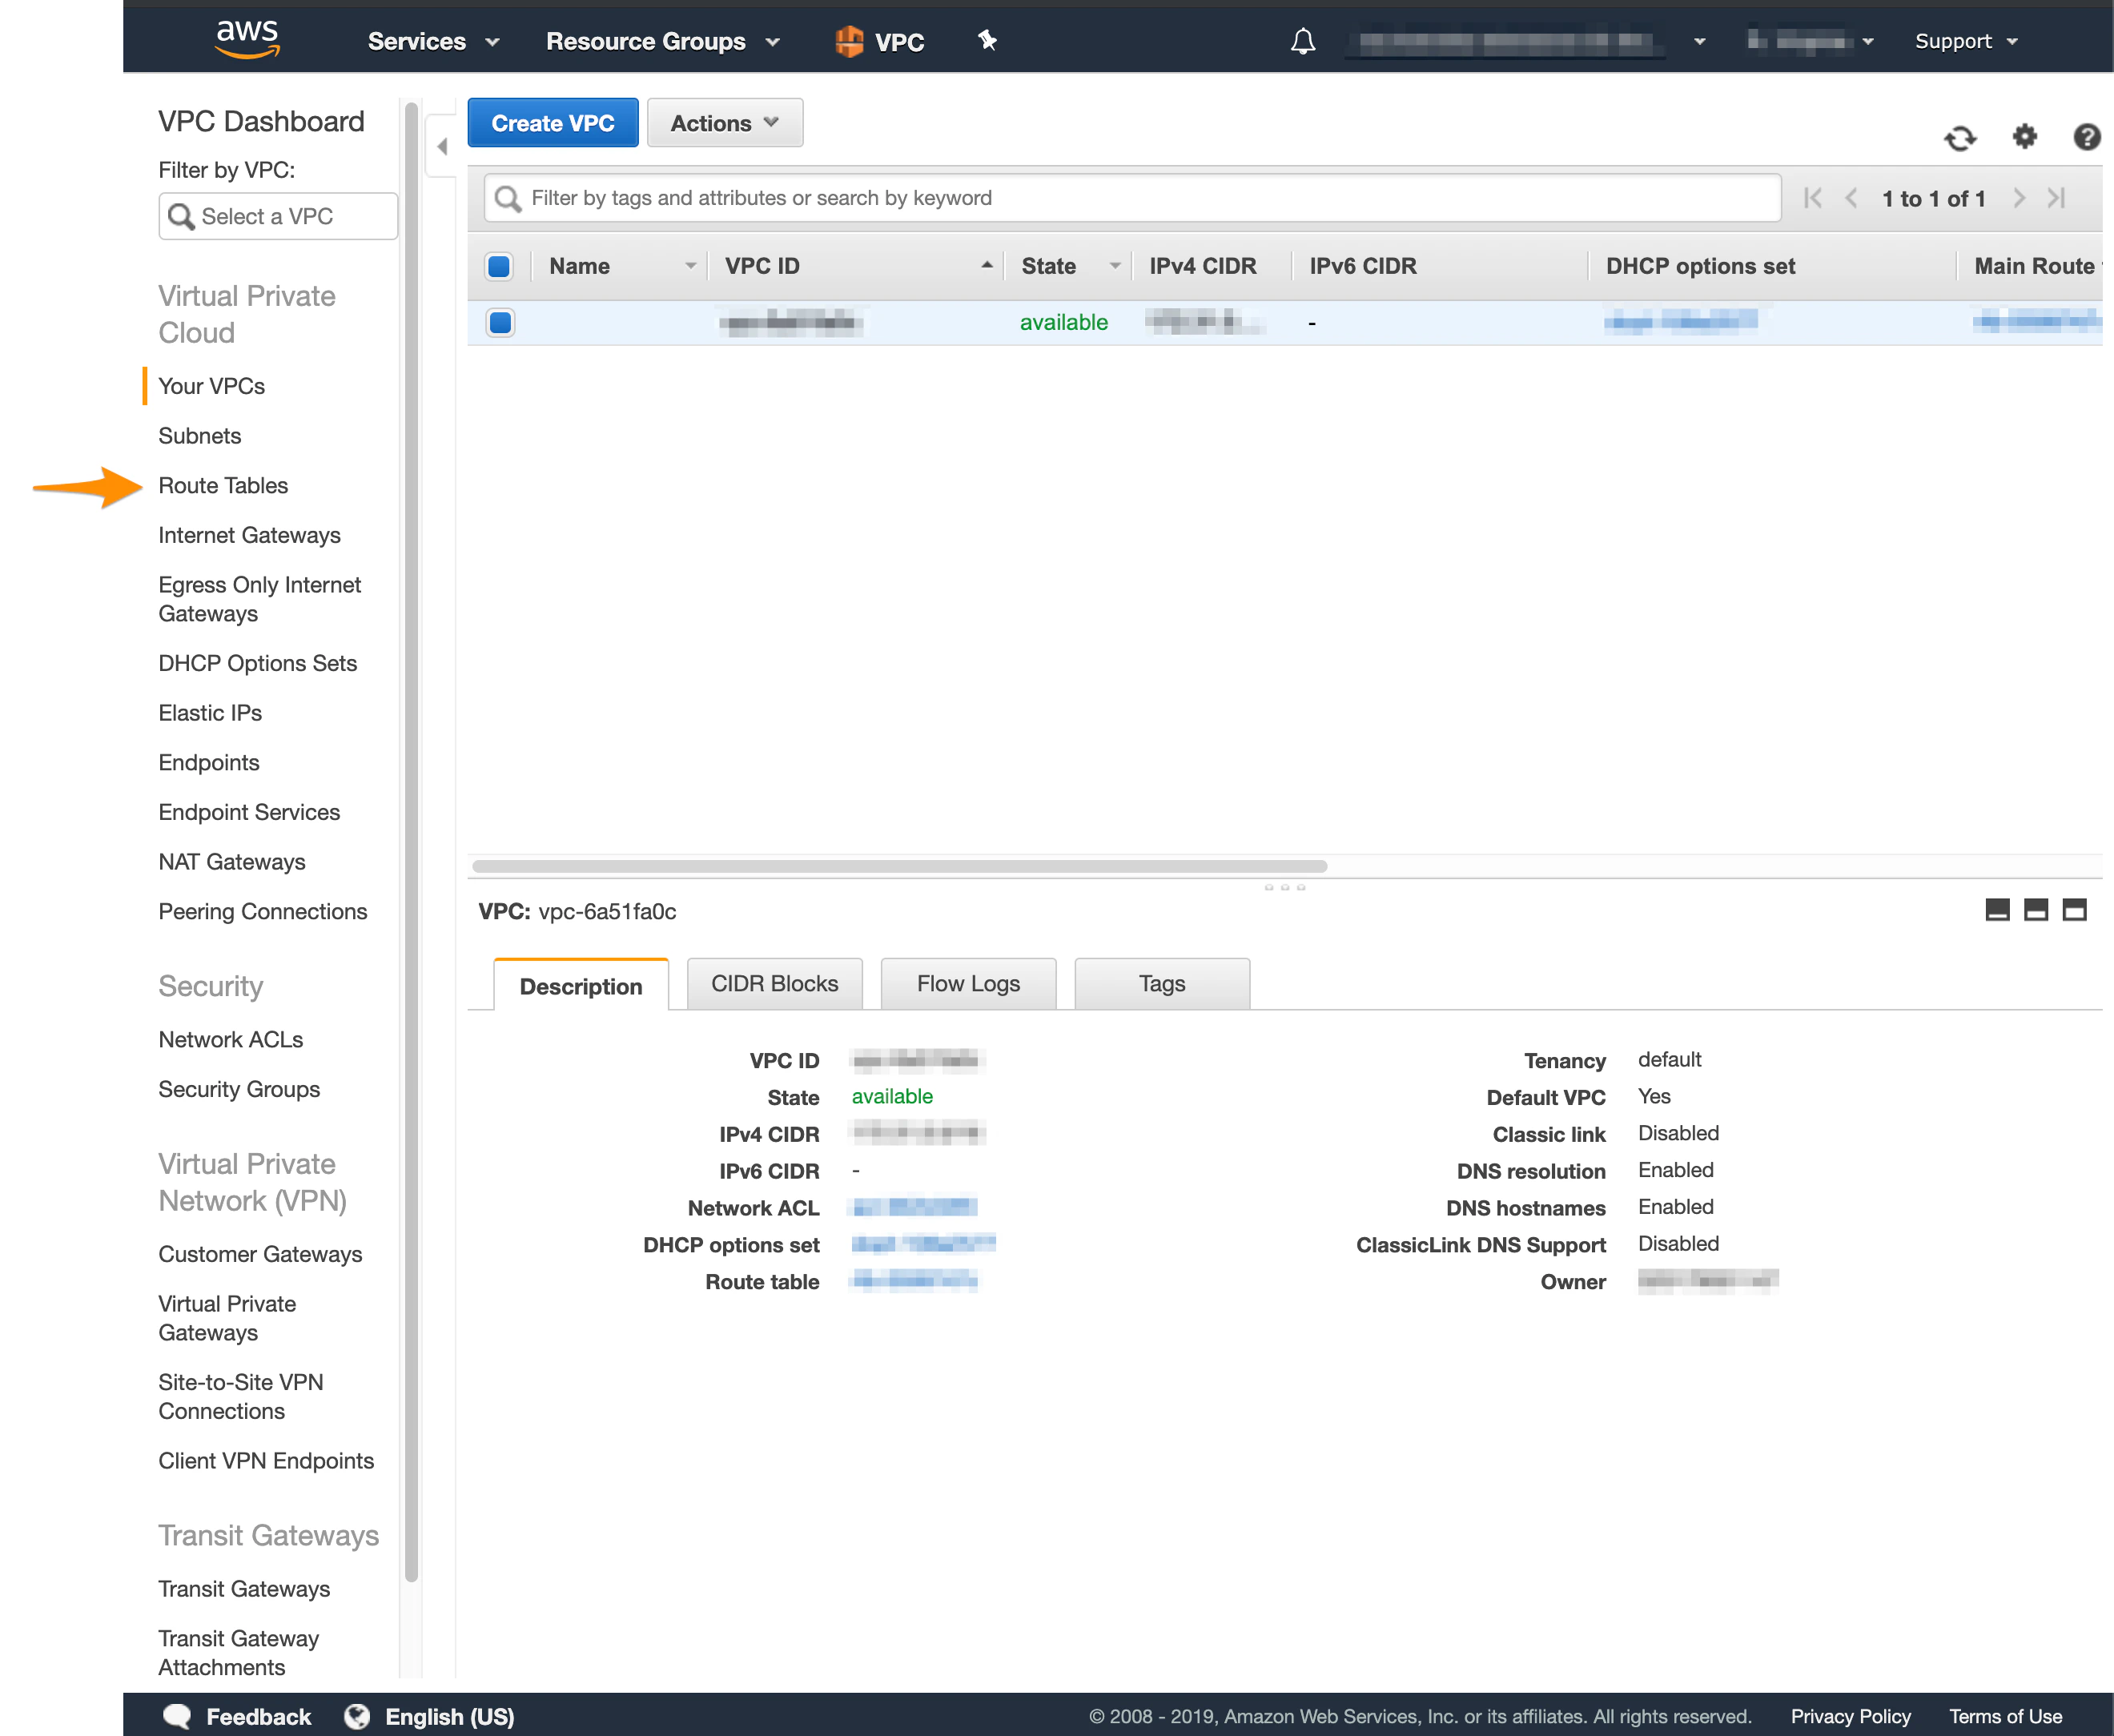
1. In the VPC service sidebar, locate the **Virtual Private Cloud** menu and select **Route Tables**.
Next, you need to manually enable [route propagation](https://docs.aws.amazon.com/vpn/latest/s2svpn/VPNRoutingTypes.html) for the virtual private gateway.
1. In the VPC service sidebar, locate the **Virtual Private Cloud** menu and select **Route Tables**.
 2. In the list of routing tables, select the main route table for your VPC.
3. At the bottom of the screen, select **Route Propagation**. If your virtual private gateway is not listed, make sure that it's attached to the VPC.
4. Click **Edit route propagation**.
2. In the list of routing tables, select the main route table for your VPC.
3. At the bottom of the screen, select **Route Propagation**. If your virtual private gateway is not listed, make sure that it's attached to the VPC.
4. Click **Edit route propagation**.
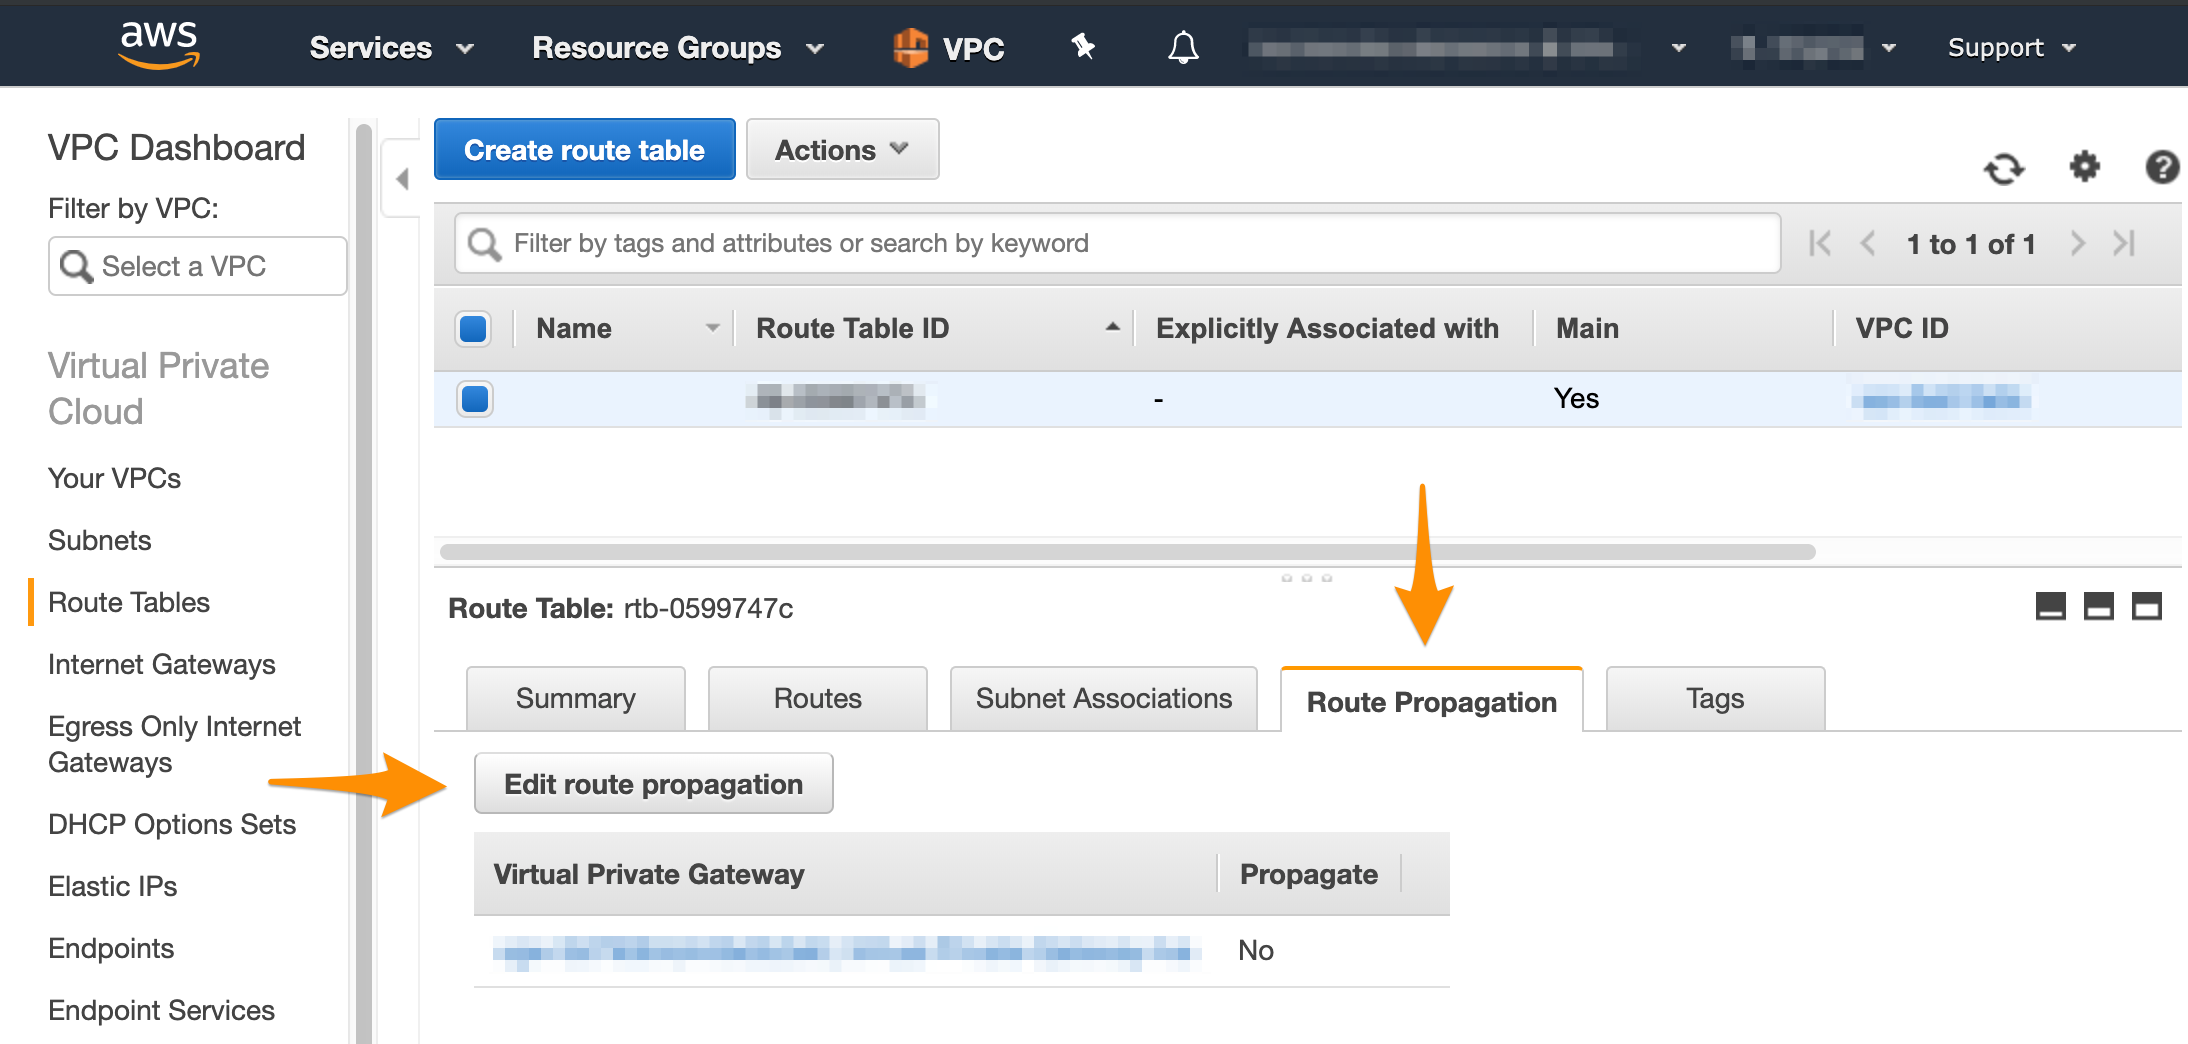 5. Select the **Propagate** checkbox and click **Save**.
## Step 4: Create the tunnel
After you have a customer gateway and a virtual private gateway in place, you can configure the tunnel.
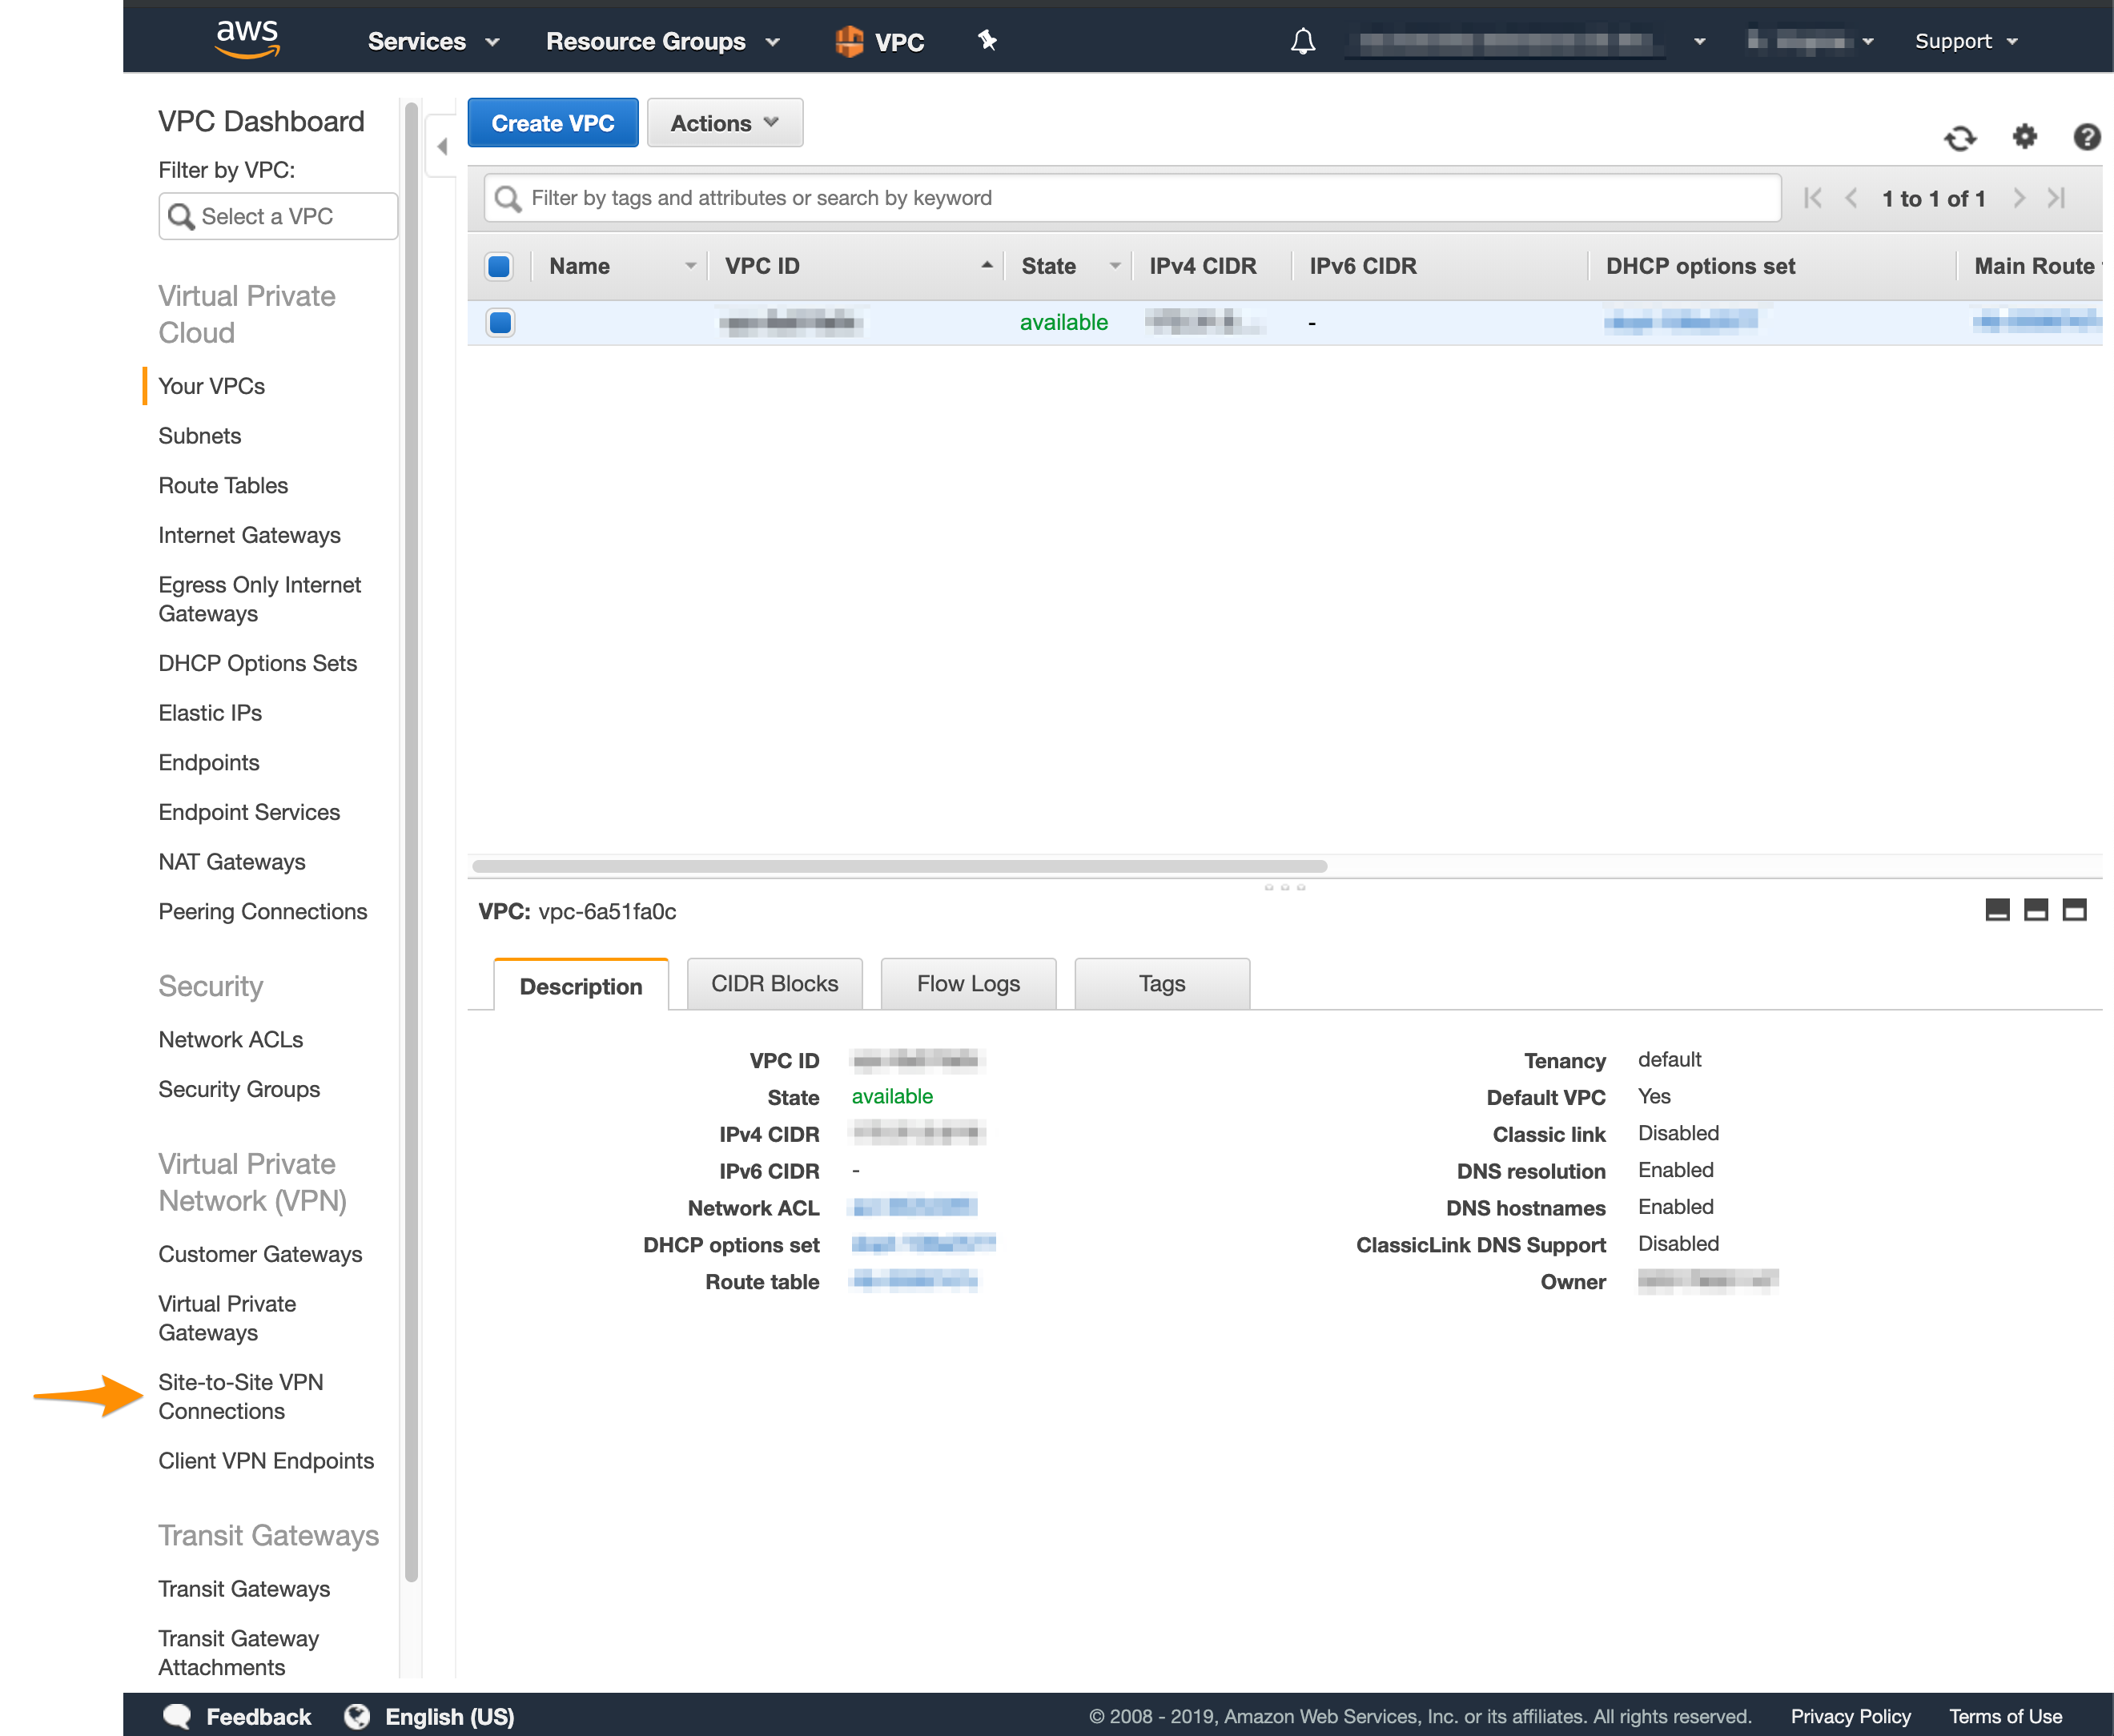
1. In the VPC service sidebar, locate the **Virtual Private Network** menu and select **Site-to-Site VPN Connections**.
5. Select the **Propagate** checkbox and click **Save**.
## Step 4: Create the tunnel
After you have a customer gateway and a virtual private gateway in place, you can configure the tunnel.
1. In the VPC service sidebar, locate the **Virtual Private Network** menu and select **Site-to-Site VPN Connections**.
 2. Click **Create VPN Connection**.
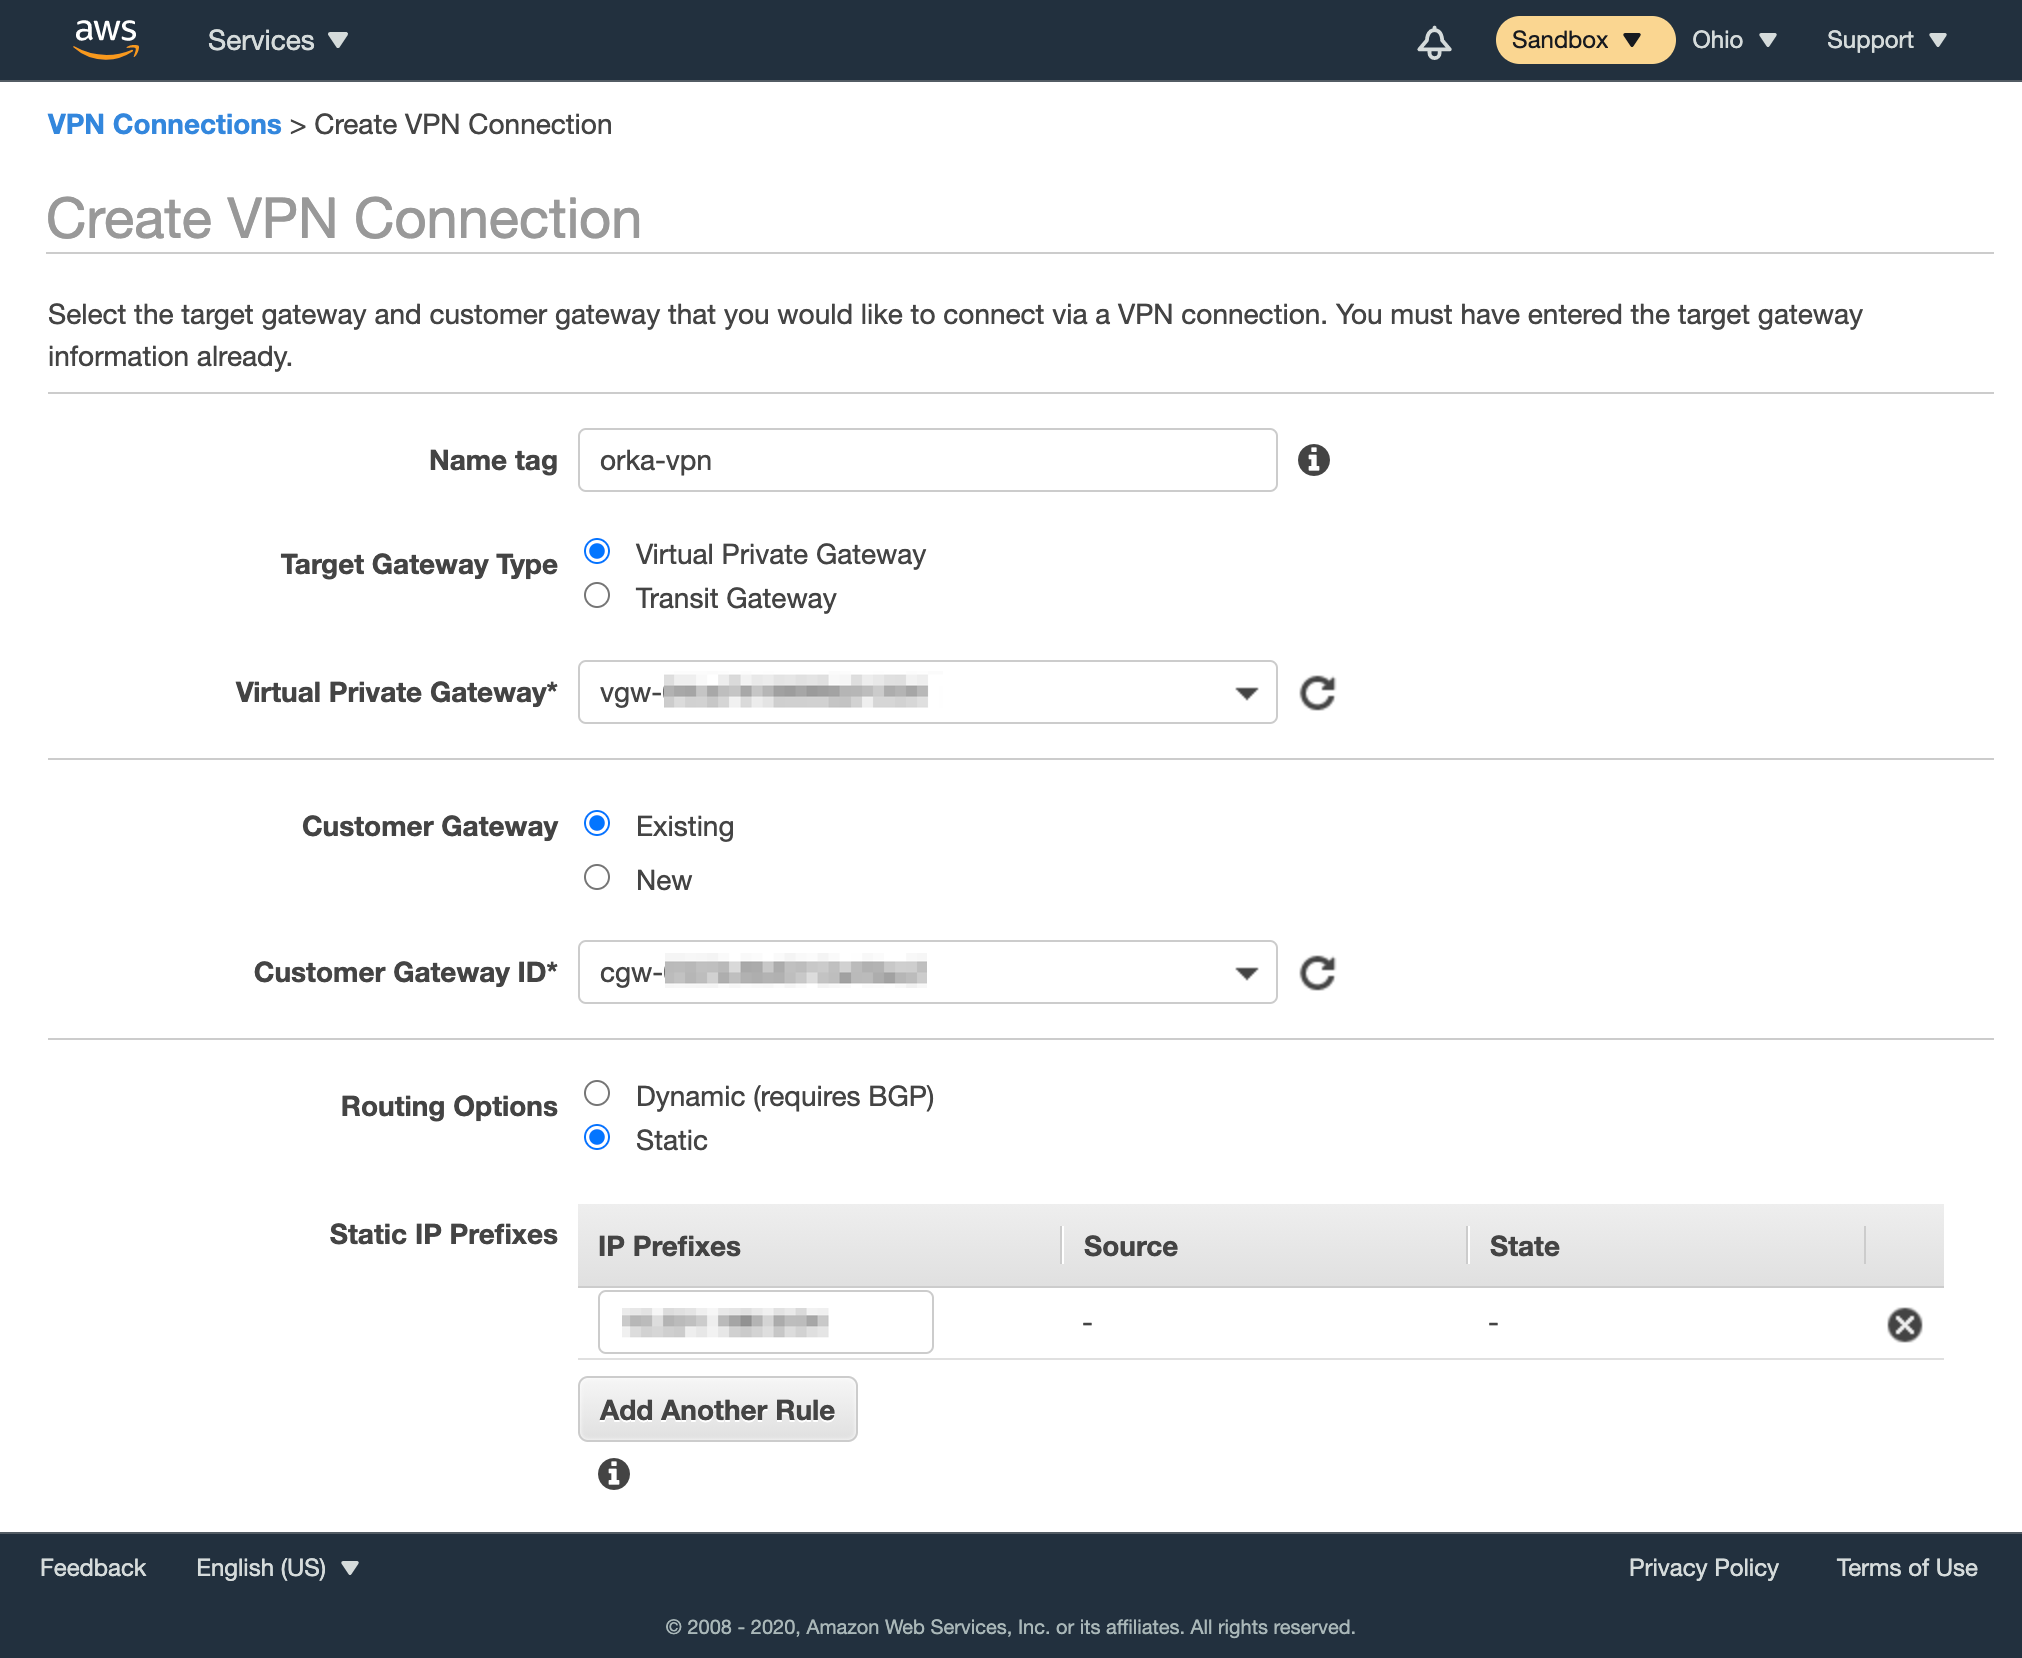
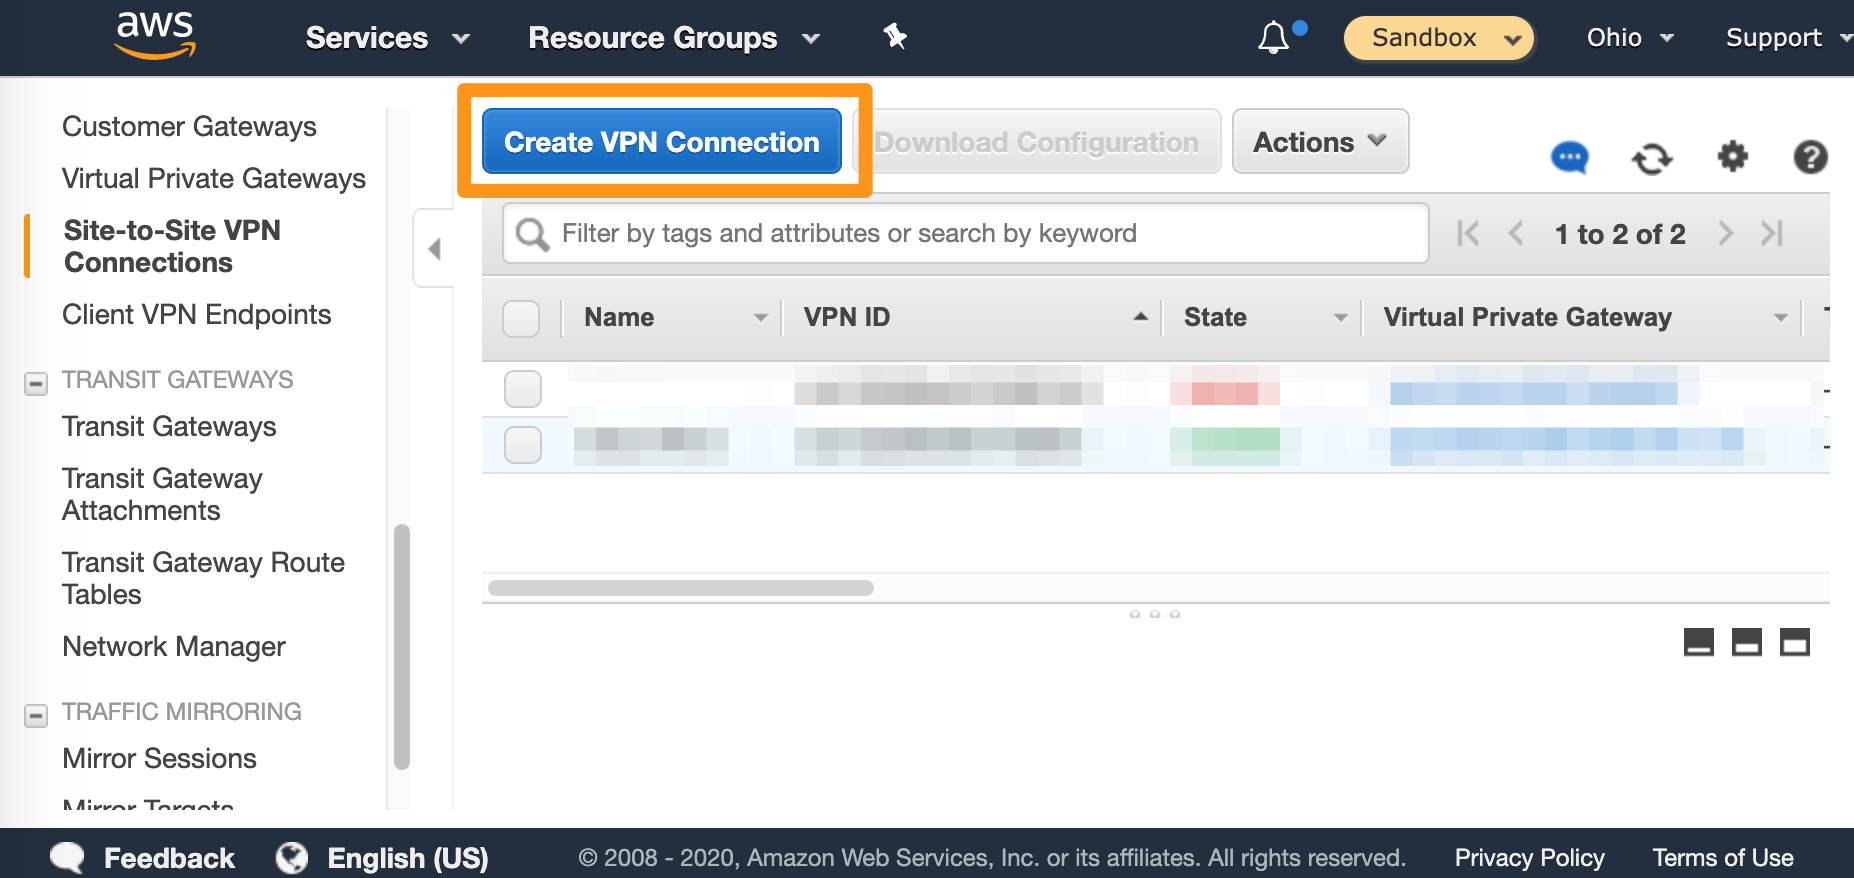 3. Fill in the form.
1. Provide **Name tag**.
2. For **Target Gateway Type**, select **Virtual Private Gateway**, and from the **Virtual Private Gateway** drop-down menu, select the virtual private gateway you created earlier.
3. Select that you want to use an **Existing** customer gateway, and from the **Customer Gateway ID** drop-down menu, select the customer gateway that you created earlier.
4. For **Routing Options**, select **Static**.
5. In **Static IP Prefixes**, provide the [CIDR notation](https://www.digitalocean.com/community/tutorials/understanding-ip-addresses-subnets-and-cidr-notation-for-networking#cidr-notation) for your `Private-1` network. Most likely: `10.221.188.0/24`.
6. Ignore the remaining options (not shown on the screenshot).
3. Fill in the form.
1. Provide **Name tag**.
2. For **Target Gateway Type**, select **Virtual Private Gateway**, and from the **Virtual Private Gateway** drop-down menu, select the virtual private gateway you created earlier.
3. Select that you want to use an **Existing** customer gateway, and from the **Customer Gateway ID** drop-down menu, select the customer gateway that you created earlier.
4. For **Routing Options**, select **Static**.
5. In **Static IP Prefixes**, provide the [CIDR notation](https://www.digitalocean.com/community/tutorials/understanding-ip-addresses-subnets-and-cidr-notation-for-networking#cidr-notation) for your `Private-1` network. Most likely: `10.221.188.0/24`.
6. Ignore the remaining options (not shown on the screenshot).
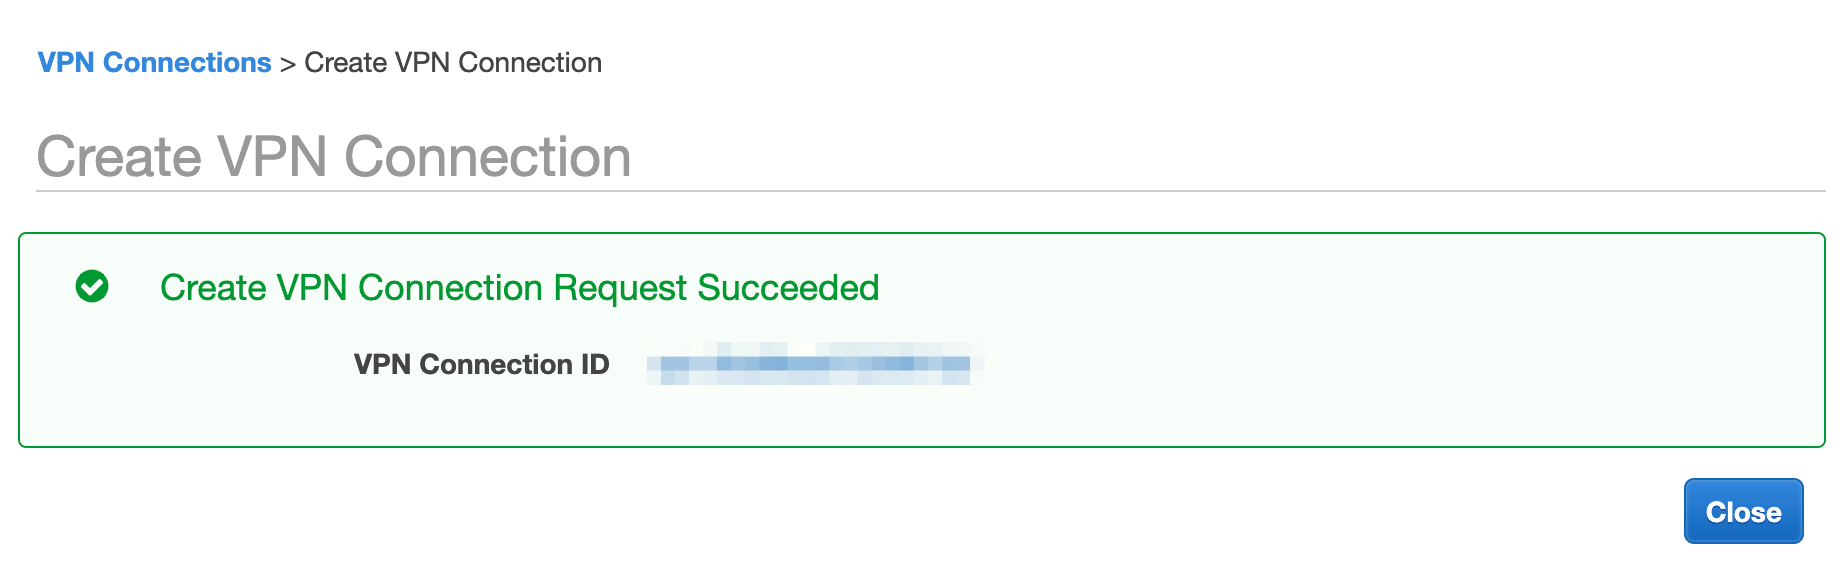
 4. Click **Create VPN Connection**.
 ## Step 5: Ensure that AWS allows inbound traffic
Based on your requirements and current setup, you might need to enable inbound traffic from Orka to AWS.
See [Amazon VPC Documentation: Security Groups for Your VPC](https://docs.aws.amazon.com/vpc/latest/userguide/VPC_SecurityGroups.html) and [Amazon VPC Documentation: Network ACLs](https://docs.aws.amazon.com/vpc/latest/userguide/vpc-network-acls.html).
## Step 5: Ensure that AWS allows inbound traffic
Based on your requirements and current setup, you might need to enable inbound traffic from Orka to AWS.
See [Amazon VPC Documentation: Security Groups for Your VPC](https://docs.aws.amazon.com/vpc/latest/userguide/VPC_SecurityGroups.html) and [Amazon VPC Documentation: Network ACLs](https://docs.aws.amazon.com/vpc/latest/userguide/vpc-network-acls.html).