> ## Documentation Index
> Fetch the complete documentation index at: https://docs.macstadium.com/llms.txt
> Use this file to discover all available pages before exploring further.
# Connect to your Orka cluster via VPN
> Connect to your Orka cluster's Cisco ASAv via VPN with OpenConnect or Cisco AnyConnect. Required before managing VMs or configuring cluster networking.
## Before You Begin
* The server address from Step 1: VPN in the [IP Plan](/macstadium/macstadium-overview/ip-plan).
* The username and password from Step 1: VPN in the IP Plan.
## When VPN is required
Your Orka cluster sits behind a dedicated Cisco ASAv firewall. VMs and the Orka management plane are on a private network and not reachable from the public internet without VPN.
| Scenario | VPN required? |
| ----------------------------------------------------------------------- | ----------------------------------------------------- |
| `orka3` CLI commands (deploy, list, delete VMs) | Yes |
| Orka web UI | Yes |
| SSH into a VM | Yes |
| VNC / Screen Sharing into a VM | Yes |
| CI/CD runner already inside your corporate network (routed through VPN) | Depends on your network topology |
| VDI end-user sessions via Citrix Workspace app | No (Citrix proxies the session over outbound TCP 443) |
VDI end users do not need a VPN client. Citrix Workspace app establishes the session outbound through Citrix Cloud. VPN is only required for administrators managing the Orka cluster itself.
To protect your environment, MacStadium deploys your Orka cluster with a dedicated [Cisco Adaptive Security Virtual Appliance (ASAv)](https://www.cisco.com/c/en/us/products/collateral/security/adaptive-security-virtual-appliance-asav/datasheet-c78-733399.html) firewall. Cisco ASAv runs the same software as physical Cisco ASAs and delivers full ASA firewall and VPN capabilities to the cloud.
MacStadium has pre-configured the firewall and has enabled VPN access. All you need to do is run a VPN client and provide the server address and credentials for the connection.
## (Open-Source Option) OpenConnect
#### **Why OpenConnect?**
If you are a predominantly CLI user, you might want to use [OpenConnect](https://www.infradead.org/openconnect/index.html) - an open-source VPN client available from the command line.
### Download and Install OpenConnect
* If you have Homebrew on your system, you can run `brew install openconnect` from your command line.
* If you're running on Windows, you can [download](https://www.infradead.org/openconnect/download.html) and [build](https://www.infradead.org/openconnect/building.html) the OpenConnect package yourself or you can use Cisco AnyConnect instead.
### Use OpenConnect
1. From your command line, run the following command. Replace `` with the server address from Step 1: VPN in the IP Plan.
```
sudo openconnect --protocol=anyconnect
// OR if running on Windows
openconnect --protocol=anyconnect
```
2. Follow the prompts.
* On the immediate Password prompt, provide your sudo password (the password for your current computer user) and press Enter.
* On the Enter 'yes' to accept, 'no' to abort; anything else to view: prompt, type yes and press Enter.
* On the Username prompt, provide the username from Step 1: VPN in the IP Plan and press Enter.
* On the Password prompt, provide the password from Step 1: VPN in the IP Plan and press Enter.
When the connection is established, you will see a similar output:
 **TIP: Want to terminate the VPN connection?**
At any time press Ctrl+C on the command line.
## Cisco AnyConnect Secure Mobility Client
#### **Why Cisco AnyConnect?**
Cisco firewalls are designed to work with the [Cisco AnyConnect Secure Mobility Client](https://www.cisco.com/c/en/us/support/security/anyconnect-secure-mobility-client/tsd-products-support-series-home.html) as a VPN client. If you prefer a GUI VPN client or you're running on Windows, you might want to use Cisco AnyConnect.
### Download and Install Cisco AnyConnect
1. In your browser, navigate to the server address from Step 1: VPN of your [IP Plan](/macstadium/macstadium-overview/ip-plan). You might need to use https\://.
2. Ignore the certificate warning and proceed to the address.
3. When prompted, enter the credentials from Step 1: VPN in the IP Plan. For Orka Small Teams, see here.\\
**TIP: Want to terminate the VPN connection?**
At any time press Ctrl+C on the command line.
## Cisco AnyConnect Secure Mobility Client
#### **Why Cisco AnyConnect?**
Cisco firewalls are designed to work with the [Cisco AnyConnect Secure Mobility Client](https://www.cisco.com/c/en/us/support/security/anyconnect-secure-mobility-client/tsd-products-support-series-home.html) as a VPN client. If you prefer a GUI VPN client or you're running on Windows, you might want to use Cisco AnyConnect.
### Download and Install Cisco AnyConnect
1. In your browser, navigate to the server address from Step 1: VPN of your [IP Plan](/macstadium/macstadium-overview/ip-plan). You might need to use https\://.
2. Ignore the certificate warning and proceed to the address.
3. When prompted, enter the credentials from Step 1: VPN in the IP Plan. For Orka Small Teams, see here.\\
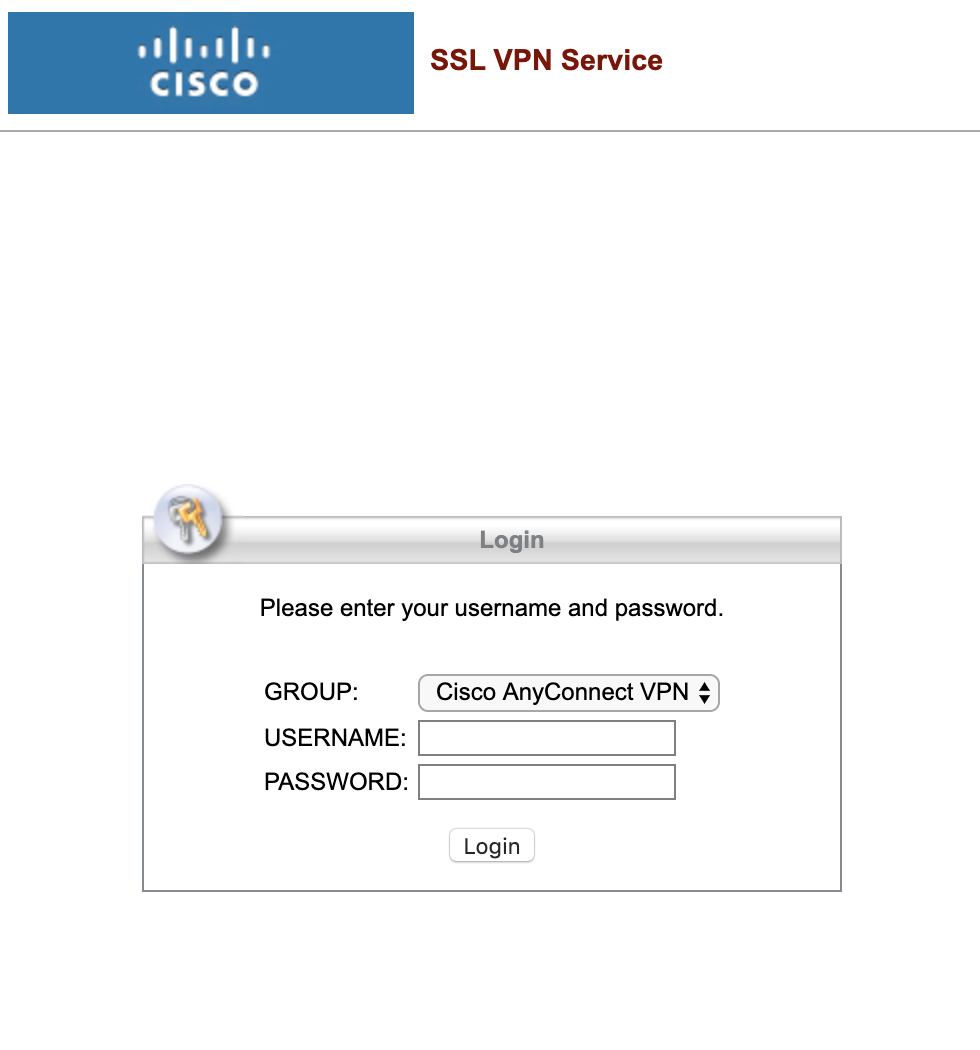 4. When prompted, download, install, and run the Cisco AnyConnect desktop client.
## Use Cisco AnyConnect
1. Run Cisco AnyConnect Secure Mobility Client.
2. When prompted, enter the server address from Step 1: VPN of your IP Plan and click Connect.\\
4. When prompted, download, install, and run the Cisco AnyConnect desktop client.
## Use Cisco AnyConnect
1. Run Cisco AnyConnect Secure Mobility Client.
2. When prompted, enter the server address from Step 1: VPN of your IP Plan and click Connect.\\
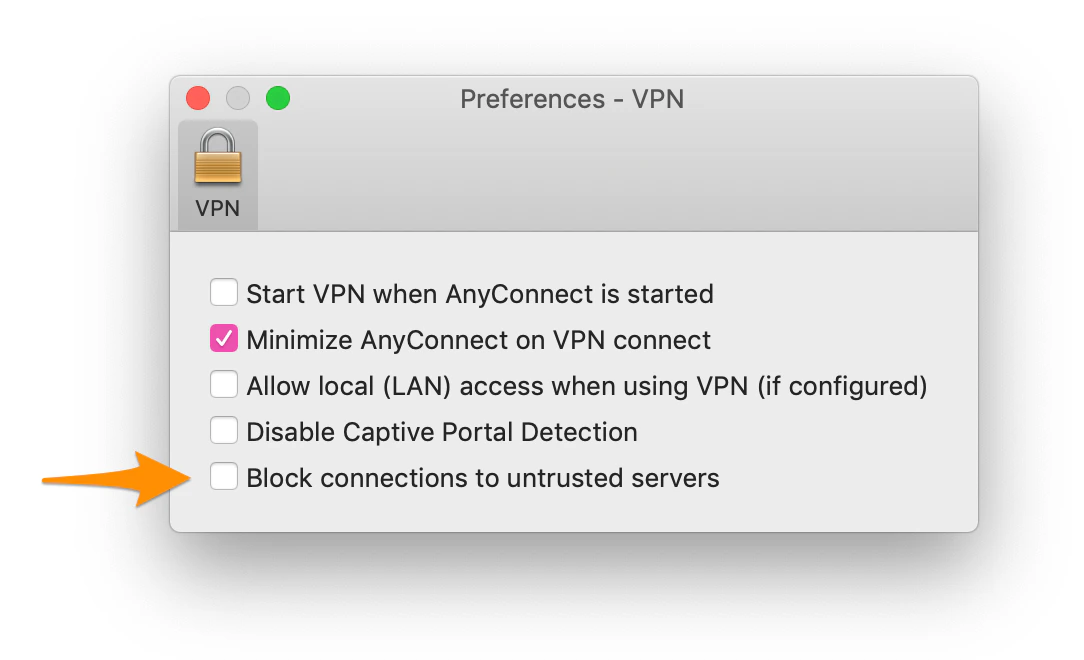
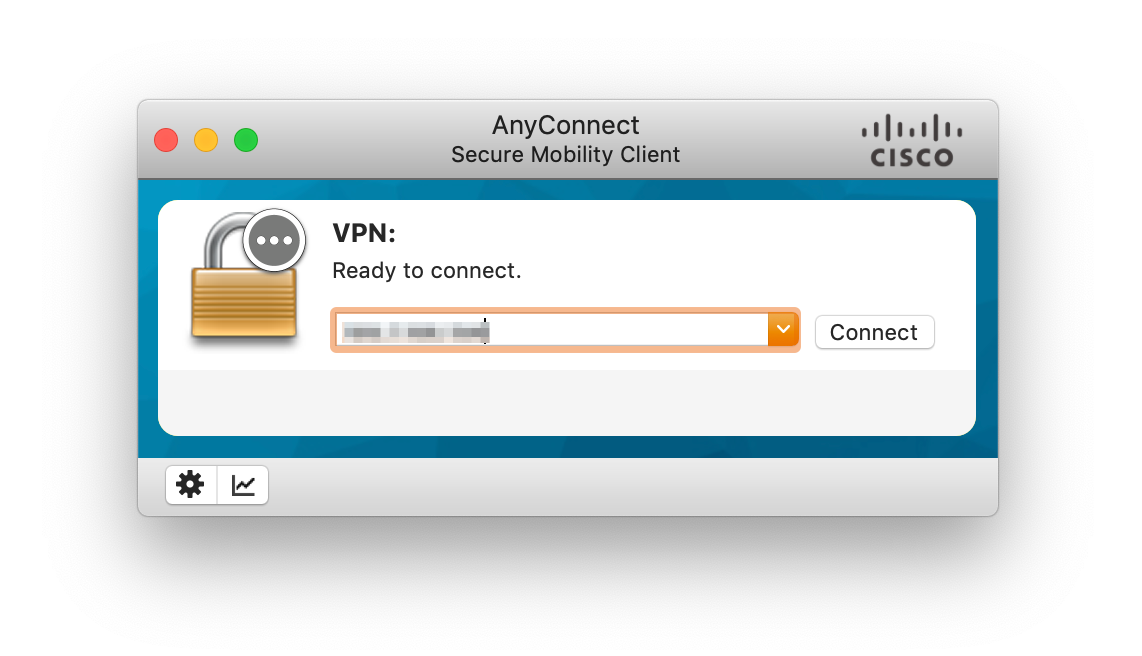 3. If prompted that an untrusted server was blocked, perform the following steps:
* Click Change Setting... and deselect Block connections to untrusted servers.
* Close the Preferences - VPN window.
* Click Connect again.\\
3. If prompted that an untrusted server was blocked, perform the following steps:
* Click Change Setting... and deselect Block connections to untrusted servers.
* Close the Preferences - VPN window.
* Click Connect again.\\
 4. If prompted that the server certificate is untrusted, click Connect Anyway.
5. When prompted, provide your login credentials and click OK.
4. If prompted that the server certificate is untrusted, click Connect Anyway.
5. When prompted, provide your login credentials and click OK.