> ## Documentation Index
> Fetch the complete documentation index at: https://docs.macstadium.com/llms.txt
> Use this file to discover all available pages before exploring further.
# Welcome to Orka Desktop 3.0
> Free macOS virtualization for individual workstations. Build and test VM images locally, then push to an OCI registry for use in a shared Orka cluster.
## Orka Desktop by MacStadium
**Orka Desktop** is a free, no-obligation virtualization tool designed for individual macOS workstations. These workstations can be a local MacBook, a hosted Mac mini or Studio by MacStadium, AWS, or an on-premises solution. Once deployed, **Orka Desktop** lets you create a seamless workflow for running the same image on any device. You can build and test an image locally, then upload it to the cloud. This is much easier than needing bespoke technologies and individual processes to test, share, and configure virtualized images.
**Orka Desktop** integrates with other cloud-based, licensed MacStadium products, like **Orka**. For example, you can upload an image built and tested with **Orka Desktop** to a container repository shared with an Orka cloud instance. Publishing local images to the Orka cloud means you can develop locally and deploy globally, offering flexibility, scalability, and an on-ramp to use MacStadium products more effectively.
You can publish any image to a container registry, for example, GitHub Packages or DockerHub, and then pull it into the **Orka Cluster**.
Orka Desktop is available from the following locations:
* MacStadium website: [macstadium.com](https://www.macstadium.com/)
* GitHub releases: [macstadium/orka-desktop](https://github.com/macstadium/orka-desktop/releases)
* Homebrew: `brew install orka-desktop`
**Orka Desktop Requirements**
Apple M1 with 8GB RAM, and 50GB disk space
macOS 15.0+ (Sequoia)
**Registry Requirements**
1. Pull - You can pull from the registry
2. Push - You can push to the registry
3. Content Discovery - You can list or otherwise query the content stored in the registry
4. Content Management - You can control the full life cycle of the content stored in the registry
All registries conforming to this specification must support all APIs in the Pull category.
Registries should also support the Push, Content Discovery, and Content Management categories. A registry claiming conformance with one of these specification categories must implement all APIs in the claimed category.
## OCI Image Overview
The Open Container Initiative (OCI) is an open governance structure for the express purpose of creating open industry standards around container formats and runtimes.
You can deploy a VM using a compatible image from a private or public registry, and store images in your own registry.
## Installation and Set Up in 3 Easy Steps
**Orka Desktop** has a clear and intuitive GUI, which makes it easy to transition to using Orka in the cloud. It provides information about your system, available images, and VMs.
1. Download Orka Desktop. Move to your Applications folder. Run Orka Desktop.
2. Create a New Virtual Machine (VM). There are two options for creating a new VM:
* **Clean Install**, where the image is created from an existing IPSW file.
* **Pull Image**, where the image is pulled from an Image Repository (based on an existing OCI image that is available via a Container Registry).
3. Use the VM.
* IPSW (Apple Software/Firmware) is a file format used in macOS firmware for devices equipped with Apple silicon.
* There is also the option to pull the latest IPSW directly from Apple's servers, which is detailed in the Other IPSW Options section.
## Downloading Orka Desktop
* MacStadium website: [macstadium.com](https://www.macstadium.com/)
* MacStadium GitHub repo: [macstadium/orka-desktop](https://github.com/macstadium/orka-desktop/releases)
* Brew package manager: `brew install orka-desktop`
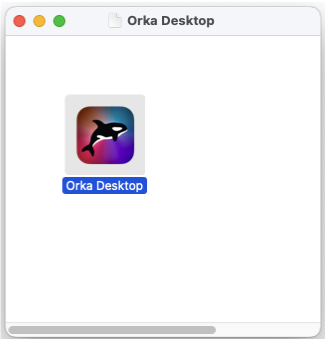 *Orka Desktop*
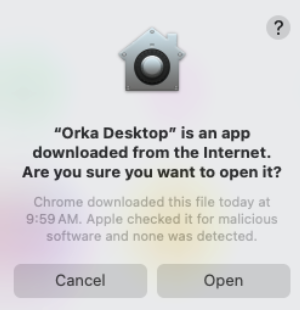 *Confirmation Box*
## Creating a New Virtual Machine (Clean Install via IPSW Files)
1. Download Orka Desktop.
2. Open the Orka Desktop tool and the *System Information* screen displays.
3. Click + **Create New VM**.\\
*Confirmation Box*
## Creating a New Virtual Machine (Clean Install via IPSW Files)
1. Download Orka Desktop.
2. Open the Orka Desktop tool and the *System Information* screen displays.
3. Click + **Create New VM**.\\
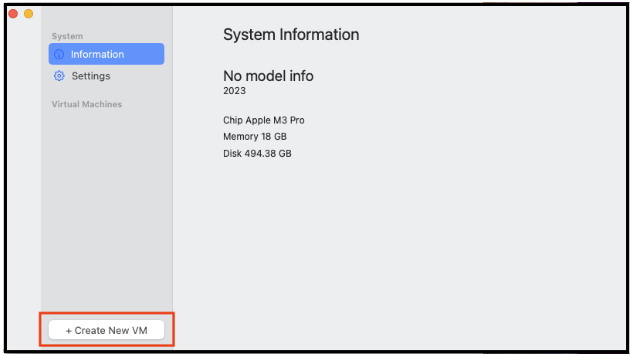 4. When the new Virtual Machine dialog box opens, select **Clean Install**(based on an IPSW); then use the **Name** field to name the VM.\\
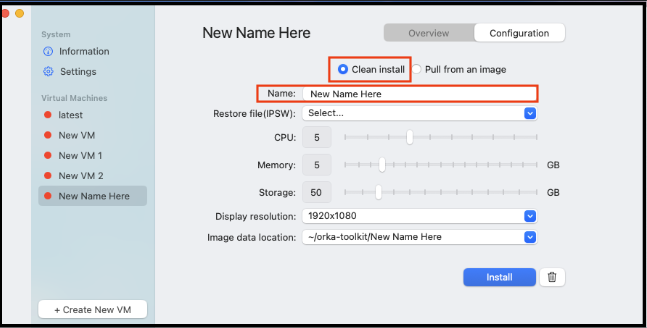 * In this example, the new VM is called New Name Here, and at the same time, that name appears on the left-hand side of the screen, under the list of available Virtual Machines.
* The VM is now in a pending installation state.
5. If you want to select an existing IPSW file, select **Other** from the dropdown menu.\\
* In this example, the new VM is called New Name Here, and at the same time, that name appears on the left-hand side of the screen, under the list of available Virtual Machines.
* The VM is now in a pending installation state.
5. If you want to select an existing IPSW file, select **Other** from the dropdown menu.\\
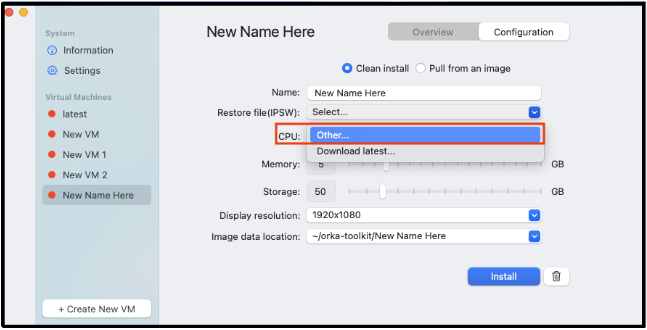 *Other (to select from an existing IPSW file)*
Selecting the **Other** dropdown opens a folder where you can pick the existing IPSW file to install.
6. If you do not have a local IPSW file to use for the new VM, select Download Latest to get the latest files from Apple.\\
*Other (to select from an existing IPSW file)*
Selecting the **Other** dropdown opens a folder where you can pick the existing IPSW file to install.
6. If you do not have a local IPSW file to use for the new VM, select Download Latest to get the latest files from Apple.\\
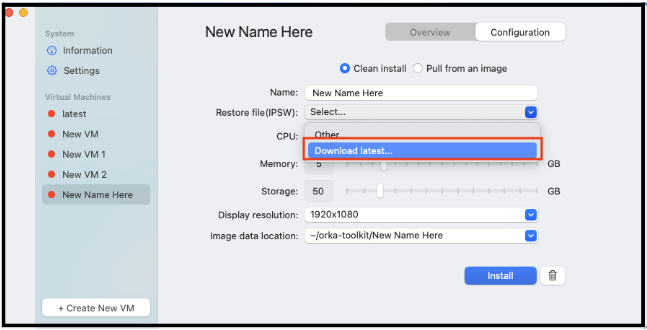 *Download Latest (to get the latest files from Apple)*
Selecting the Download Latest dropdown opens a confirmation box.
7. Use the stepped sliders to manually adjust the number of CPUs, and the amount of Memory and Storage that you want to allocate to the VM.\\
*Download Latest (to get the latest files from Apple)*
Selecting the Download Latest dropdown opens a confirmation box.
7. Use the stepped sliders to manually adjust the number of CPUs, and the amount of Memory and Storage that you want to allocate to the VM.\\
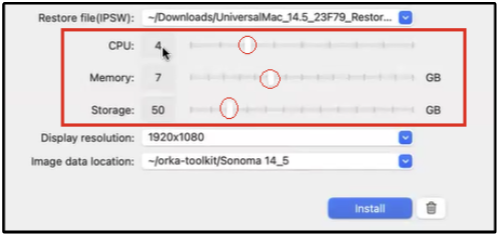 *Confirmation Box*
8. Use the Display Resolution dropdown to set the resolution of the screen when running Console into the image.
9. Use the Image Data Location to select the location of the saved files.
*Confirmation Box*
8. Use the Display Resolution dropdown to set the resolution of the screen when running Console into the image.
9. Use the Image Data Location to select the location of the saved files.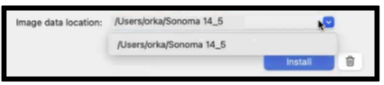 \
*Image Data Location*
10. Click Install and the progress bar displays the install progress.
When the install completes, there is a new VM available on the Orka Desktop, which can be used to Start, Pause, Resume, Stop, or Console into.
## Creating a New Virtual Machine (Pull from OCI Image)
1. Download Orka Desktop.
2. Open the Orka Desktop tool and the *System Information* screen displays.
3. Click + **Create New VM**
\
*Image Data Location*
10. Click Install and the progress bar displays the install progress.
When the install completes, there is a new VM available on the Orka Desktop, which can be used to Start, Pause, Resume, Stop, or Console into.
## Creating a New Virtual Machine (Pull from OCI Image)
1. Download Orka Desktop.
2. Open the Orka Desktop tool and the *System Information* screen displays.
3. Click + **Create New VM**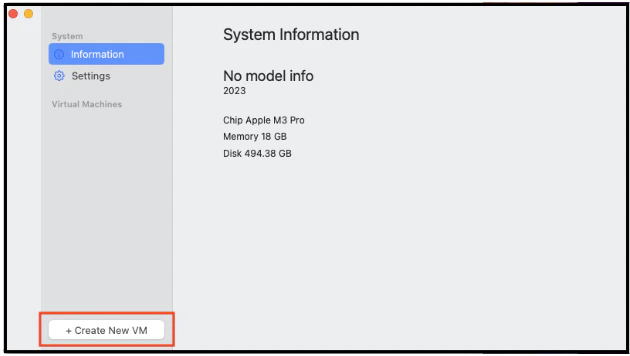 4. When the new Virtual Machine dialog box opens, select **Pull from an Image**; then use the **Name** field to name the VM.\\
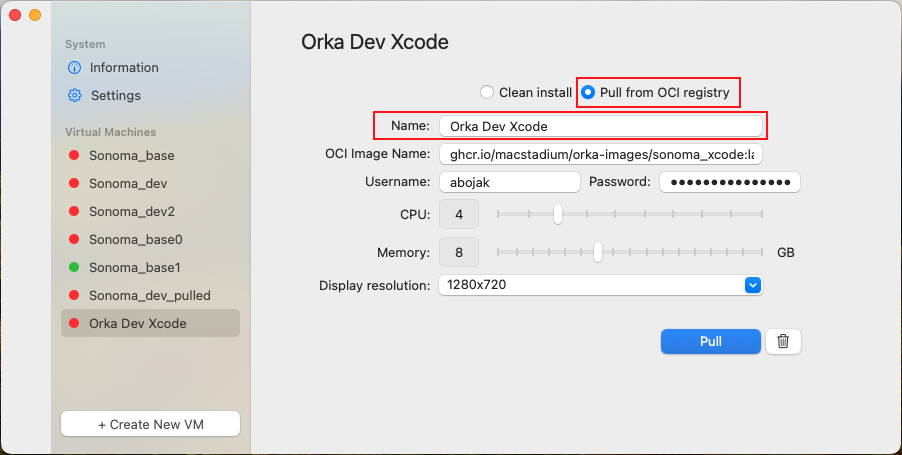 *Pull from an Image*
* In this example, the new VM is called New VM Pulled From Image, and at the same time, that name appears on the left-hand side of the screen, under the list of available Virtual Machines.
* The VM is now in a pending installation state.
5. Complete all fields with the required information.
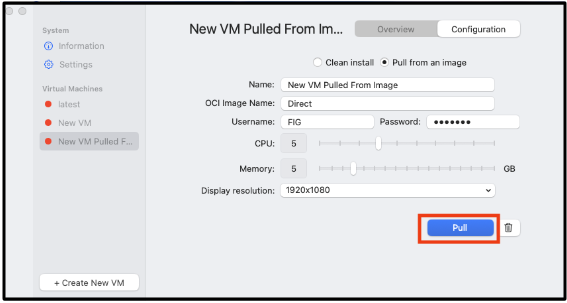
6. Use the stepped sliders to manually adjust the number of CPUs, and the amount of Memory and Storage that you want to allocate to the VM.
7. Use the Display Resolution dropdown to set the resolution of the screen when running Console into the image.\\
*Pull from an Image*
* In this example, the new VM is called New VM Pulled From Image, and at the same time, that name appears on the left-hand side of the screen, under the list of available Virtual Machines.
* The VM is now in a pending installation state.
5. Complete all fields with the required information.
6. Use the stepped sliders to manually adjust the number of CPUs, and the amount of Memory and Storage that you want to allocate to the VM.
7. Use the Display Resolution dropdown to set the resolution of the screen when running Console into the image.\\
 8. Click **Pull**.
 ### Configuration Warnings
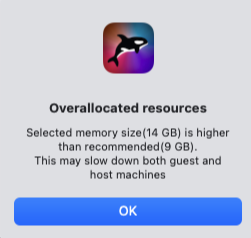
When adding CPU Count and Memory Size, the Orka Desktop application displays a warning message if the recommended sizes are exceeded.
### Configuration Warnings
When adding CPU Count and Memory Size, the Orka Desktop application displays a warning message if the recommended sizes are exceeded.
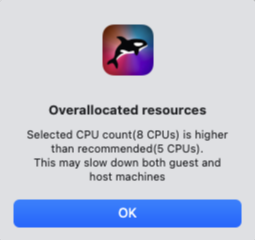 *CPU Count Warning*
 *Memory Size Warning*
## Starting the VM
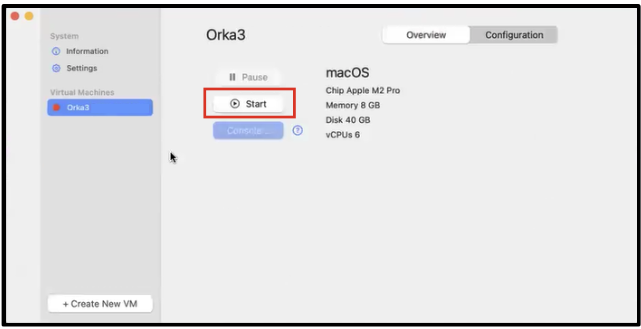
1. Click an existing VM on the left-hand side. In this example, the VM is Orka3.
2. Click Start.\\
*Memory Size Warning*
## Starting the VM
1. Click an existing VM on the left-hand side. In this example, the VM is Orka3.
2. Click Start.\\
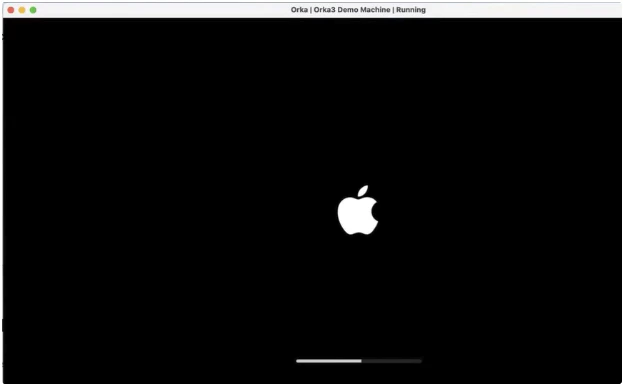
 3. A separate window opens and the VM starts.
 *VM Starting*
Starting a VM for the first time may take several minutes.
* This VM might be configured to run a different version of macOS from your host, so you can test the same software in two different environments. Note that you can only use OSs in VMs that are more recent than the OS running on the host.
* You can install Xcode and use the VM as a build machine for iOS apps.
* IT admins can test Mobile Device Management (MDM) profiles using VMs without maintaining several Mac mini machines. You can perform MDM profile testing on a VM created by Orka Desktop.
* Apple has limited the ability to sign into iCloud with an Apple ID within a VM.
## Stop a VM
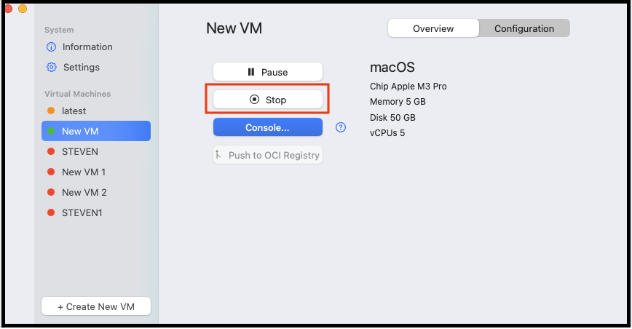
If a VM is running, then click the Start button to Stop it.
*VM Starting*
Starting a VM for the first time may take several minutes.
* This VM might be configured to run a different version of macOS from your host, so you can test the same software in two different environments. Note that you can only use OSs in VMs that are more recent than the OS running on the host.
* You can install Xcode and use the VM as a build machine for iOS apps.
* IT admins can test Mobile Device Management (MDM) profiles using VMs without maintaining several Mac mini machines. You can perform MDM profile testing on a VM created by Orka Desktop.
* Apple has limited the ability to sign into iCloud with an Apple ID within a VM.
## Stop a VM
If a VM is running, then click the Start button to Stop it.
 ## Console into a VM
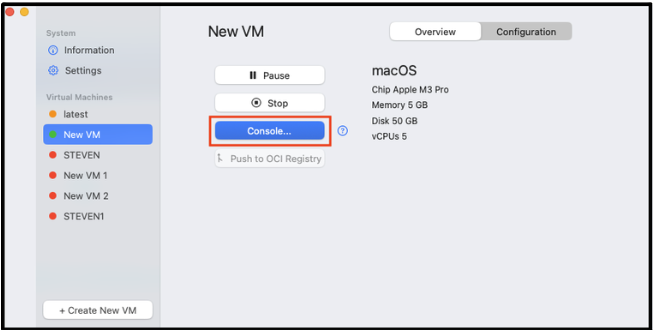
Think of this functionality as a graphical console, which opens the VM display in a UI screen. In other words, it opens a new screen for interactions with guest OS.
## Console into a VM
Think of this functionality as a graphical console, which opens the VM display in a UI screen. In other words, it opens a new screen for interactions with guest OS.
 ## Resume VM
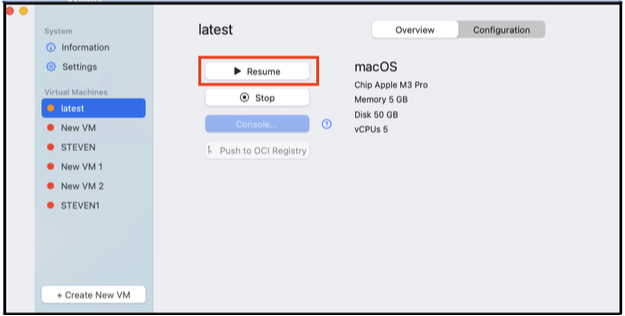
Resumes a VM that was paused.
## Resume VM
Resumes a VM that was paused.
 ## Push to OCI Registry
You can push the image to an OCI registry so that others can download and use it. This is helpful for sharing an image across a team. For example, an IT admin can create and configure an image and push it to a shared location, then team members can access that image and begin using it. You can also push an image to a shared registry for testing purposes.
1. Select an existing VM.
2. Click **Push to OCI Registry**.
## Push to OCI Registry
You can push the image to an OCI registry so that others can download and use it. This is helpful for sharing an image across a team. For example, an IT admin can create and configure an image and push it to a shared location, then team members can access that image and begin using it. You can also push an image to a shared registry for testing purposes.
1. Select an existing VM.
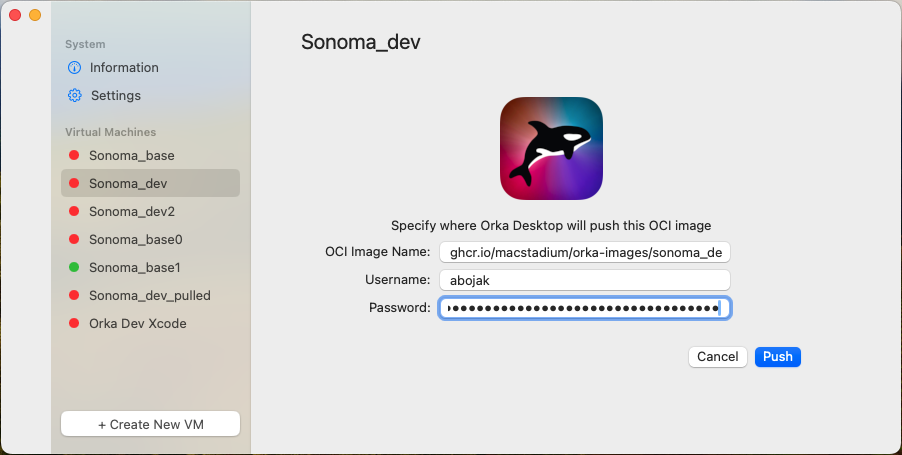
2. Click **Push to OCI Registry**.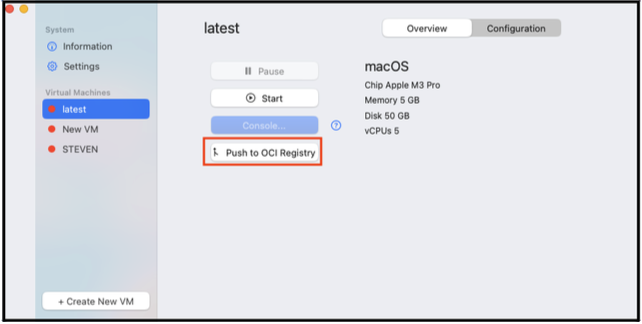 3. Complete the required fields and click **Push**.
 4. A progress bar appears while the image is being pushed.
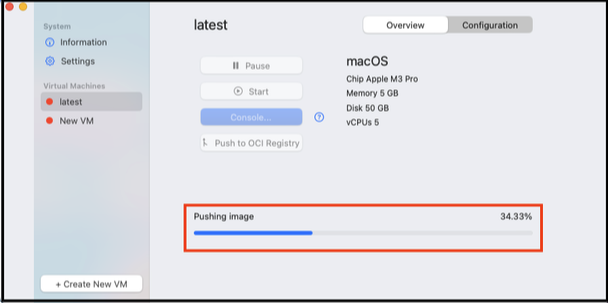 *Progress Bar*
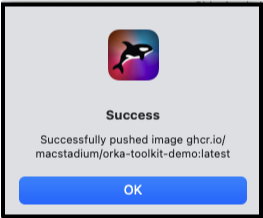 *Push Success Message*
## Managing the VM
Right-click an existing VM to display a dropdown menu.
*Push Success Message*
## Managing the VM
Right-click an existing VM to display a dropdown menu.
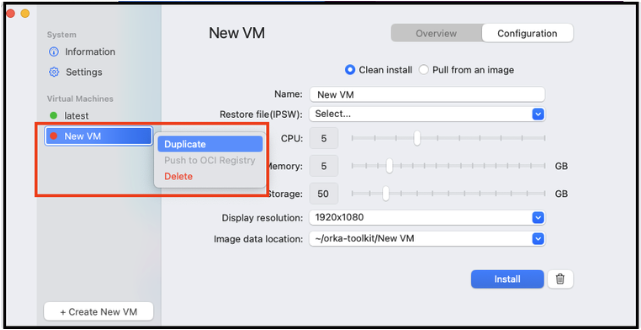 *Right Click on VM*
* **Duplicate** = Duplicate can be used for upgrade testing. Use Duplicate to create a copy of the existing VM, then test the upgrade to a new VM.
* **Push to OCI Registry** = Push your image to an OCI registry.
* **Delete** = Delete is used to delete the VM from Orka Desktop.
## Log Files
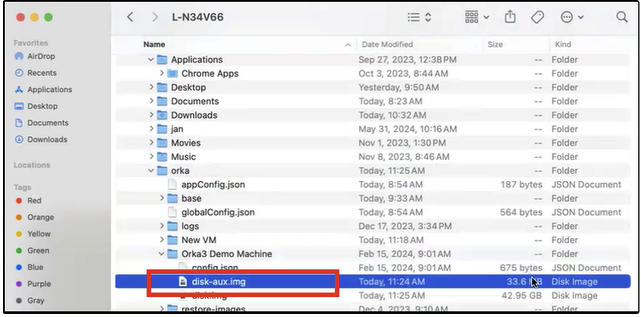
The following information is found in the log file: directory, image directory, and default VM settings.
The log file has four sections, with the following information:
* Node Info (Contains system details, for example, chip, cores, memory, OS version, and so on).
* Image Info (Lists images, creates new image, deploys new VM based on an image).
* VM Details (For each running VM, there are actions like, Open Screenshare, Open SSH, Stop, Save, Save As, View Log actions).
* Logs (Running logs, and any other useful information for debugging.)
*Right Click on VM*
* **Duplicate** = Duplicate can be used for upgrade testing. Use Duplicate to create a copy of the existing VM, then test the upgrade to a new VM.
* **Push to OCI Registry** = Push your image to an OCI registry.
* **Delete** = Delete is used to delete the VM from Orka Desktop.
## Log Files
The following information is found in the log file: directory, image directory, and default VM settings.
The log file has four sections, with the following information:
* Node Info (Contains system details, for example, chip, cores, memory, OS version, and so on).
* Image Info (Lists images, creates new image, deploys new VM based on an image).
* VM Details (For each running VM, there are actions like, Open Screenshare, Open SSH, Stop, Save, Save As, View Log actions).
* Logs (Running logs, and any other useful information for debugging.)
 ## About
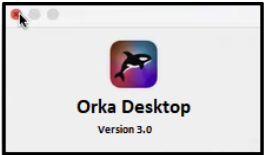
Click About to confirm the version number of the product.
## About
Click About to confirm the version number of the product.
 ## Settings
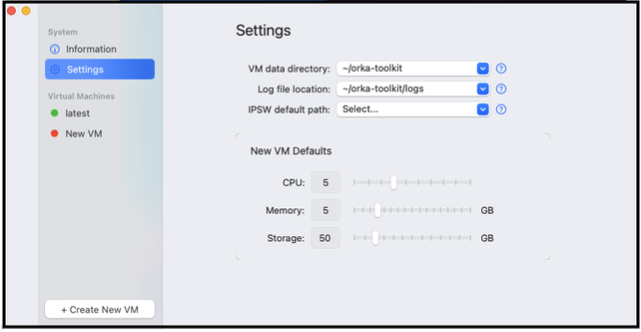
Use to set log file location, VM directory, and other information.
## Settings
Use to set log file location, VM directory, and other information.
 * Orka Desktop automatically starts a Console (screen share) session with the VM when Start is selected.
* Managing and debugging issues with the VMs is made simple with a comprehensive list of actions available, including the ability to view and traverse log files and other artifacts.
## Other IPSW Options
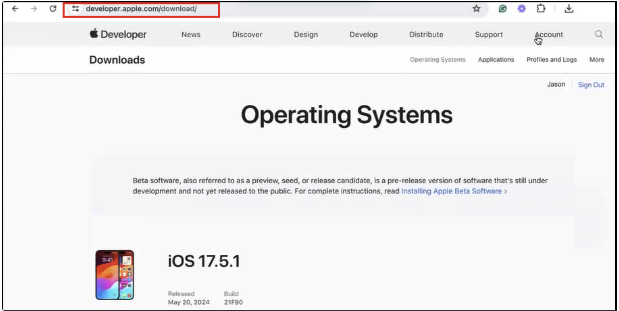
Download the appropriate files from [developer.apple.com](https://developer.apple.com).
* Orka Desktop automatically starts a Console (screen share) session with the VM when Start is selected.
* Managing and debugging issues with the VMs is made simple with a comprehensive list of actions available, including the ability to view and traverse log files and other artifacts.
## Other IPSW Options
Download the appropriate files from [developer.apple.com](https://developer.apple.com).
 ## Personal Access Token (PAT) with GitHub
A Personal Access Token (PAT) is used to push or pull from a container repository hosted by GitHub (ghcr.io). First, create a PAT and use those credentials. Other container repositories may only use a username and password for credentials. Consult the instructions for the container repository you are using. To use ghcr.io with Orka Desktop, see the [GitHub documentation](https://docs.github.com/en).
## Community and Support
Use the GitHub project for your support needs. The [Discussions](https://github.com/macstadium/orka-desktop/discussions) section is available for questions, feedback, or sharing your use case, and the [Issues](https://github.com/macstadium/orka-desktop/issues) section is for filing bugs or feature requests.
## Personal Access Token (PAT) with GitHub
A Personal Access Token (PAT) is used to push or pull from a container repository hosted by GitHub (ghcr.io). First, create a PAT and use those credentials. Other container repositories may only use a username and password for credentials. Consult the instructions for the container repository you are using. To use ghcr.io with Orka Desktop, see the [GitHub documentation](https://docs.github.com/en).
## Community and Support
Use the GitHub project for your support needs. The [Discussions](https://github.com/macstadium/orka-desktop/discussions) section is available for questions, feedback, or sharing your use case, and the [Issues](https://github.com/macstadium/orka-desktop/issues) section is for filing bugs or feature requests.