Requires Orka 3.5 or later. If you’re on an earlier version, see the release notes for your version before proceeding.
Getting Your Credentials
Your Harbor credentials will be provided to you by our support team, and are included in your IP Plan. These will include your:- Harbor URL
- Harbor metrics URL
- Username
- Password
Accessing the Harbor Web Interface
Initial Login
-
You will need to be logged in to the Orka CLI using the
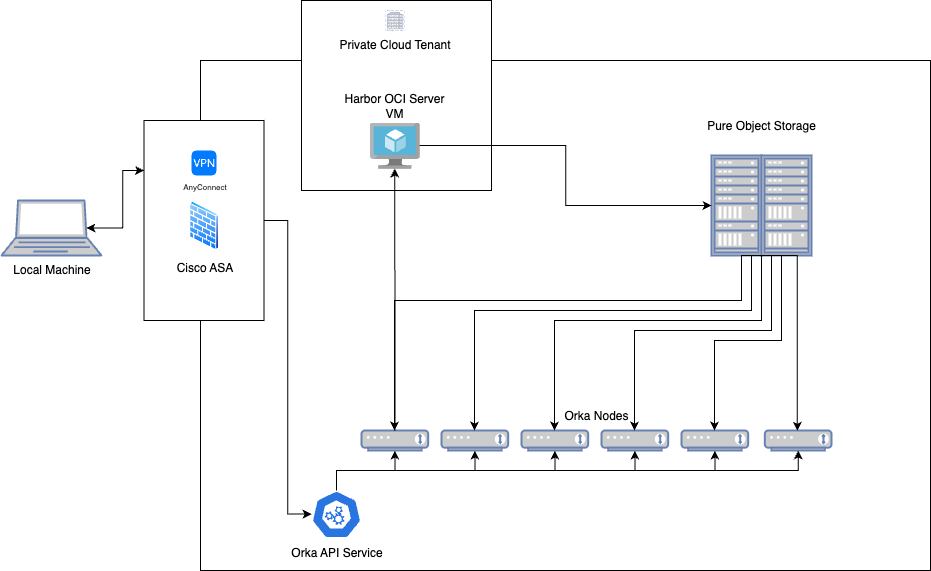
orka3 logincommand in your terminal, and connected to the VPN as outlined in your IP plan. - Navigate to your Harbor URL included in your IP Plan in a web browser. This will typically be the last available IP in your Orka subnet. Example: https://10.221.189.254. Your Harbor metrics URL will differ, and have the /metrics destination. Example: http://10.221.189.254:9090/metrics. Each Harbor instance includes a Let’s Encrypt certificate, enabling you to access your instance via FQDN by adding the appropriate entry to your local hosts file.
- Click ‘Log in’
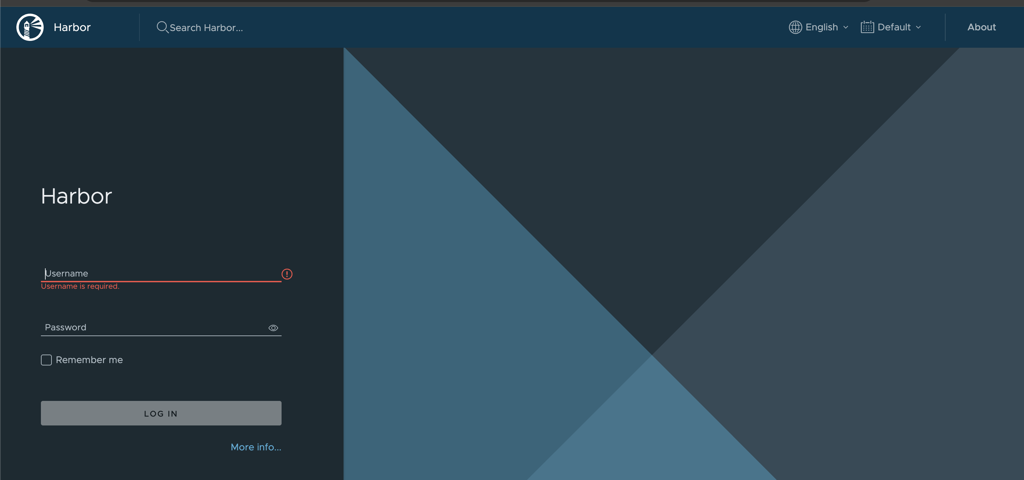
- Enter your username and password
- Click ‘Log in’
Harbor Dashboard Overview
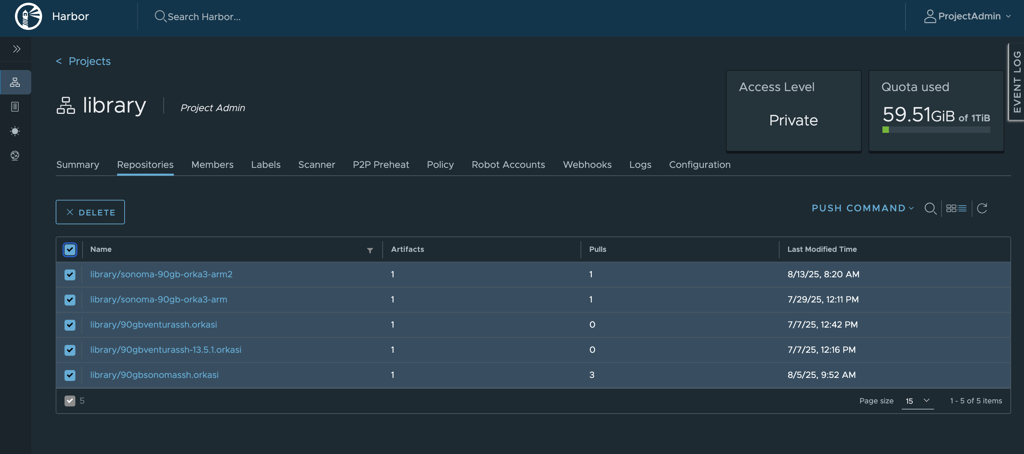
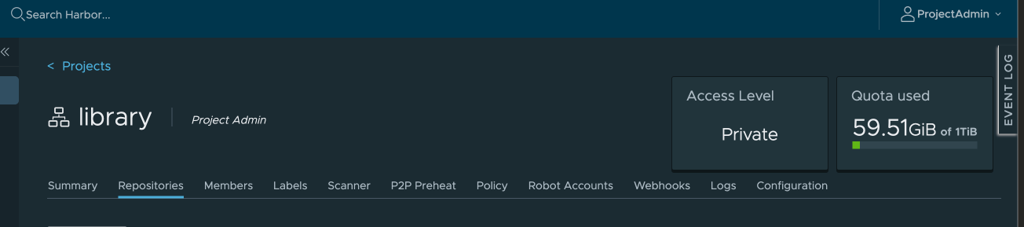
Once logged in, you’ll see the Harbor dashboard, with several key sections:- Projects: Your assigned project where you can manage repositories. If you require more than one project, please reach out to our Support team for assistance.
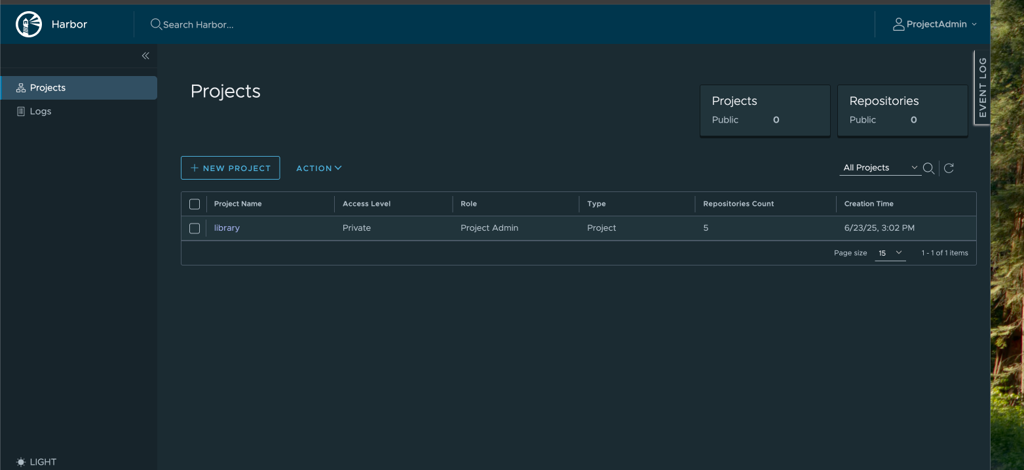
- Repositories: Container image repositories within your project
- Users: Project-level user management (limited to your project scope). To add users, please open a support ticket.
Key Harbor Web Interface Features
Project Summary
The project section provides an overview of:- The total number of repositories in your project
- Your storage usage and quota limits
- Recent activity and statistics
- Project members and roles
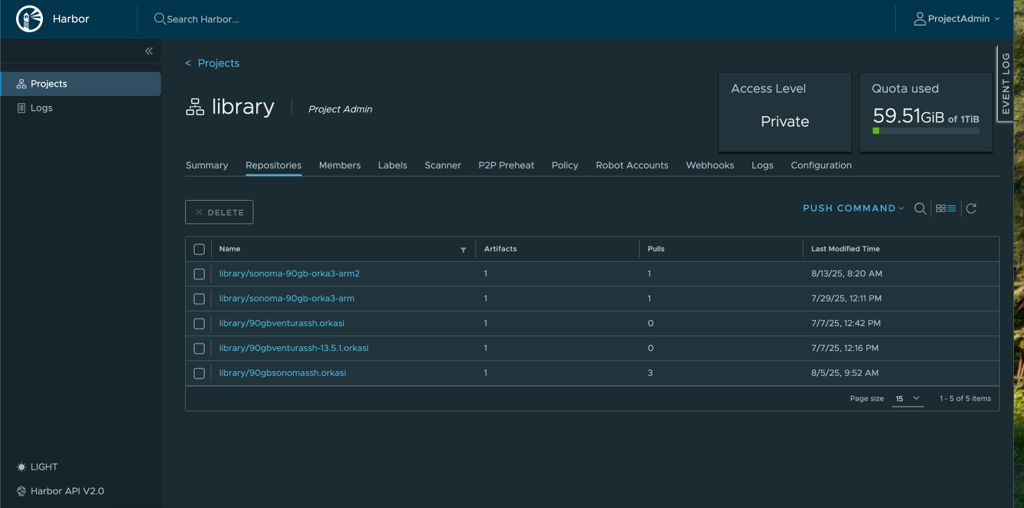
Repository Management
The ‘repositories’ section provides a detailed overview of:- All the repositories within your project
- Browsing image tags and versions
- Delete images if necessary (see ‘Garbage collection’ section below)
User Management
As a Project Admin, you can:- View existing project users
- Manage user roles within your project scope
- Note: To add new users to your project, please contact the MacStadium Support team.
Using Harbor with the Orka CLI
Add credentials to Orka to access the Harbor OCI repository:orka3 regcred add -u <OCI.User> -p <OCI.Pass> https://<OCI.FQDN>
Pulling Images
Instruct all Orka nodes to fetch an image from the OCI repository:orka3 imagecache add <OCI.FQDN>/library/<Image.Name> --all
Cache the image to a single node:
orka3 imagecache add <OCI.FQDN>/library/<Image.Name> --nodes <Node.Name>
Monitor the status of the image being fetched:
orka3 imagecache info <OCI.FQDN>/library/<Image.Name>
For more information, run orka3 regcred --help command in the Orka CLI.
Pushing Images
The state of a running VM is saved on the host and pushed to your Harbor container registry. This operation is applicable only to Apple silicon-based VMs. The provided image must be in the following format:server.com/repository/image:tag.
If --namespace is not set, Harbor assumes that the VM is running in the orka-default namespace.Registry credentials must exist in the same namespace as the VM. Registry credentials are required to authenticate to the registry for the push operation. For more information, run
orka3 regcred --help in the Orka CLI.
Pushing an OCI image is an async operation. To check the status of the operation, run:orka3 vm get-push-status JOB_NAME
Usage
orka3 vm push VM_NAME IMAGE[:TAG] [flags]
Image Management and Deletion
Deleting Images
Note: Images must be deleted through Harbor, not via the Orka CLI.- Log in to the Harbor web interface
- Navigate to your project
- Select the repository that contains the image for deletion
- Check the box next to the image tag(s) you want to delete
- Click ‘DELETE’ to confirm the action
Garbage Collection
- Default schedule: Garbage collection runs hourly to reclaim storage space from deleted images
- Timing: Garbage collection occurs hourly, at the top of the hour
- Custom scheduling: If you would like to adjust your instance’s garbage collection schedule, please contact our support team.
Storage Quota and Limits
Your Harbor instance comes with pre-defined storage quotas. You can monitor your resource usage via the Harbor web interface under your project settings. If you attempt to push an image and have hit your storage quota, you will be met with an internal server error.Example
Advanced Features and Configurations
For more detailed information about Harbor’s advanced features and capabilities, please refer to the official Harbor documentation:- Harbor documentation: https://goharbor.io/
- User guide: https://goharbor.io/docs/2.13.0/working-with-projects/
- Administration: https://goharbor.io/docs/2.13.0/administration/
- Scheduled maintenance: We are currently finalizing our maintenance process for platform updates. These updates will require scheduled downtime to ensure system security and performance. We will provide advance notice via email and MacStadium portal notification of all planned maintenance windows, and their impact on service availability. These details will be added to our documentation once they are complete.
Troubleshooting
Push Fails with an App Transport Security Error
Iforka3 vm get-push-status returns an error referencing App Transport Security (ATS) or a secure connection requirement:
https:// scheme.
To fix it, remove the existing credential and re-add it with https://:
Additional Support
Adding Users
If you need to add additional users to your project, please contact the MacStadium Support team with:- The email address of the user to be added
- The desired role for each user
- Your project name
Configuration Changes
For any configuration changes such as custom garbage collection schedules, storage quota increases, or advanced security settings, please contact our support team.Support Channels
- Email support@macstadium.com
- Orka documentation: https://docs.macstadium.com/orka