Snapshots
A snapshot is a restorable point-in-time copy of a VM or Private Cloud storage. Snapshots can be used to revert either individual virtual machines, or an entire Private Cloud instance back to the snapshotted state. Snapshots can be run either as part of a schedule or on-demand. Snapshots are particularly useful in the event of a misconfigured environment, as restoring from a cloud snapshot can revert the entire environment to its previous state. There are two types of snapshots:- Cloud Snapshot: a snapshot of an entire Private Cloud instance.
- VM Snapshot: a snapshot of an individual Virtual Machine.
Snapshot Profiles
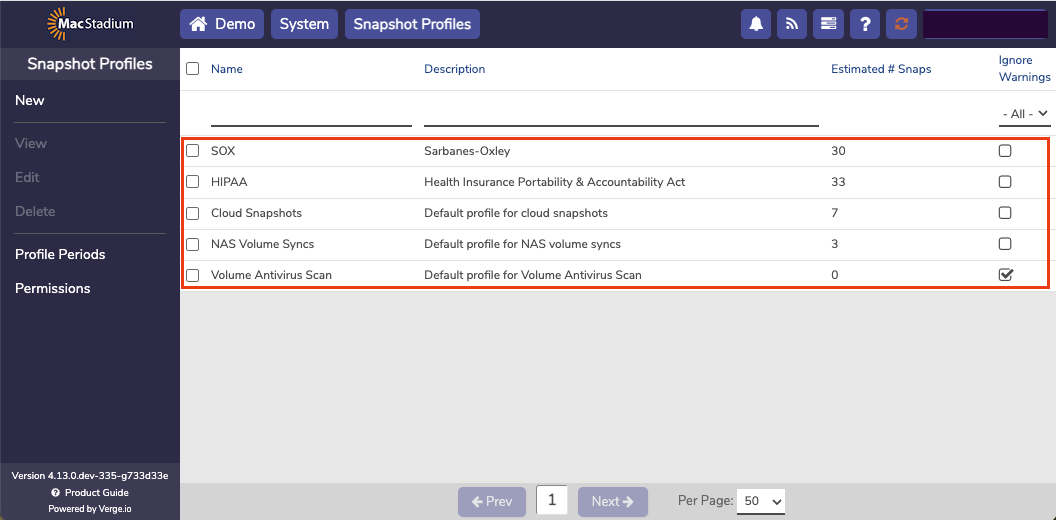
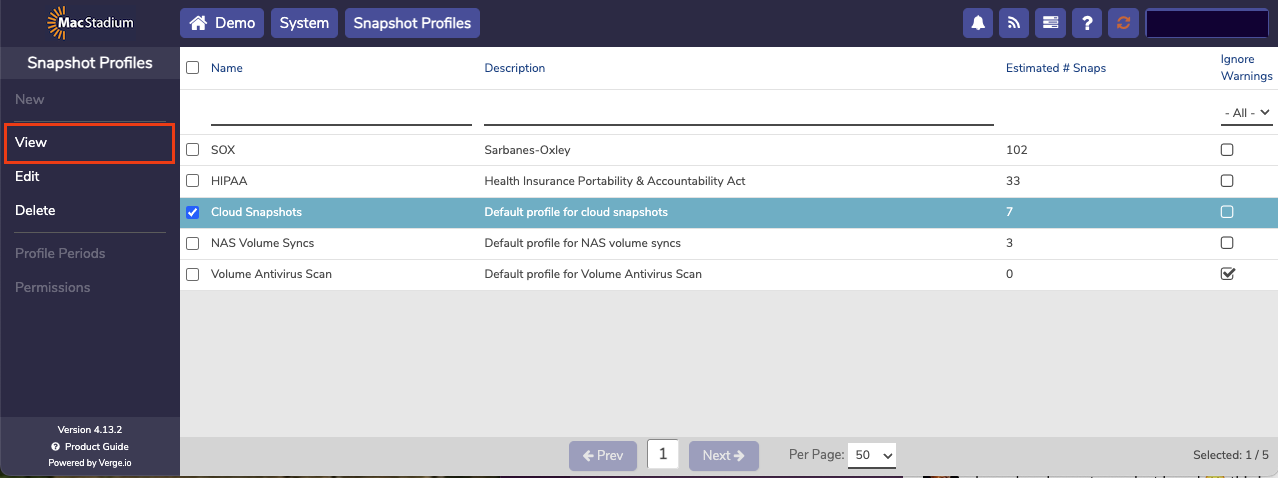
Snapshots are created by using snapshot profiles. Once a snapshot profile is set up, it can be set to automatically snapshot machines on a regular basis according to stored schedules. The retention period, frequency, and machines snapshotted are all configurable. A snapshot profile can be assigned to an entire Private Cloud, an individual VM, or a NAS volume. Private Cloud includes multiple default snapshot profiles that can be used out of the box or modified as needed. You can also create new snapshot profiles from scratch. Default Snapshot Profiles Default profiles are readily available and can be modified if needed. The following are default snapshot profiles:-
SOX (Sarbanes-Oxley)
- Yearly snapshots retained for 7 years
- Monthly snapshots retained for 1 year
- Weekly snapshots retained for 31 days
- Daily snapshots retained for 7 days
-
HIPAA (Health Insurance Portability & Accountability Act)
- Yearly snapshots retained indefinitely (no expiration)
- Monthly snapshots retained for 1 year
- Weekly snapshots retained for 31 days
- Daily snapshots retained for 7 days
-
NAS Volume Syncs
- Daily (at 6pm) snapshots retained for 3 days
-
Cloud Snapshots (suggested default profile for entire-system snapshots)
- Hourly for 3 hours
- Daily (at midnight) snapshots retained for 3 days
- Daily (at noon) snapshots retained for 1 day
Using a Default Snapshot Profile
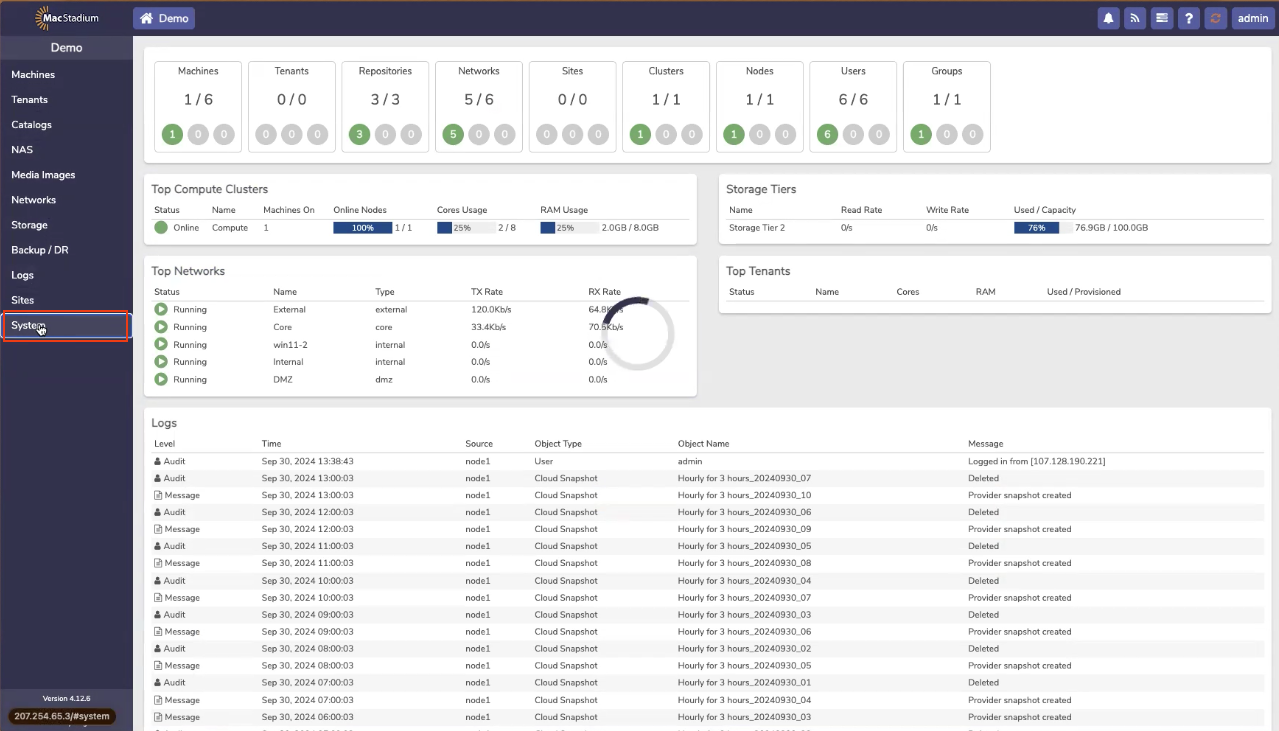
- Click System.
- Click Snapshot Profiles and a list of default snapshot profiles appears.
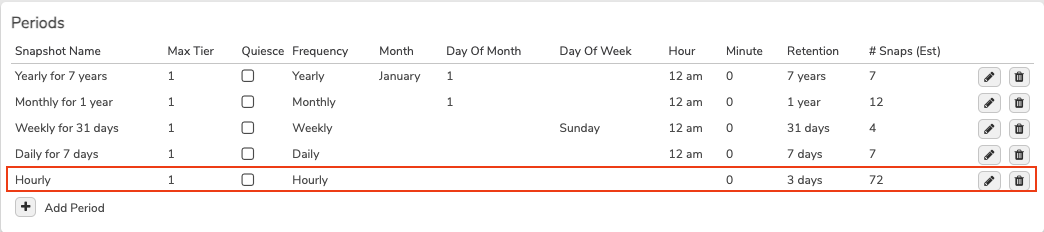
- In this example, we’ll show the SOX profile, which was created for compliance focused orgs, but MacStadium recommends Cloud Snapshots for normal use cases.
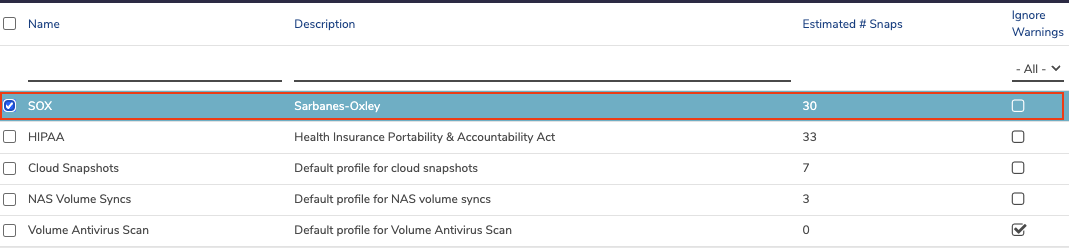
- Double-click SOX row, and the SOX Snapshot Profile opens.
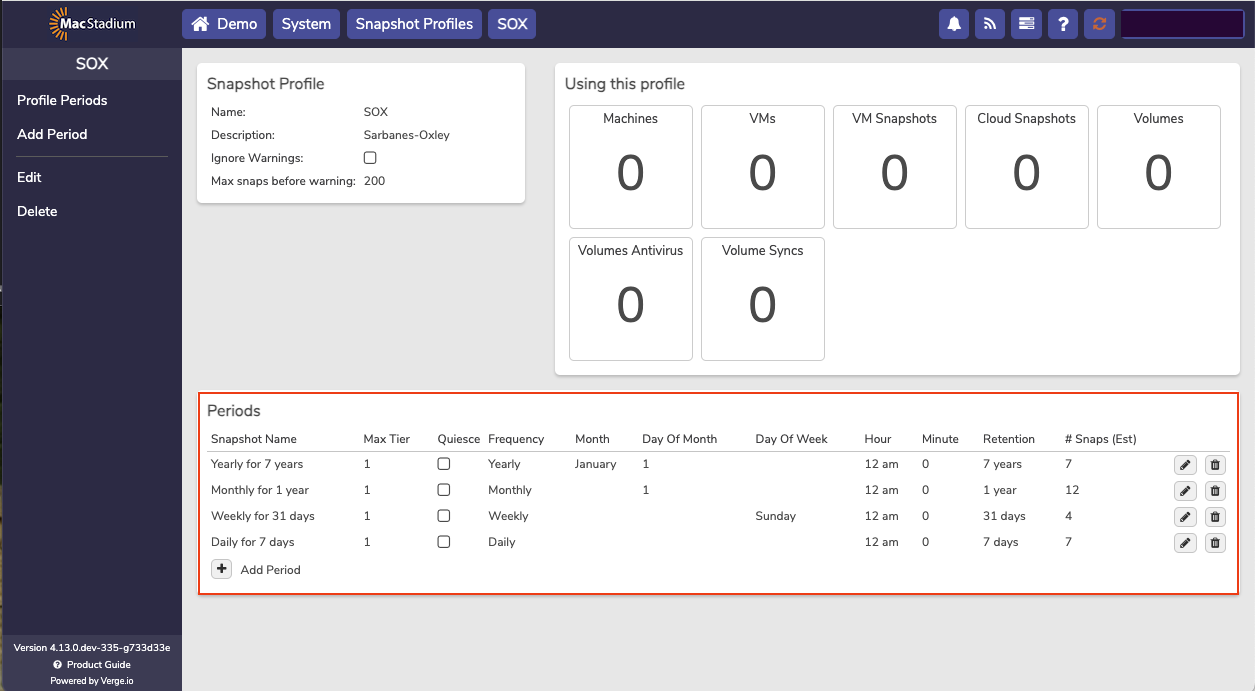
- A snapshot is taken Daily. It is retained for 7 Days.
- A snapshot is taken Weekly. It is retained for 4 Weeks.
- A snapshot is taken Monthly. It is retained for 1 year.
- A snapshot is taken Yearly. It is retained for 7 years.
There is a + Add Period button, which can be used to add more snapshots. For example, a user might want an hourly snapshot or a 6-hour snapshot. The retention time can also be set.
- In this example, click + Add Period to modify the existing default snapshot profile. The Snapshot Profile Period screen opens.
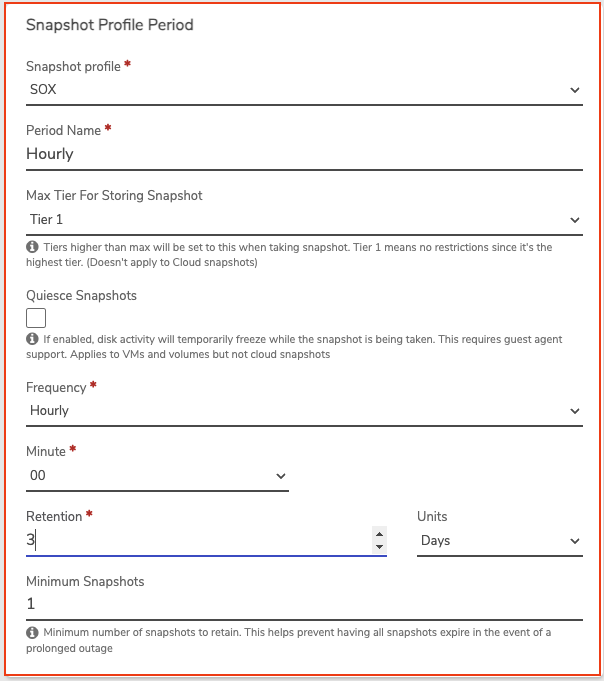
- Click Submit to create the new snapshot profile.
- Hourly
- Daily
- Weekly
- Monthly
- Yearly
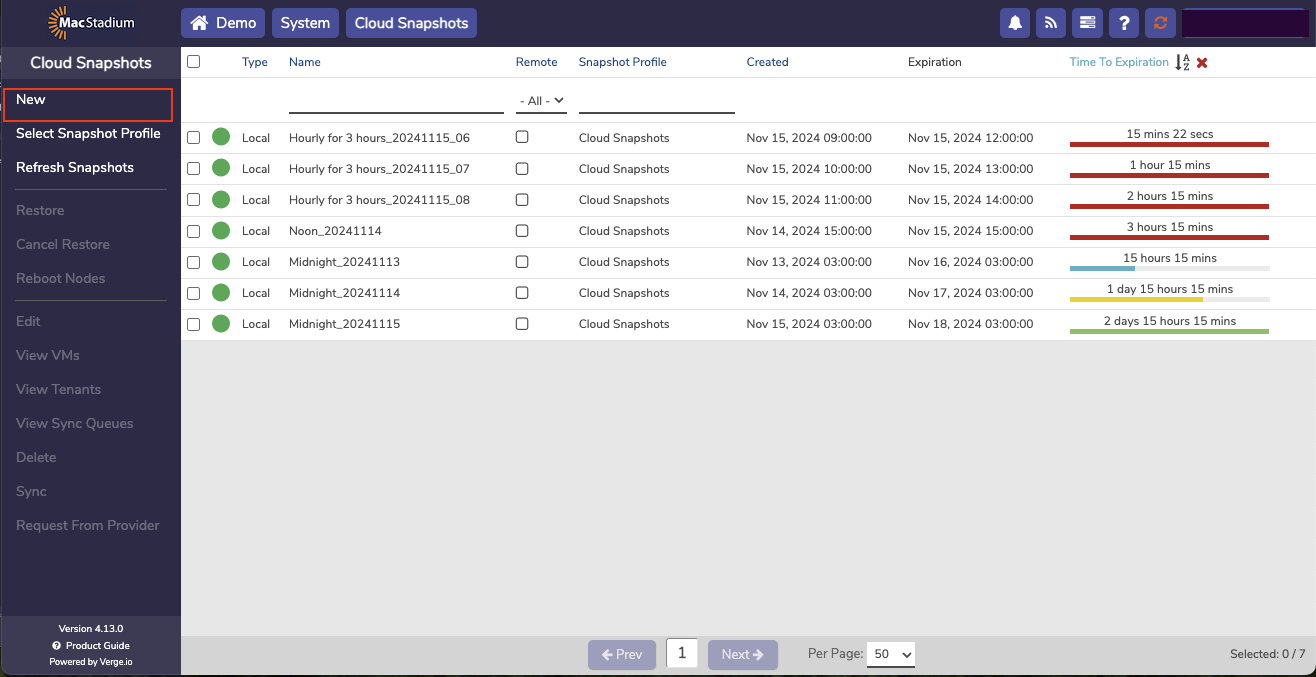
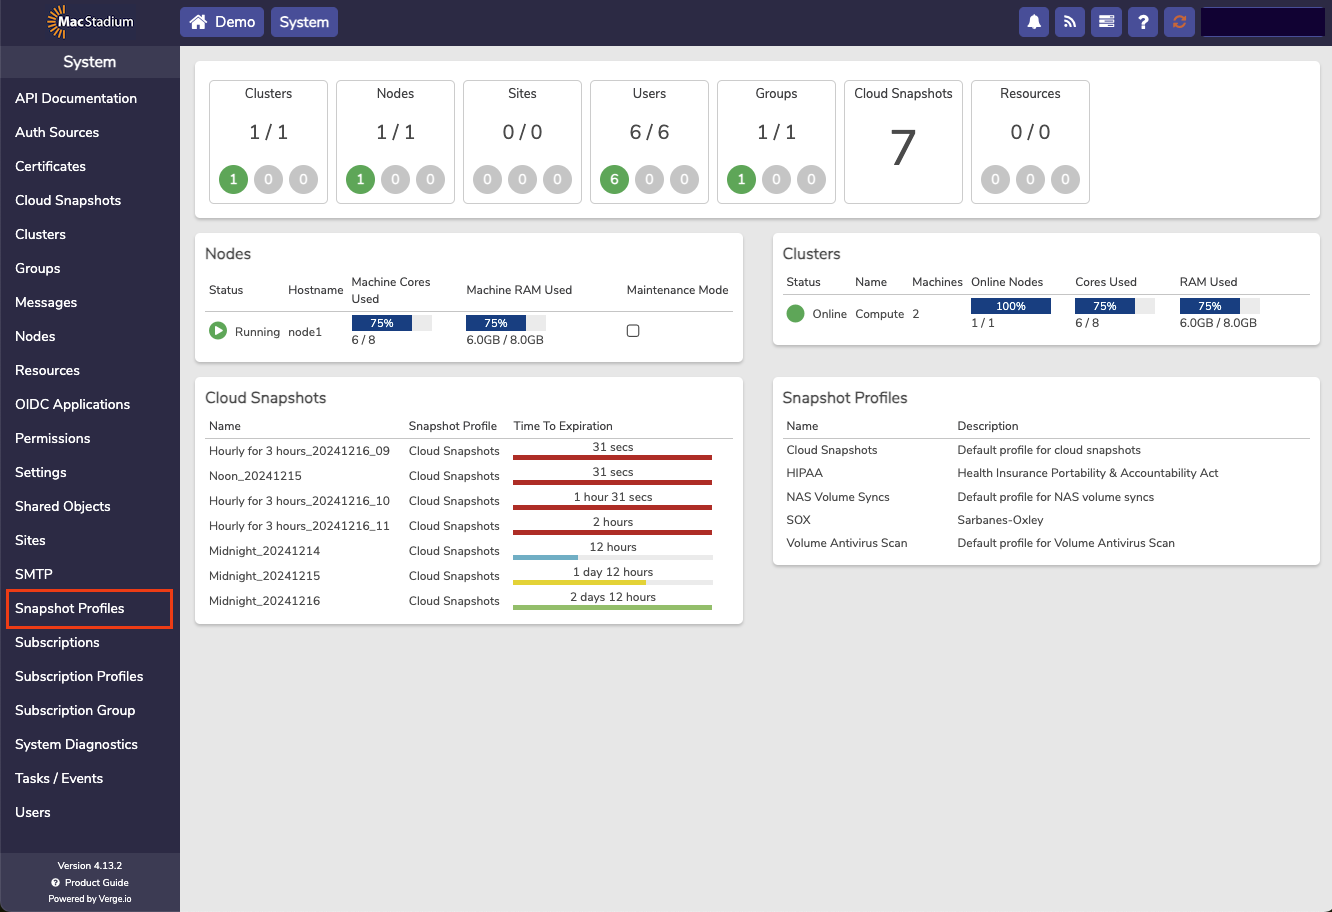
Cloud Snapshots
The Cloud Snapshot profile determines the schedule used for creating snapshots of the entire system. MacStadium recommends setting a Cloud Snapshot profile for most Private Cloud instances. Scheduled Cloud Snapshots are disabled by default. To enable cloud snapshots, navigate to System → Cloud Snapshots and select the snapshot profile to use. If a Cloud Level Snapshot is configured, individual VM snapshots may not be needed. Cloud Snapshots include every VM and volume in a Private Cloud instance, and are taken in addition to VM snapshots.Enabling Cloud Snapshots
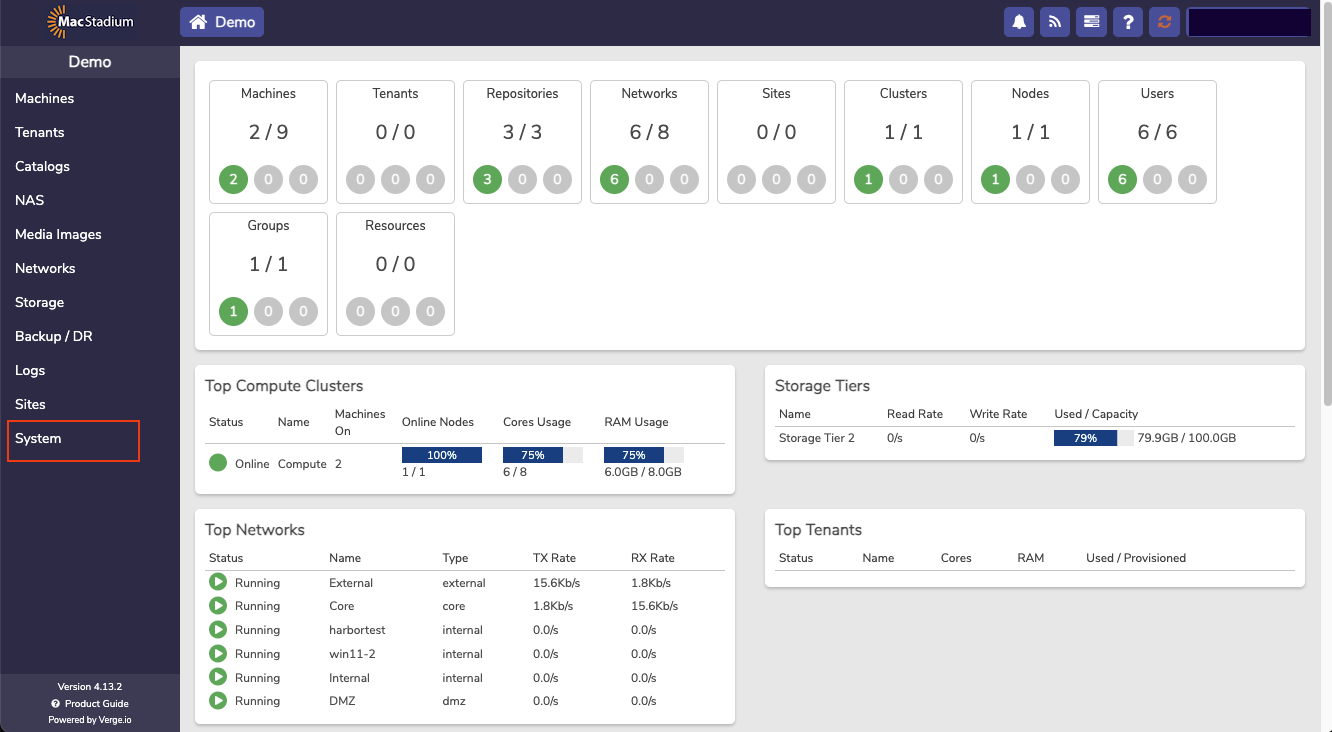
- From the main dashboard, click System on the left menu.
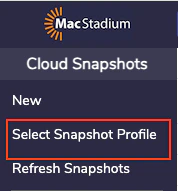
- Click Cloud Snapshots from the left menu and you’ll see the list of Snapshots.
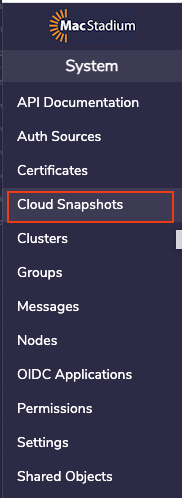

- Click Select Snapshot Profile from the left menu.
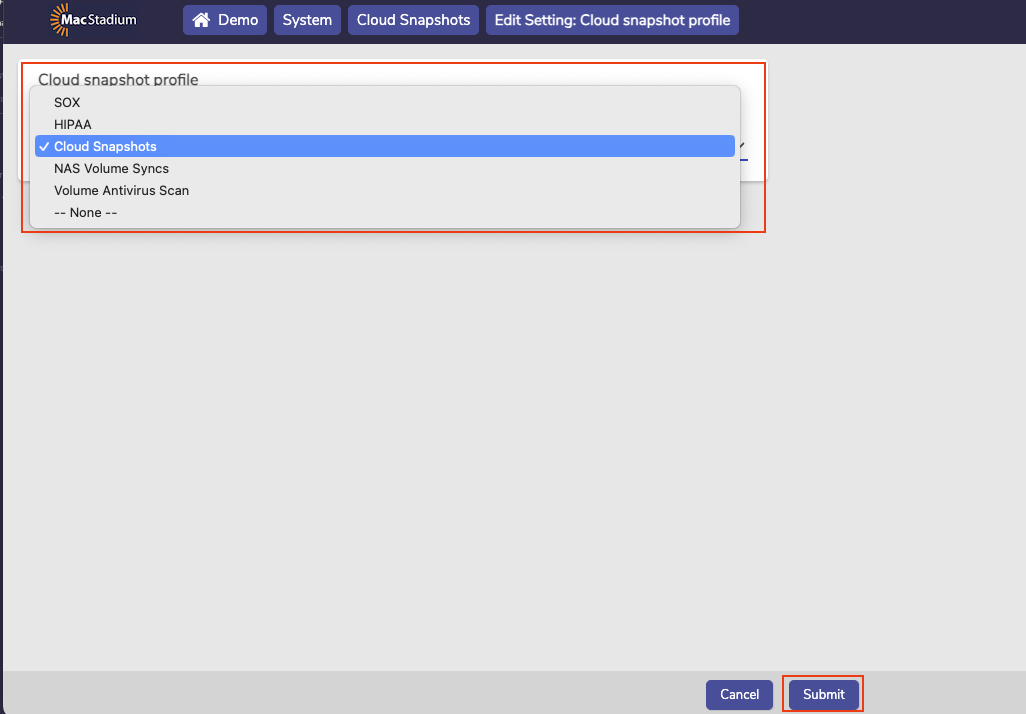
-
Select desired snapshot profile from the dropdown list.
- The default Cloud Snapshots profile is recommended as a starting point for Cloud Snapshots.
- Click Submit at the bottom of the page.
Manually Creating a Cloud Snapshot
- From the main dashboard, click System from the left menu.
- Select Cloud Snapshots.
- Select New from the left menu.
-
Fill in the form:
- Name (required): enter a name for the snapshot.
- Description (optional): enter a description.
- Expires: select a date and time for expiration.
- Expiration Type: you can select Never Expire, but this is not recommended. Snapshots without an expiration can consume substantial amounts of storage.
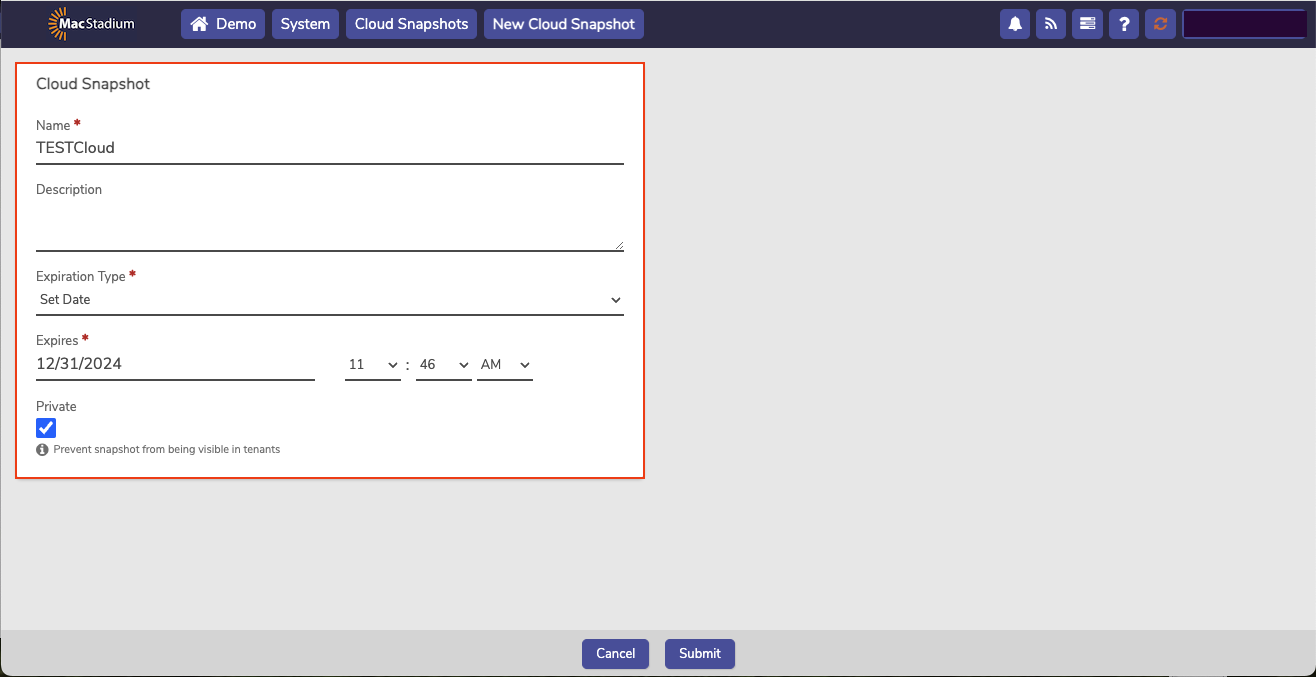
- The Private checkbox is selected by default. This option pertains to multitenancy and can be ignored in most cases.
- Click Submit.
Managing Profiles for Scheduled Snapshots
These profiles pertain to any snapshot that uses them.- From the main dashboard, click System from the left menu.
- Click Snapshot Profiles from the left menu.
- Click the desired snapshot profile.
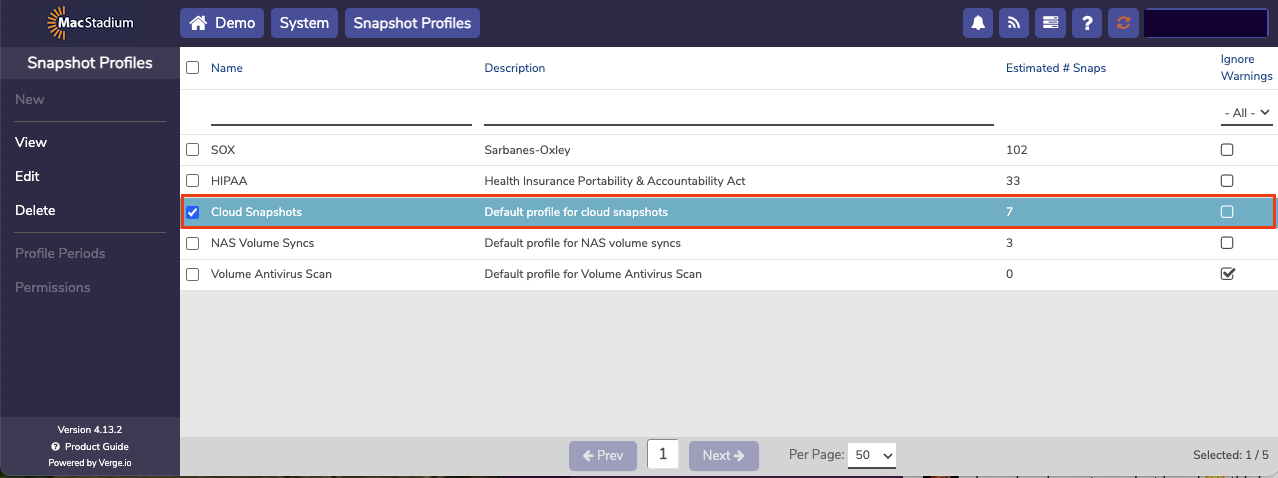
- Click View.
- To add periods to the profile click the +Add Period link. (A snapshot profile can contain multiple periods.)
- To modify an existing period: click the (pencil icon) to the far right.
- To remove existing periods: click the (trash can icon) to the far right.