- Log in to your VPC service
- Create a customer gateway
- Set up a virtual private gateway
- Create the site-to-site VPN connection
- Ensure that AWS allows inbound traffic
Log in to your VPC service
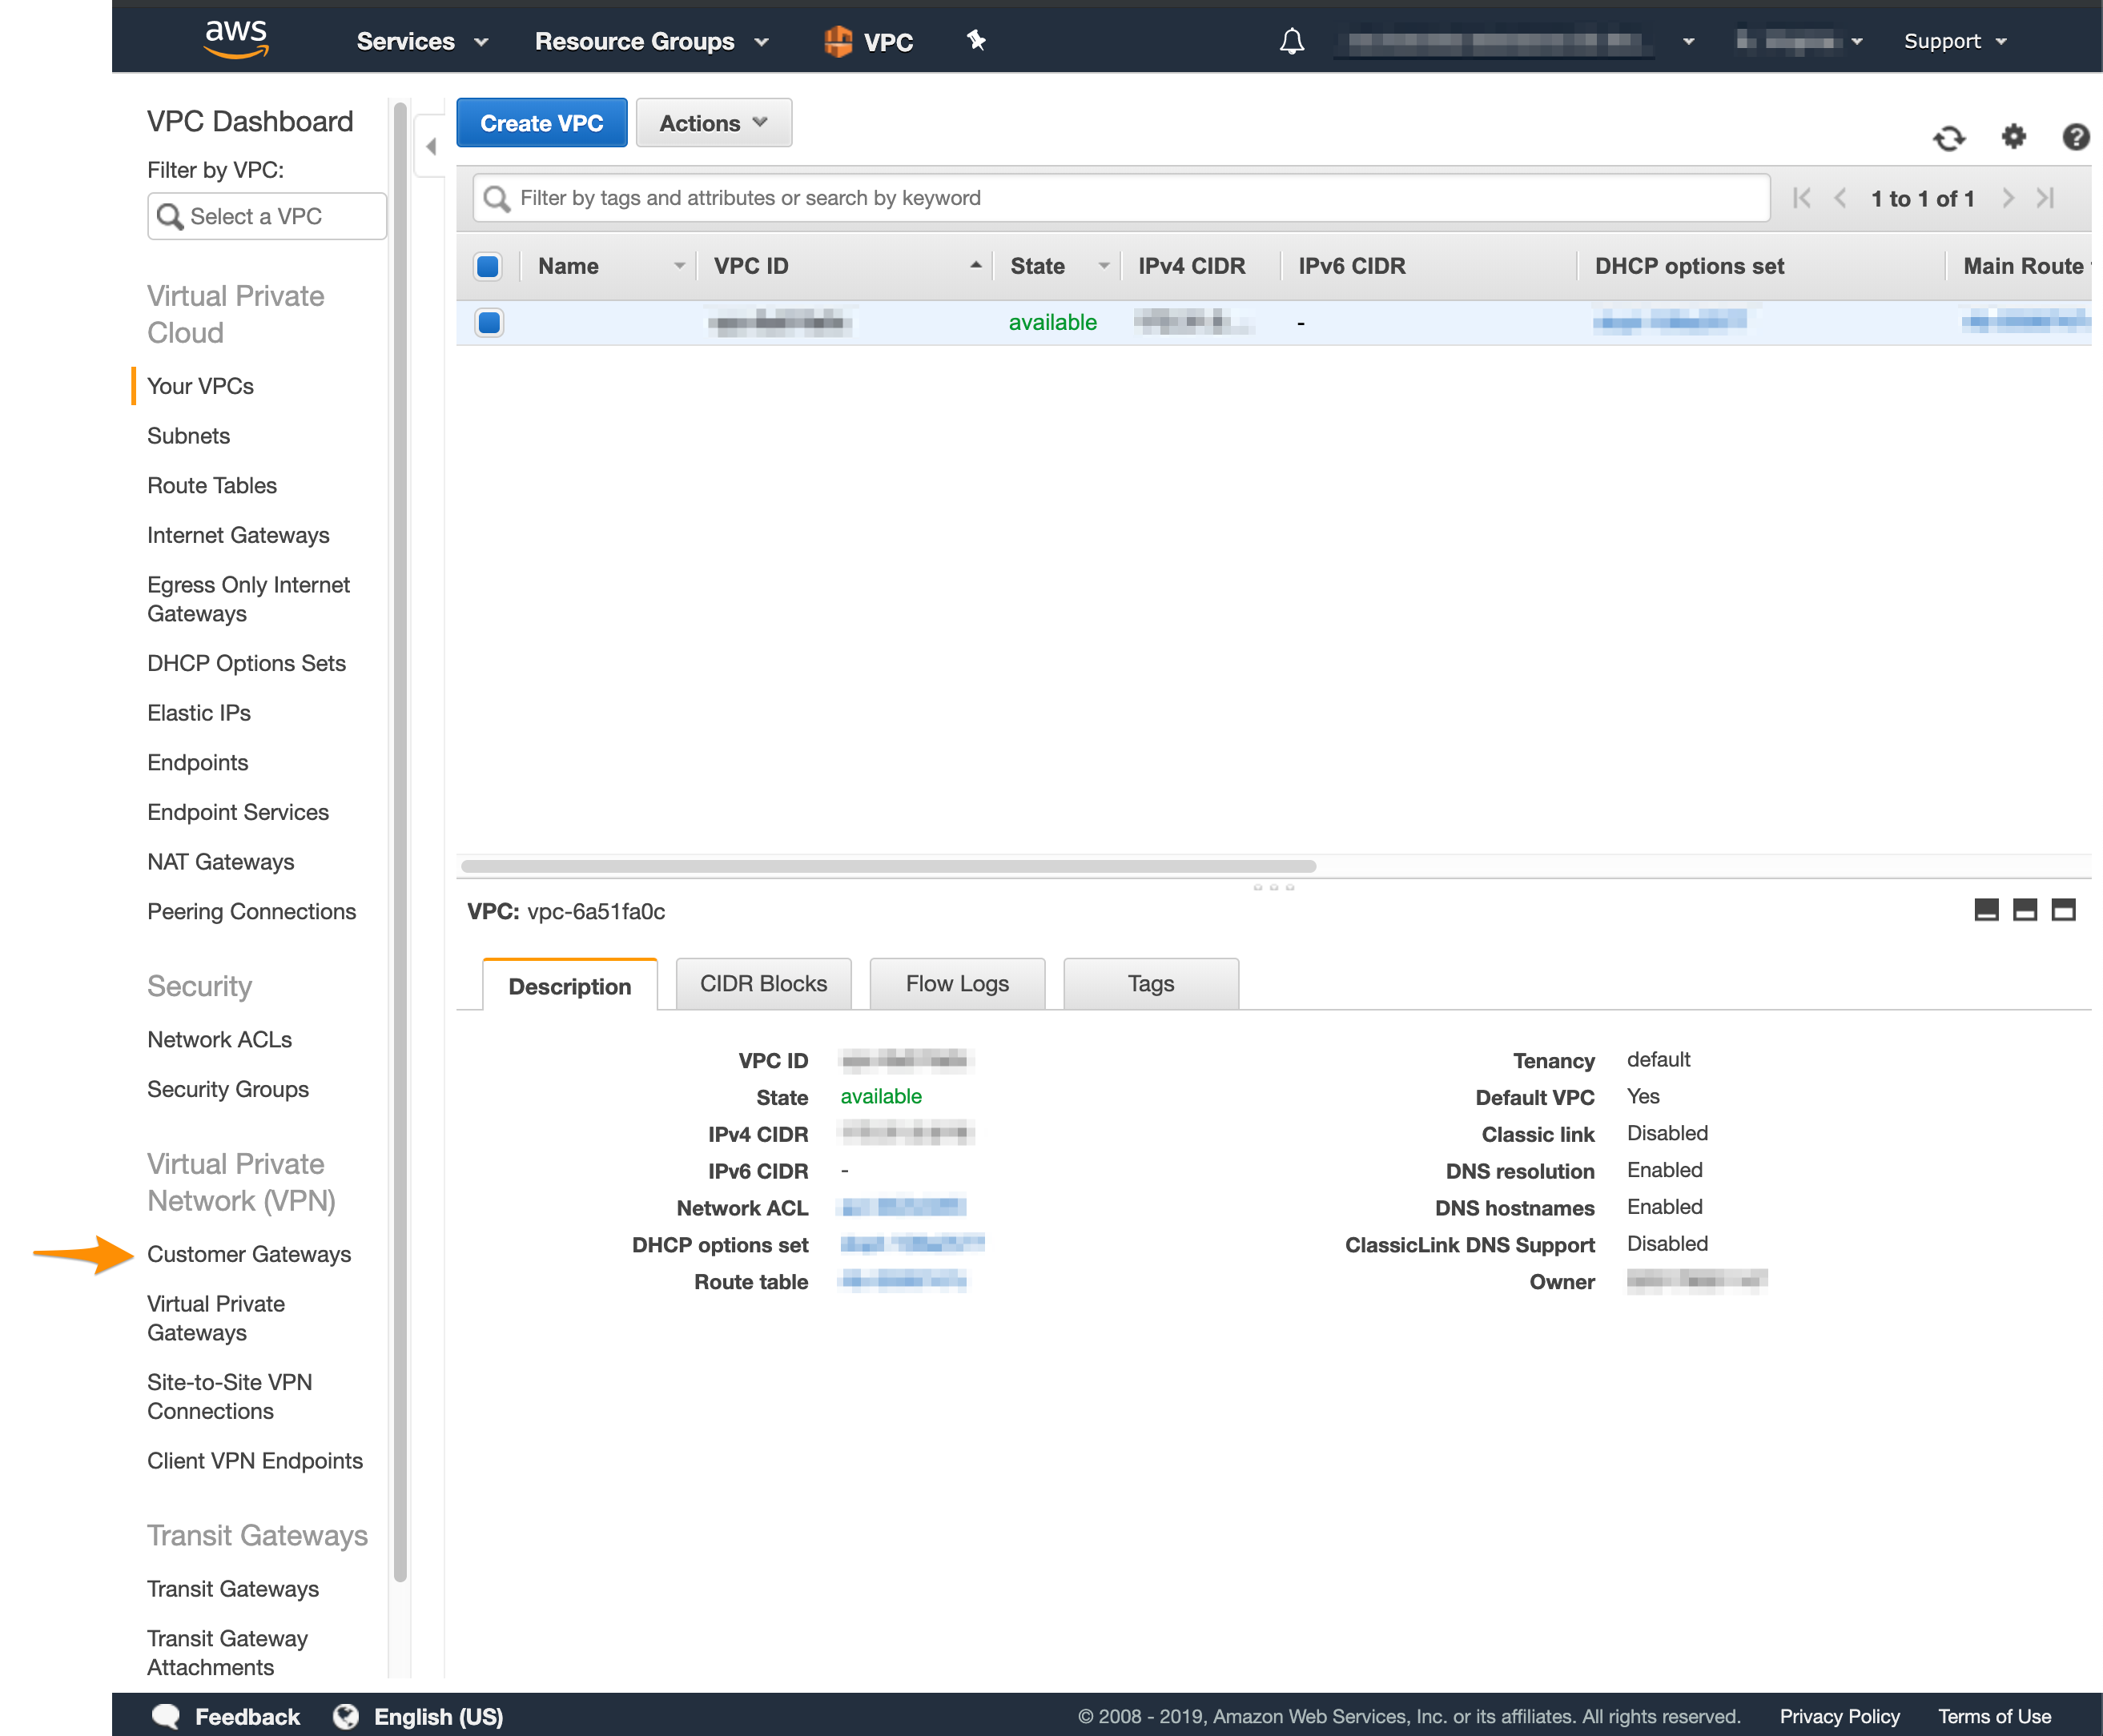
- Log in to your AWS Management Console and access your VPC service.
- In the top right corner of the screen, make sure that you’re working in the correct region.
Create a customer gateway
In Amazon, the customer gateway represents the MacStadium endpoint of the site-to-site VPN connection. When you configure the customer gateway, you need to use the networking information for your public network. By default, this is the FW1-Outside network. You can find the networking information for this network in Appendix B of your IP Plan. For more information about the customer gateway, see Amazon VPC Documentation: Components of Your Site-to-Site VPN.- In the VPC service sidebar, locate the Virtual Private Network menu and select Customer Gateways.\
- Click Create Customer Gateway.\

- Provide a Name.
- Set a name that helps you identify the gateway easily.
- Select Static routing.
- In the IP Address text box, provide the IP address of the public network listed in Appendix B of the IP Plan.
- By default, this is the FW1-Outside network.
- Click Create Customer Gateway.
Set up a virtual private gateway
In Amazon, the virtual private gateway represents the Amazon endpoint of the site-to-site VPN connection.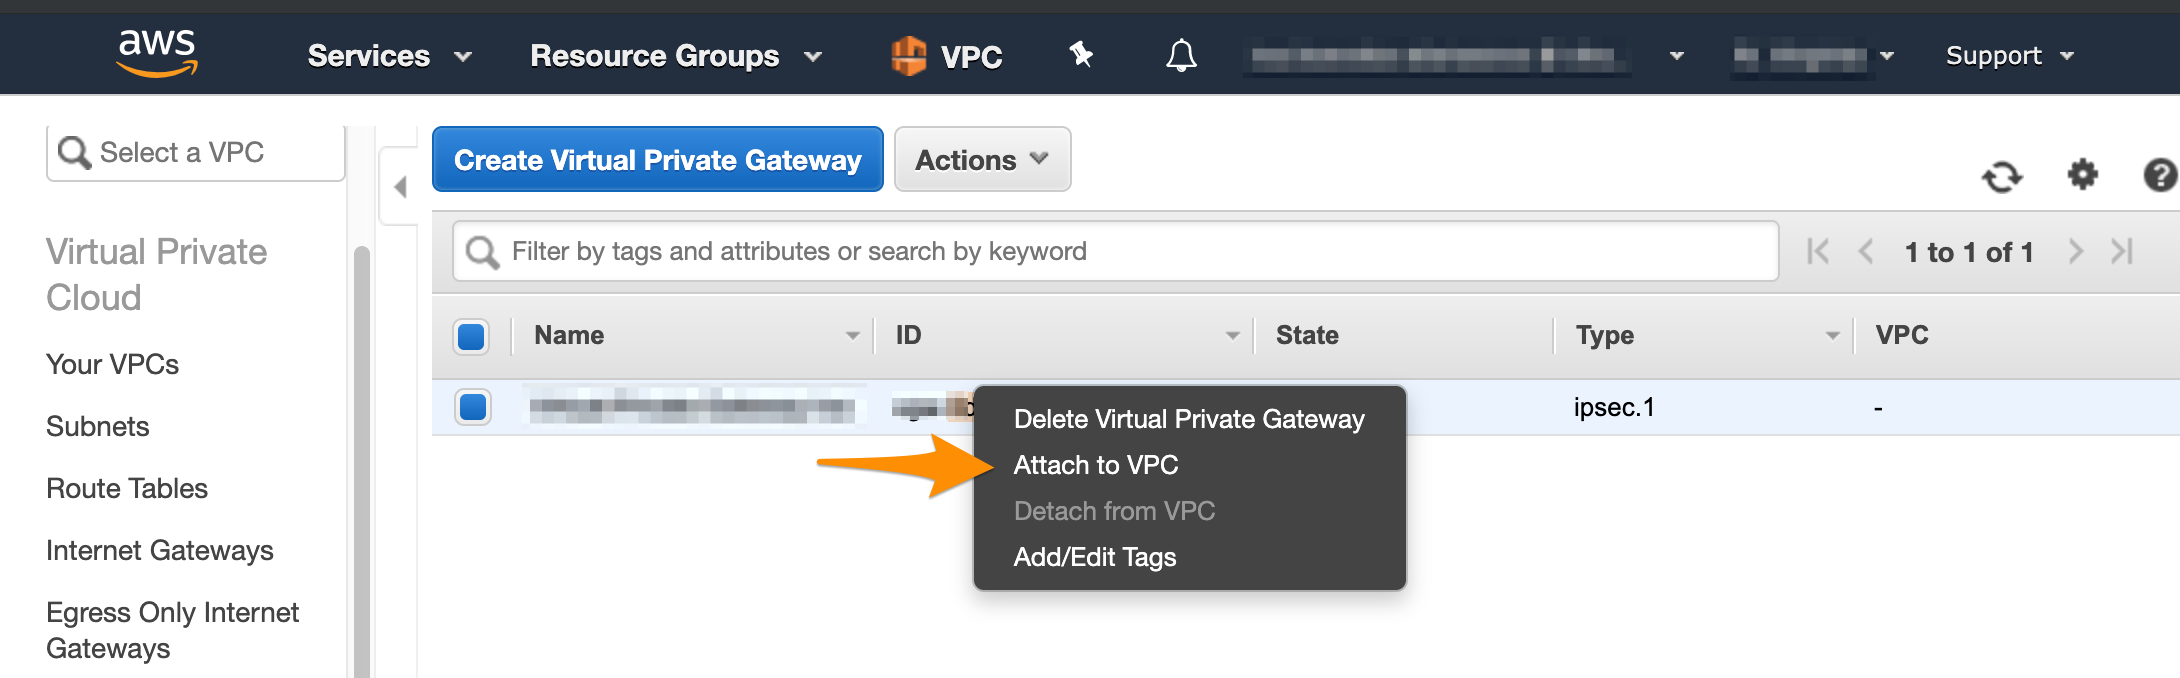
- In the VPC service sidebar, locate the Virtual Private Network menu and select Virtual Private Gateways.
-
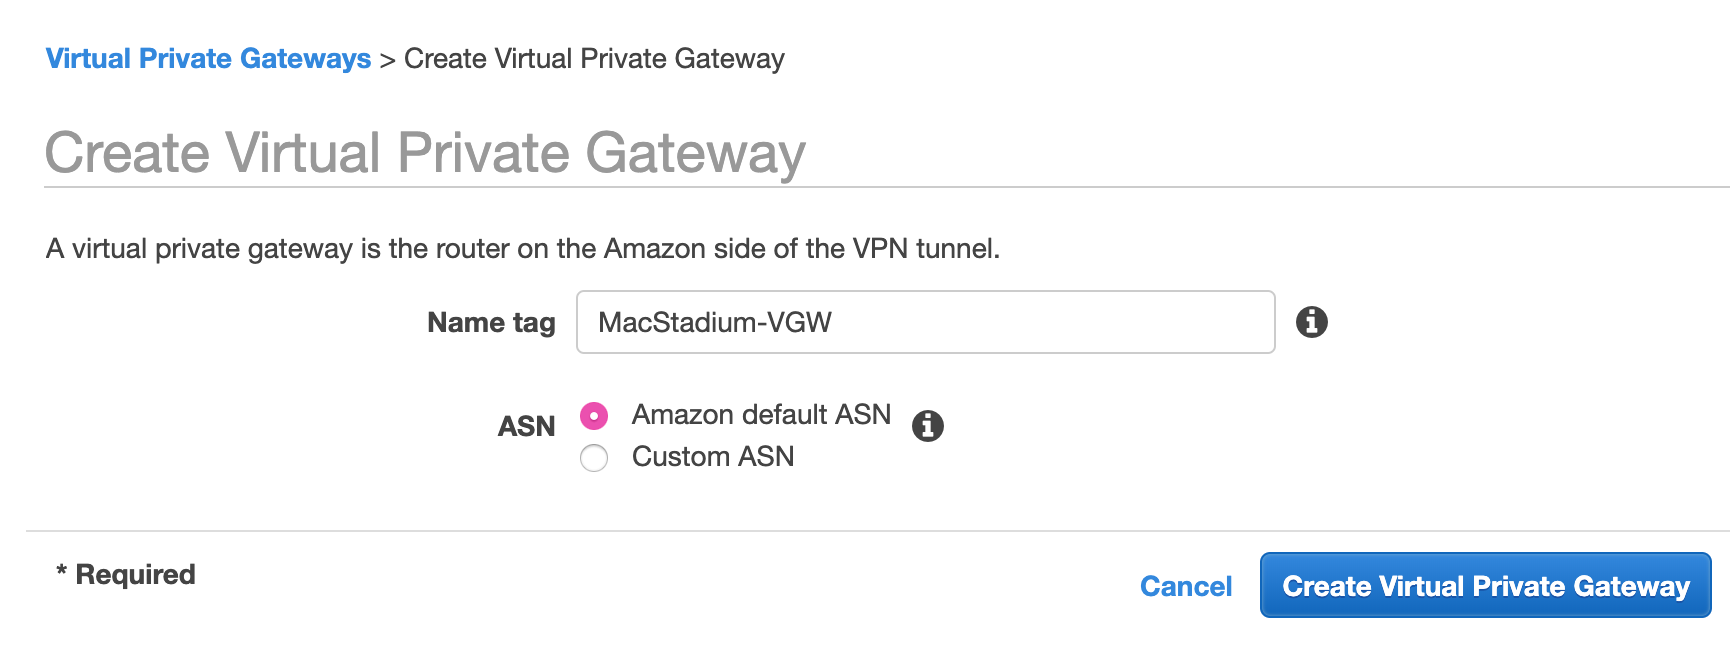
Click Create Virtual Private Gateway.\
-
Provide a Name tag.
- Set a name that helps you identify the gateway easily.
- Select Amazon default ASN and click Create Virtual Private Gateway.
-
On the Virtual Private Gateways dashboard, right-click the newly created virtual private gateway and select Attach to VPC.\

- In the VPC service sidebar, locate the Virtual Private Cloud menu and select Route Tables.\
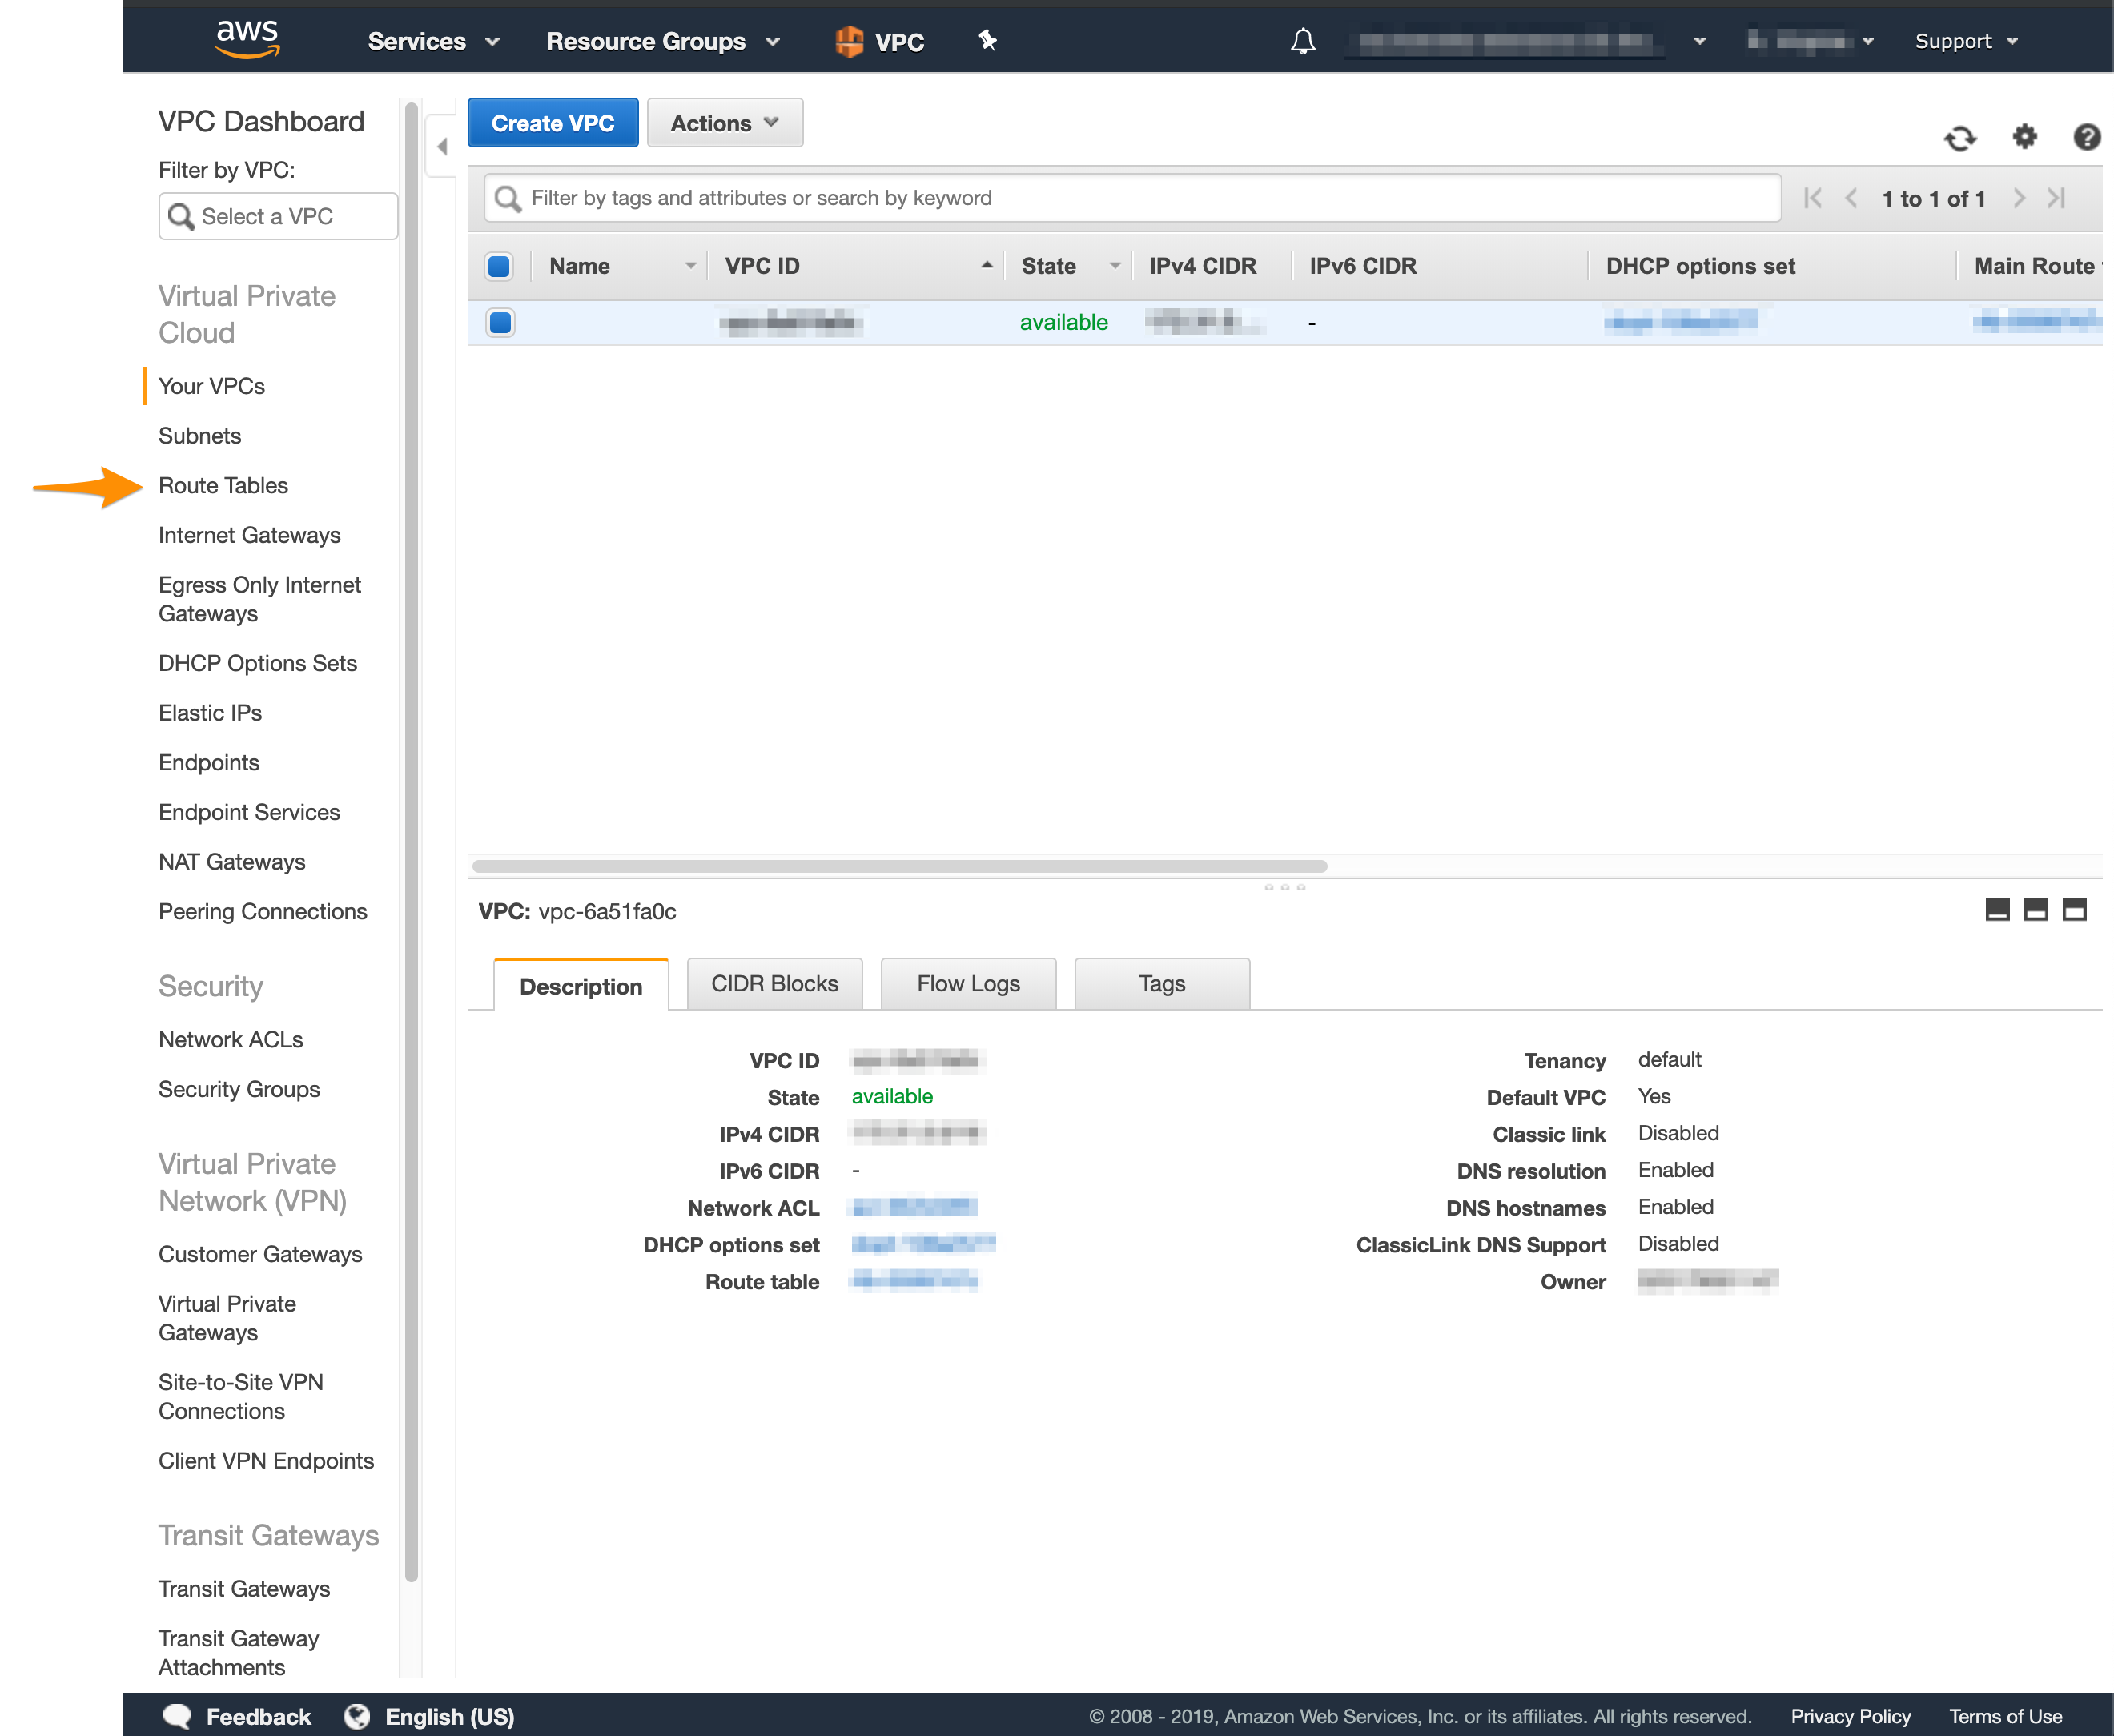
- In the list of routing tables, select the main route table for your VPC.
- At the bottom of the screen, select Route Propagation.
- If your virtual private gateway is not listed, make sure that it’s attached to the VPC.
- Click Edit route propagation.\

- Select the Propagate checkbox and click Save.
Create the site-to-site VPN connection
After you have a customer gateway and a virtual private gateway in place, you can configure the site-to-site VPN connection. During setup, you need to select the customer gateway and the virtual private gateway that you want to use and configure routing. You need to route traffic to your internal, private network. By default, this is the Private-1 network. You can find the networking information for this network in Appendix B of your IP Plan.- In the VPC service sidebar, locate the Virtual Private Network menu and select Site-to-Site VPN Connections.\
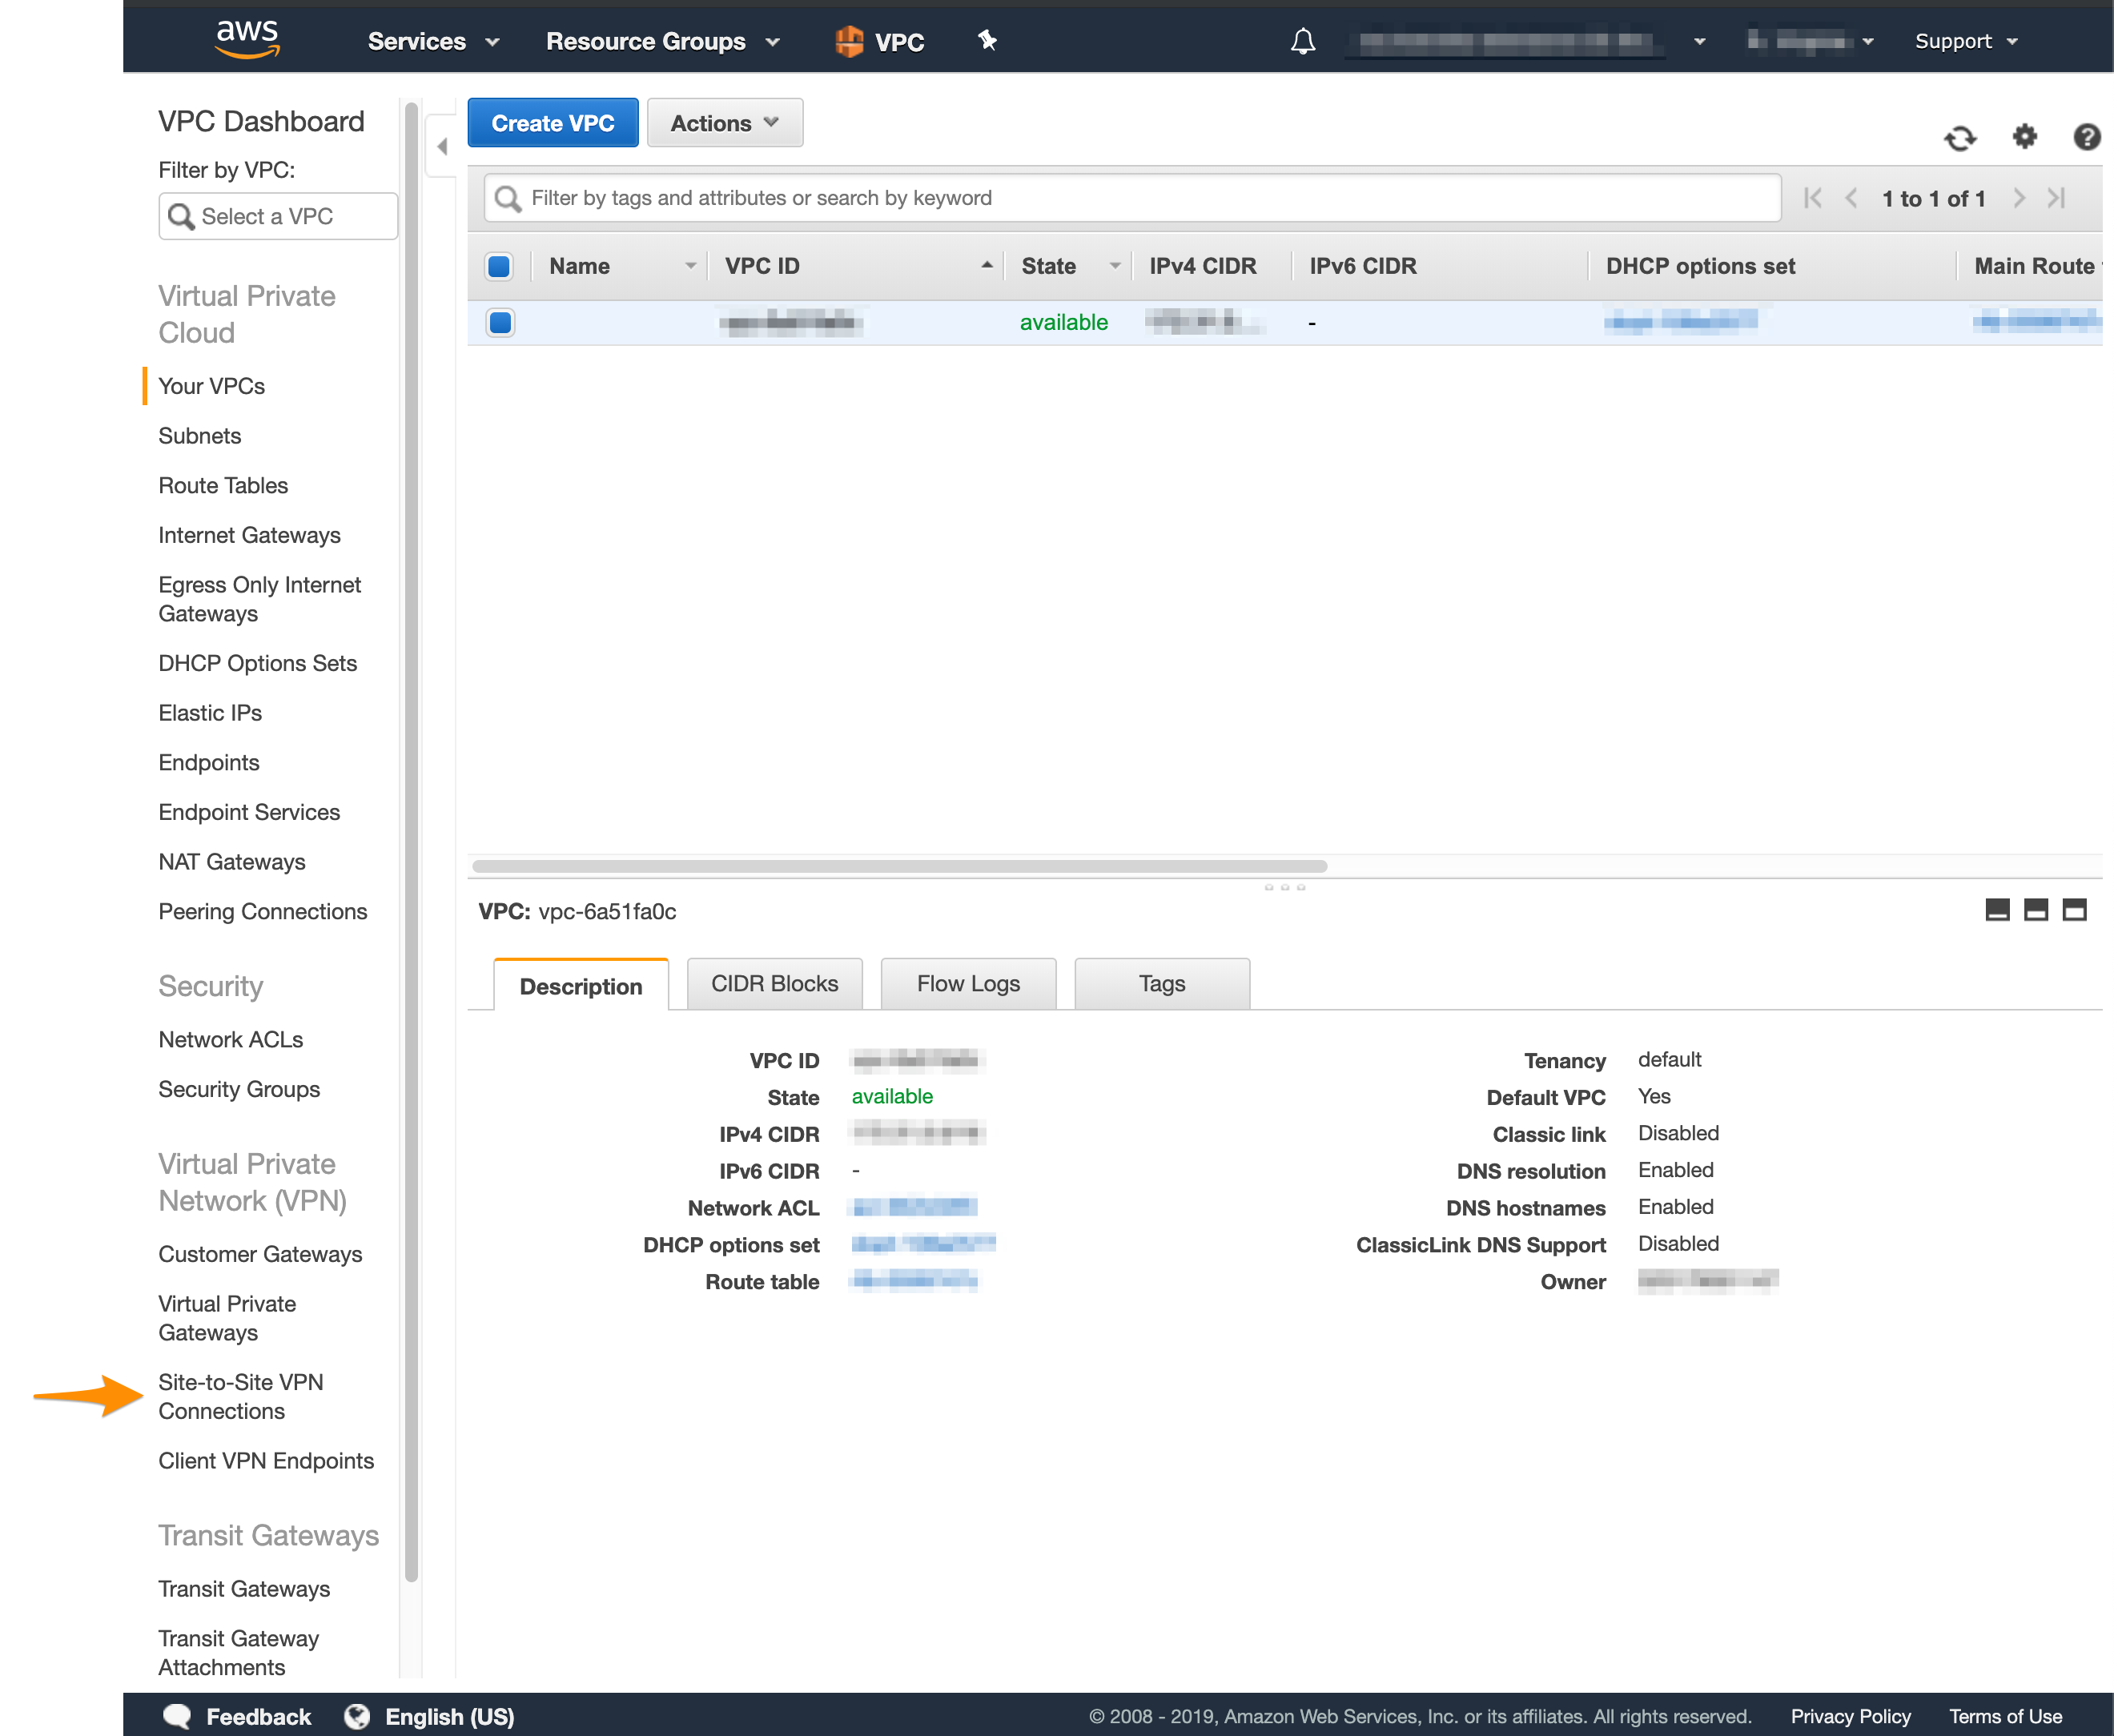
- Click Create VPN Connection.\
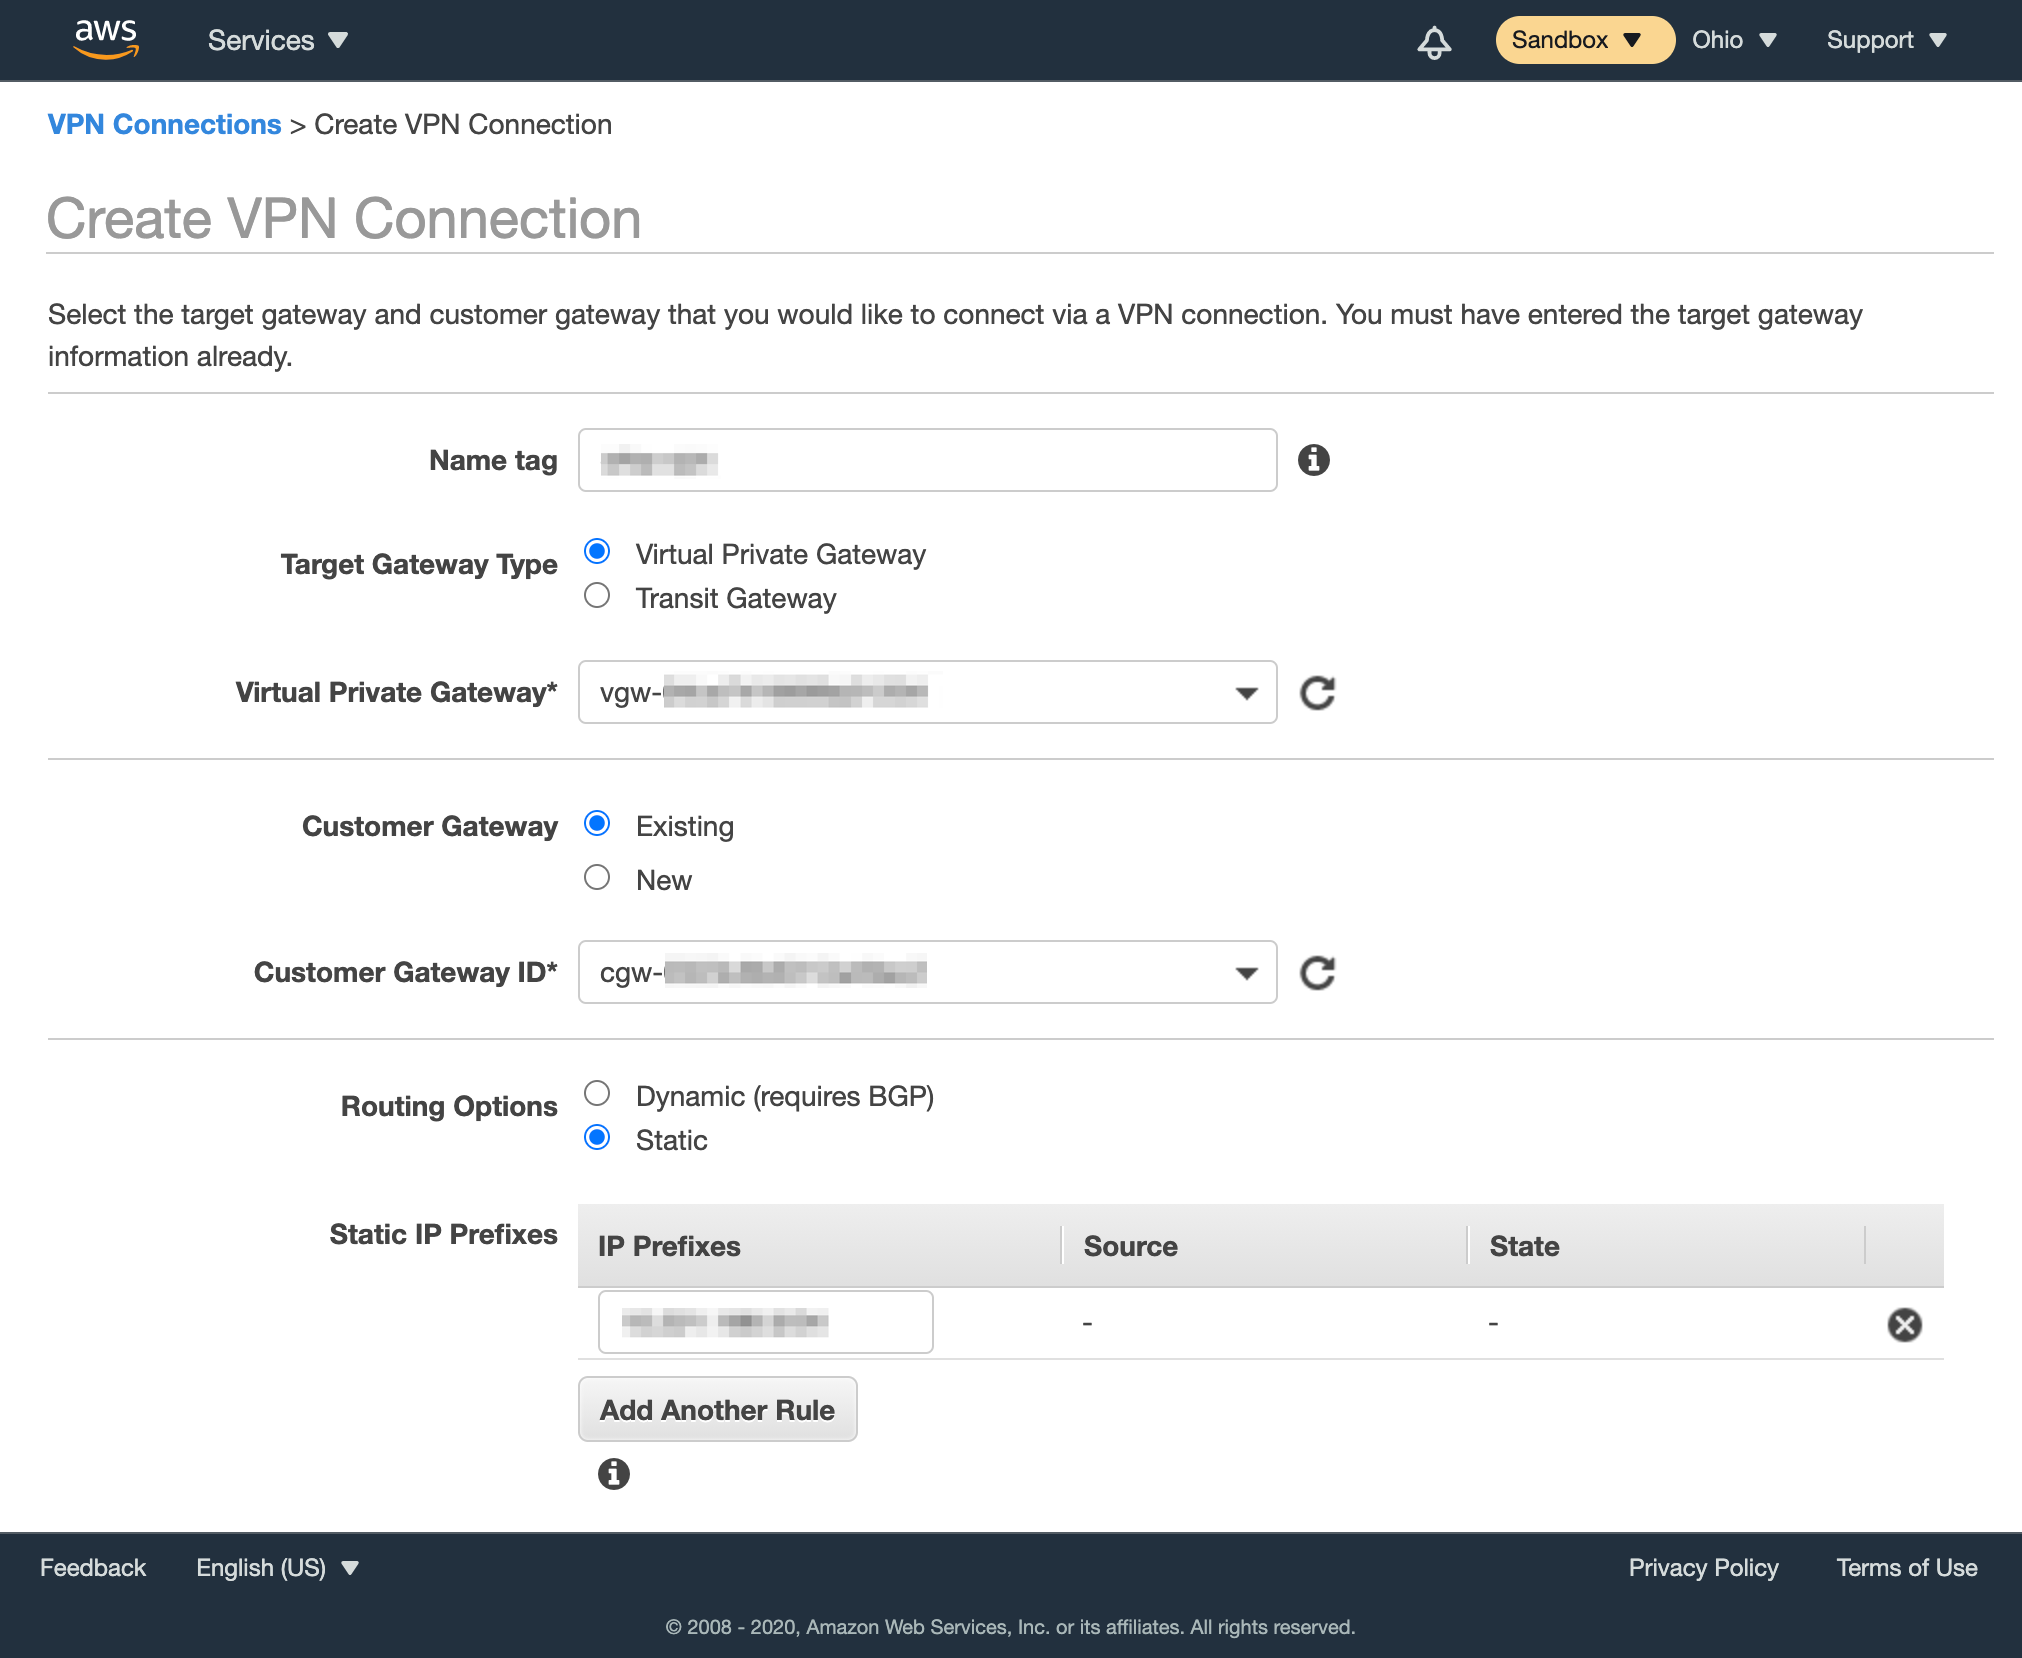
- Provide Name tag.
- For Target Gateway Type, select Virtual Private Gateway, and from the Virtual Private Gateway drop-down menu, select the virtual private gateway you created earlier.
- Select that you want to use an Existing customer gateway, and from the Customer Gateway ID drop-down menu, select the customer gateway that you created earlier.
- For Routing Options, select Static.
- In Static IP Prefixes, provide the CIDR notation for the private network listed in Appendix A of the IP Plan (by default, the Private-1 network).
- For more information about CIDR notations, see Understanding IP Addresses, Subnets, and CIDR Notation for Networking. You can also use a CIDR calculator such as this CIDR/Netmask Lookup Tool.
- Do not edit the Tunnel Options section.
- Click Create VPN Connection.