About
After creating a site-to-site VPN connection in Amazon, customers must configure the Cisco firewall to recognize the connection and let traffic into MacStadium Private Cloud.Overview
Amazon provides a semi-prefilled configuration file with very detailed instructions. The configuration file must be downloaded and provide any missing information (indicated by placeholders). Afterwards, the configuration can be applied to the Cisco ASA/ASAv to complete the Site-to-Site VPN setup.Getting Started
Amazon Configuration Download Amazon lets you download pre-filled configurations for a variety of vendors. The default firewall vendor for MacStadium private clouds is Cisco Systems, Inc.- Verify that you have created a site-to-site VPN connection in Amazon.
- For more information about how to set up your VPN, see Setting Up the AWS Side of the Site-to-Site VPN.
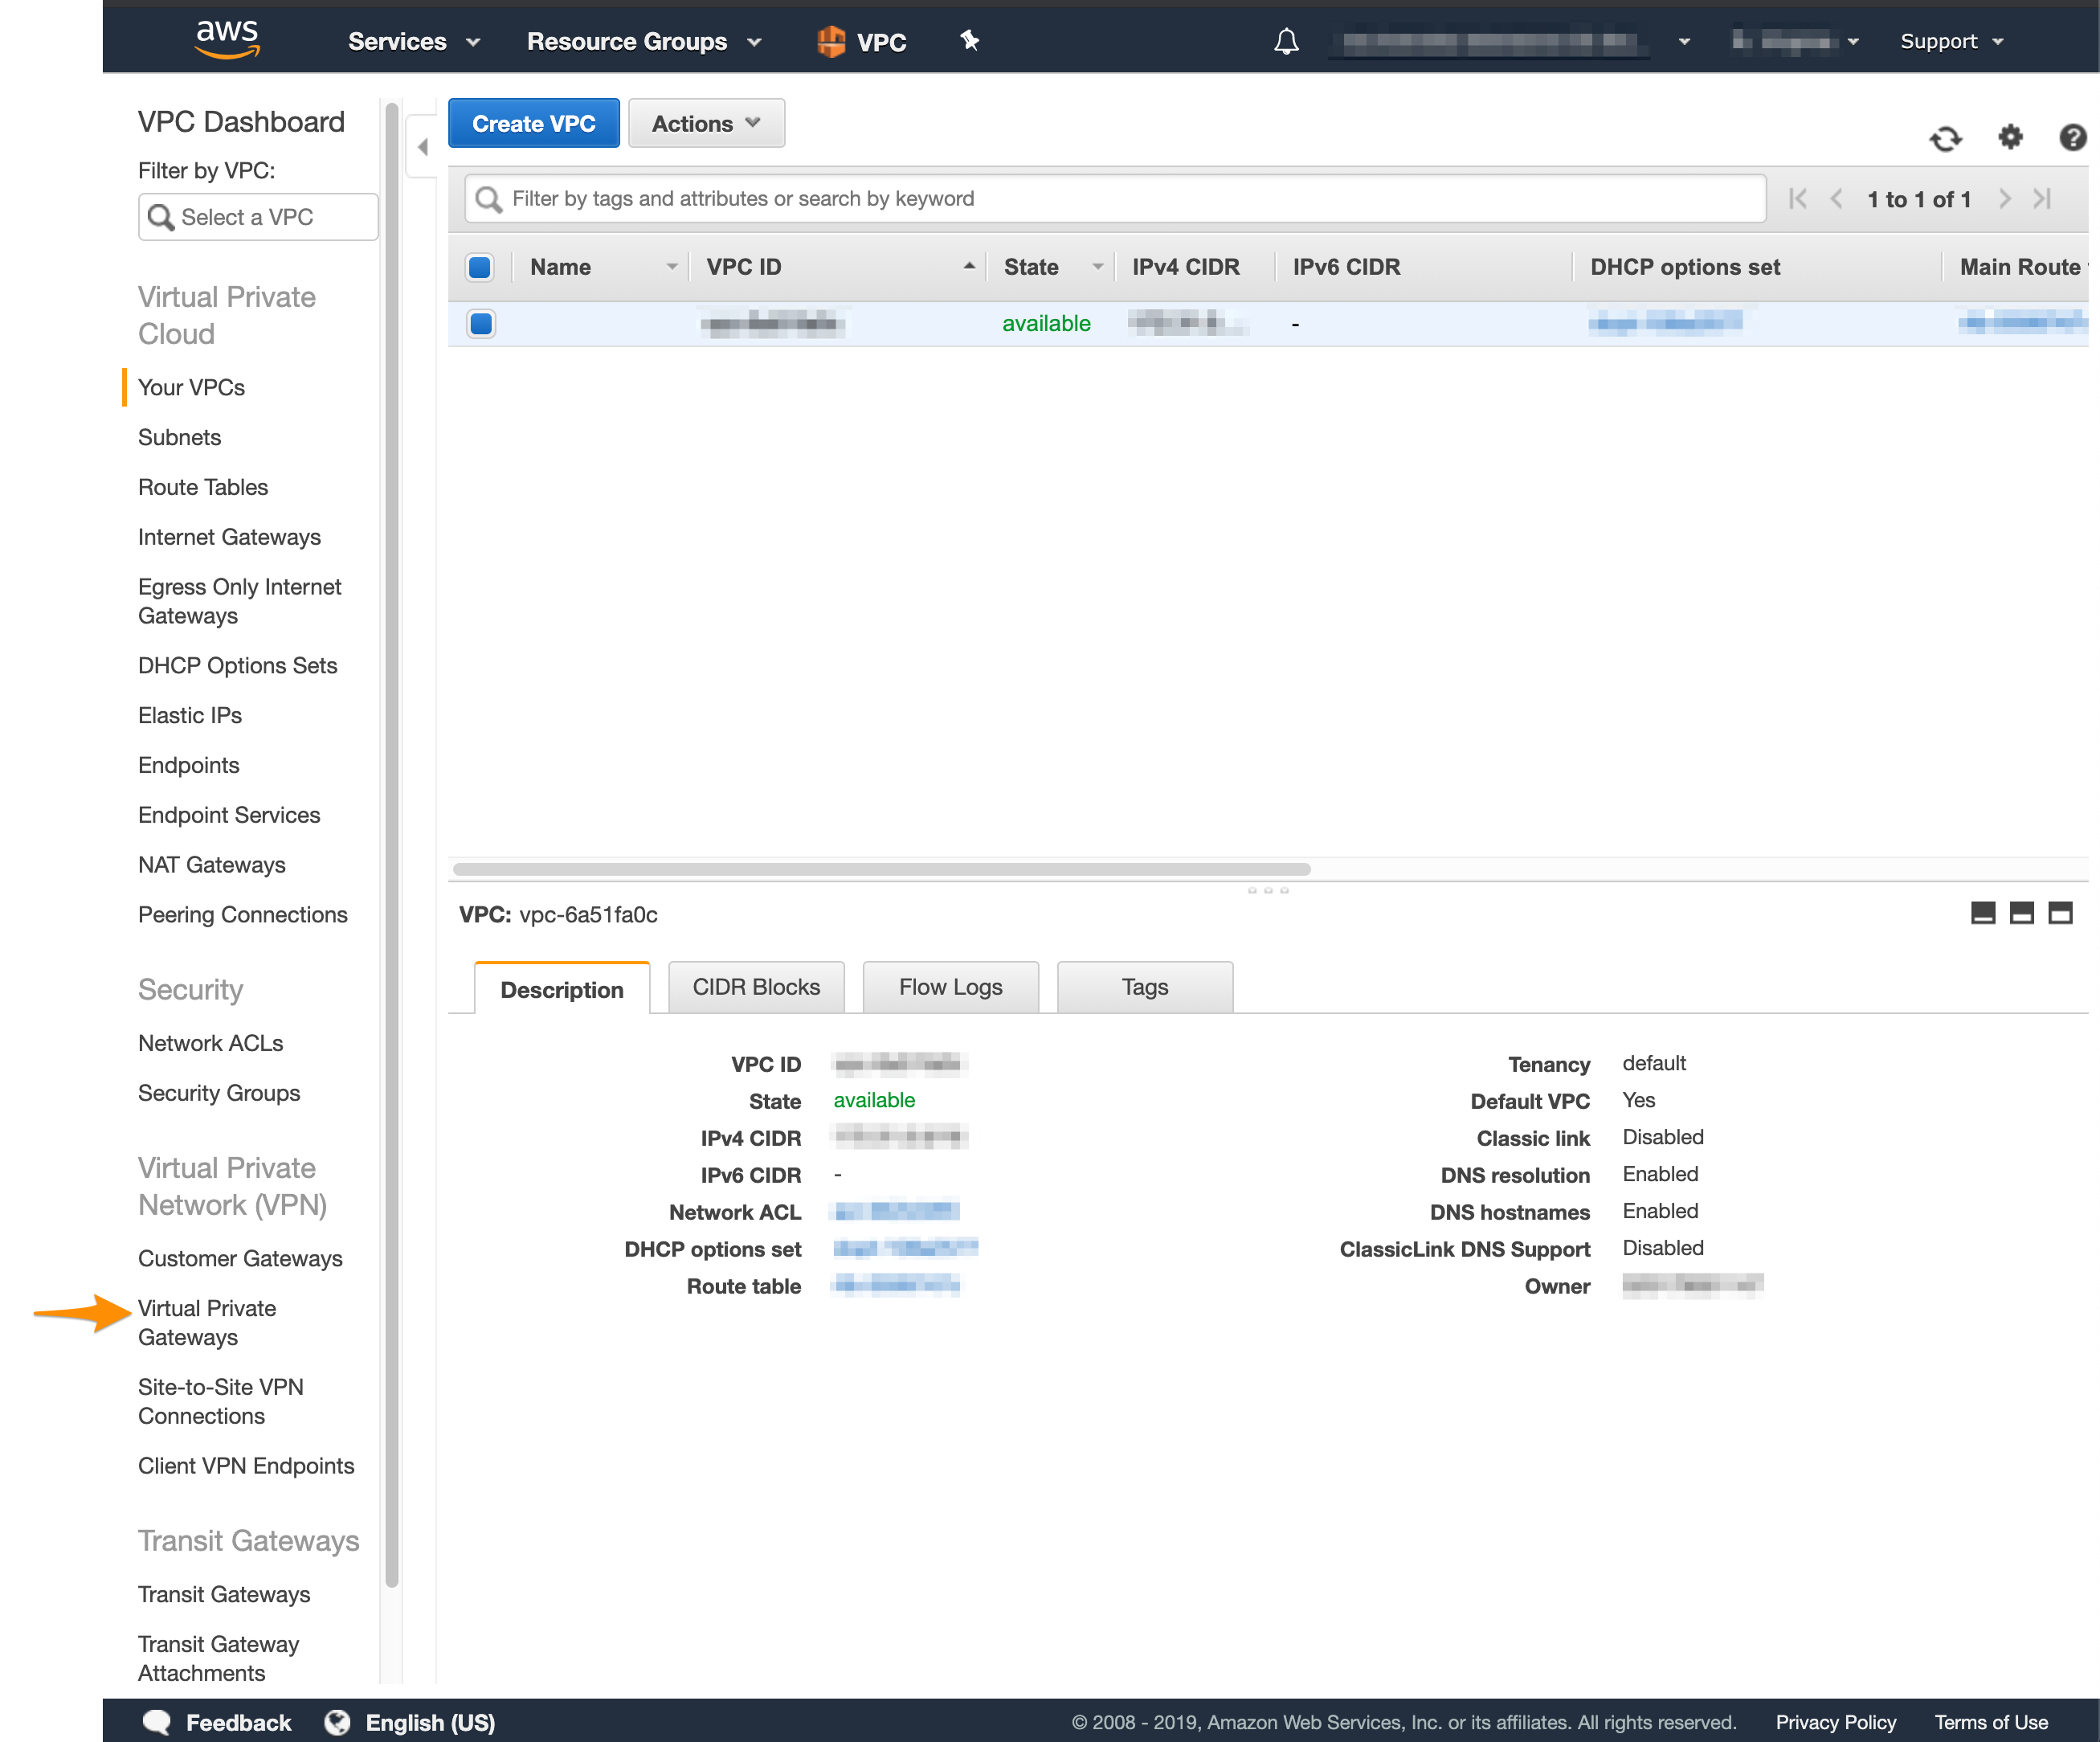
- Log in to your AWS Management Console and access your VPC service.
- In the top right corner of the screen, make sure that you’re working in the correct region.
- In the VPC service sidebar, locate the Virtual Private Network menu and select Site-to-Site VPN Connections.\
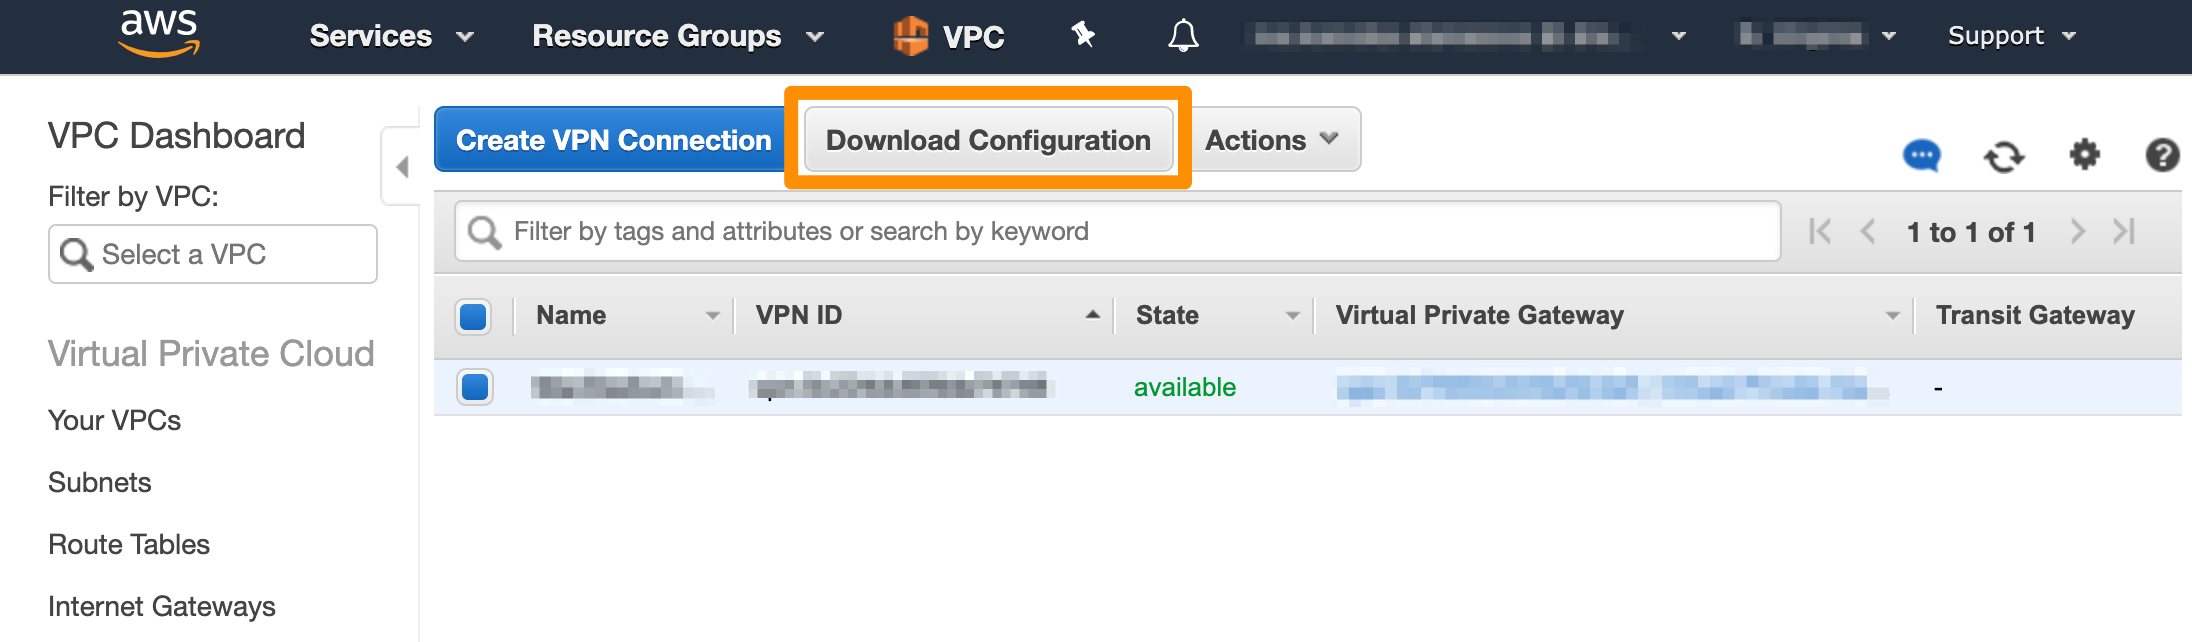
- In the list, select your newly created VPN connection and click Download Configuration.\
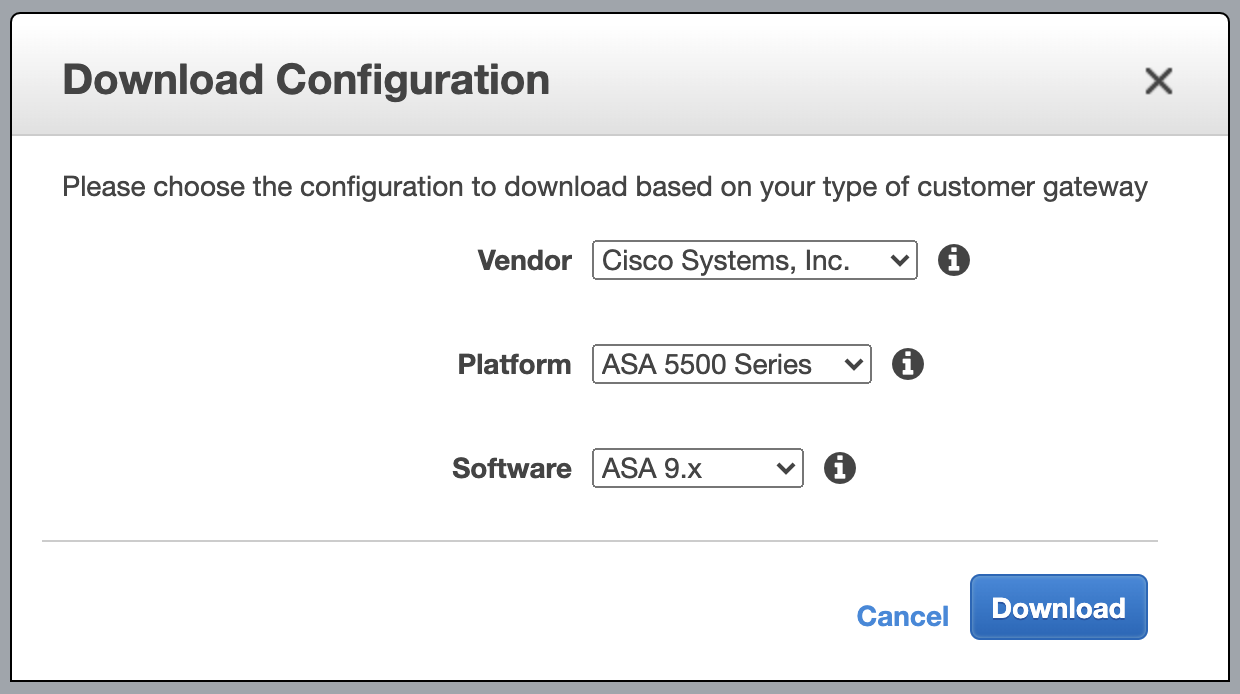
- For Vendor, select Cisco Systems, Inc.
- For Platform, select ASA 5500 Series.
- For Software, select ASA 9.x for a policy-based VPN OR ASA 9.7 + VTI for a route-based VPN.\
Fill in the configuration blanks
Unless you have extensive experience with AWS and ASA/ASAv configurations, follow the instructions in the configuration file to the letter. Otherwise, your site-to-site VPN might not work as expected.
- Verify that you have downloaded the configuration file from your AWS Management Console.
- Open the configuration file.
- Replace all placeholders with their respective values. Use Table 1: Configuration parameters for reference.
- Uncomment the line: access-list amzn-filter extended permit ip … To uncomment, remove ! at the start of the line.
- Uncomment the lines for object and nat configuration at the end of the config file. To uncomment, remove ! at the start of the line.
- Keep the following line. This ensures the SLA monitor works as expected.
- Note that based on your network configuration and requirements, you can modify this line to map to the subnet and the subnet mask for the Private-1 network from your IP Plan. If you choose to modify this line, do not configure the
<sla_monitor_address>value.
- On the following line, change 0.0.0.0 0.0.0.0 to a combination of the IP address and the subnet mask for your Amazon VPC.
- You can get these values by logging in to your AWS Management Console, navigating to your VPC dashboard, selecting your VPC, and checking the Description at the bottom of the screen. You need to convert the subnet mask bit notation to the correct subnet mask (e.g., the /16 notation converts to a 255.255.0.0 subnet mask).
- For example
- On the following line, change inside and outside to the names of the internal private network and the outside interface of your MacStadium private cloud, respectively, as provided in Appendix A of your IP Plan. By default, these are Private-1 and Outside, respectively.
- (Optional) Delete the remaining commented lines to clean up the file. Commented lines are indicated by ! at the beginning of the line.
- Save your changes.
Configure TCP State Bypass (Route-based VPN only)
If you selected ASA 9.7 + VTI (route-based VPN), you need to enable the TCP State Bypass feature. This allows outbound and inbound traffic to flow through separate VPN tunnels, which is required for HA VPN scenarios where both tunnels are active simultaneously. Table 2: TCP State Bypass parameters- Define an access list with the source and destination networks:
- Create a class map to identify the traffic for which you want to disable stateful firewall inspection:
- Create a policy map to assign the TCP State Bypass action to the class map:
- Apply the policy map to your private interface:
- Save your changes.