
Documentation Index

Fetch the complete documentation index at: https://docs.macstadium.com/llms.txt

Use this file to discover all available pages before exploring further.

About

SAML SSO is a paid offering. Contact your account team through the Customer Portal for more information.
MacStadium does not support IdP-initiated logins. After SSO is configured, all users must log in at portal.macstadium.com/sso using the ID provided by the MacStadium team.
You can also log in directly at portal.macstadium.com.

Overview

SAML SSO with Azure AD allows customers to:
  • Enable users to be automatically signed in to MacStadium using their Azure Ad accounts.
  • Manage accounts in one central location – Azure AD.

Getting Started

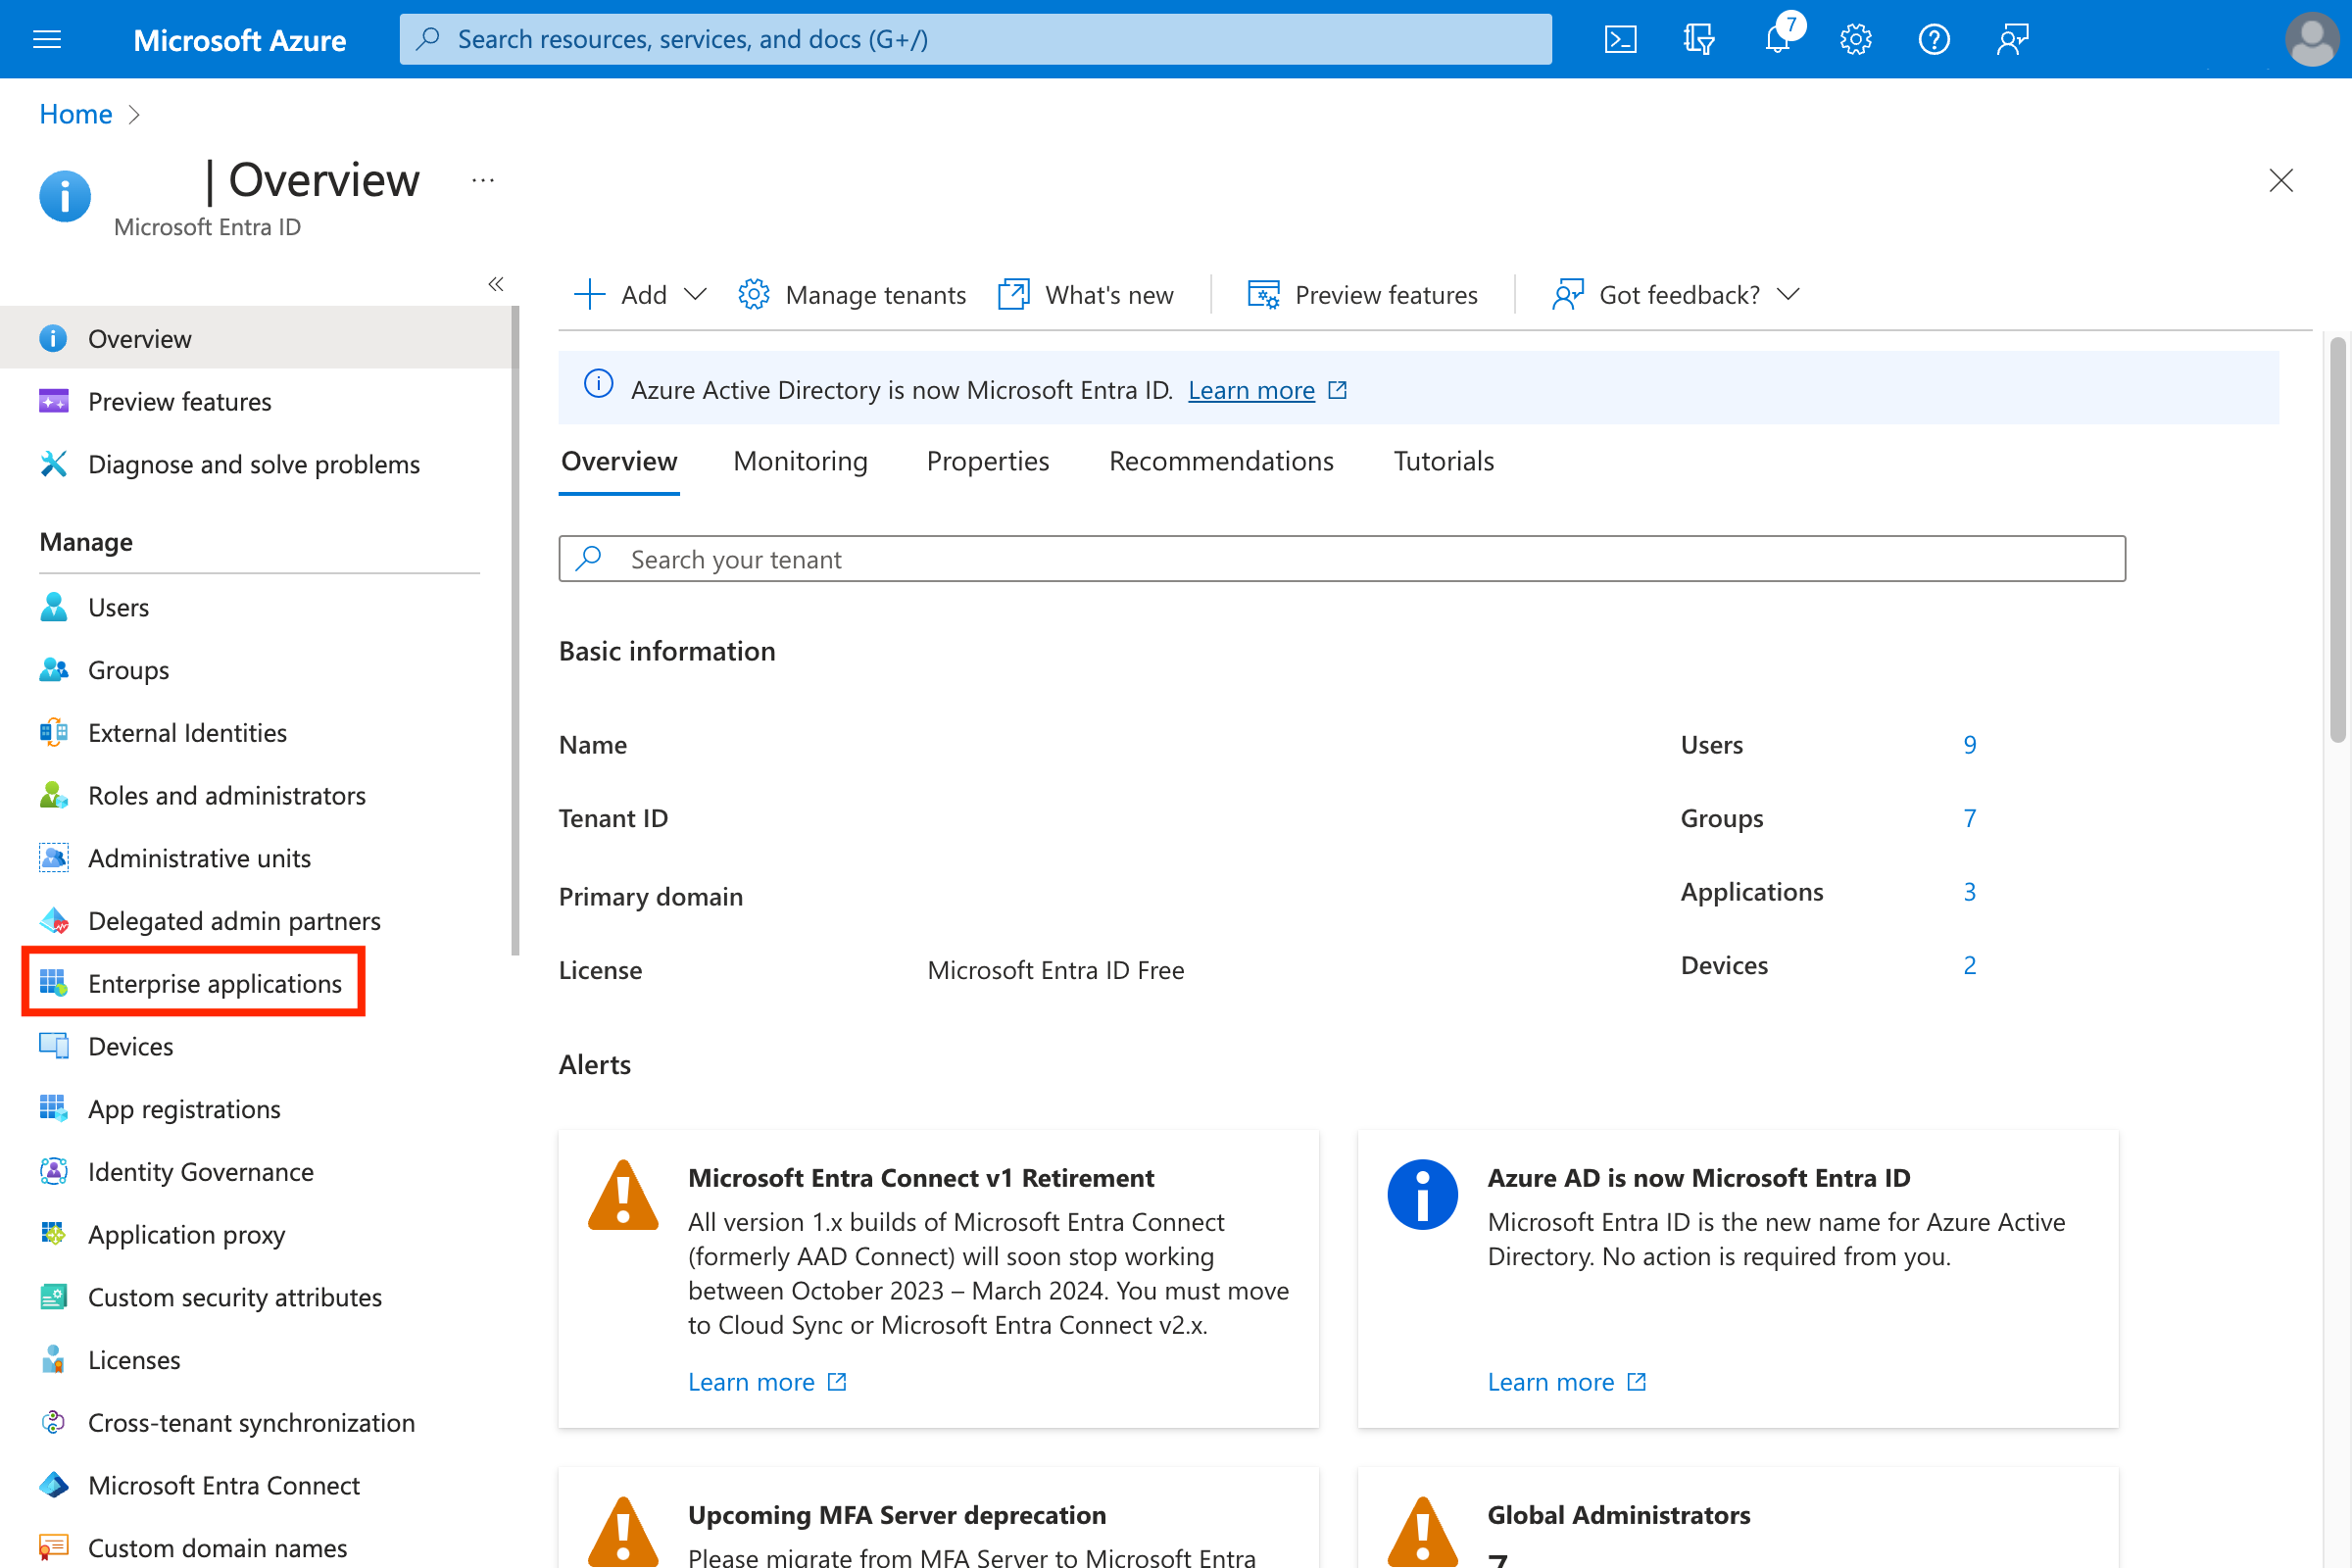
  1. Open Entra ID admin.
  2. Navigate to Enterprise applications.\ Azure Entra ID admin left sidebar with Enterprise applications option
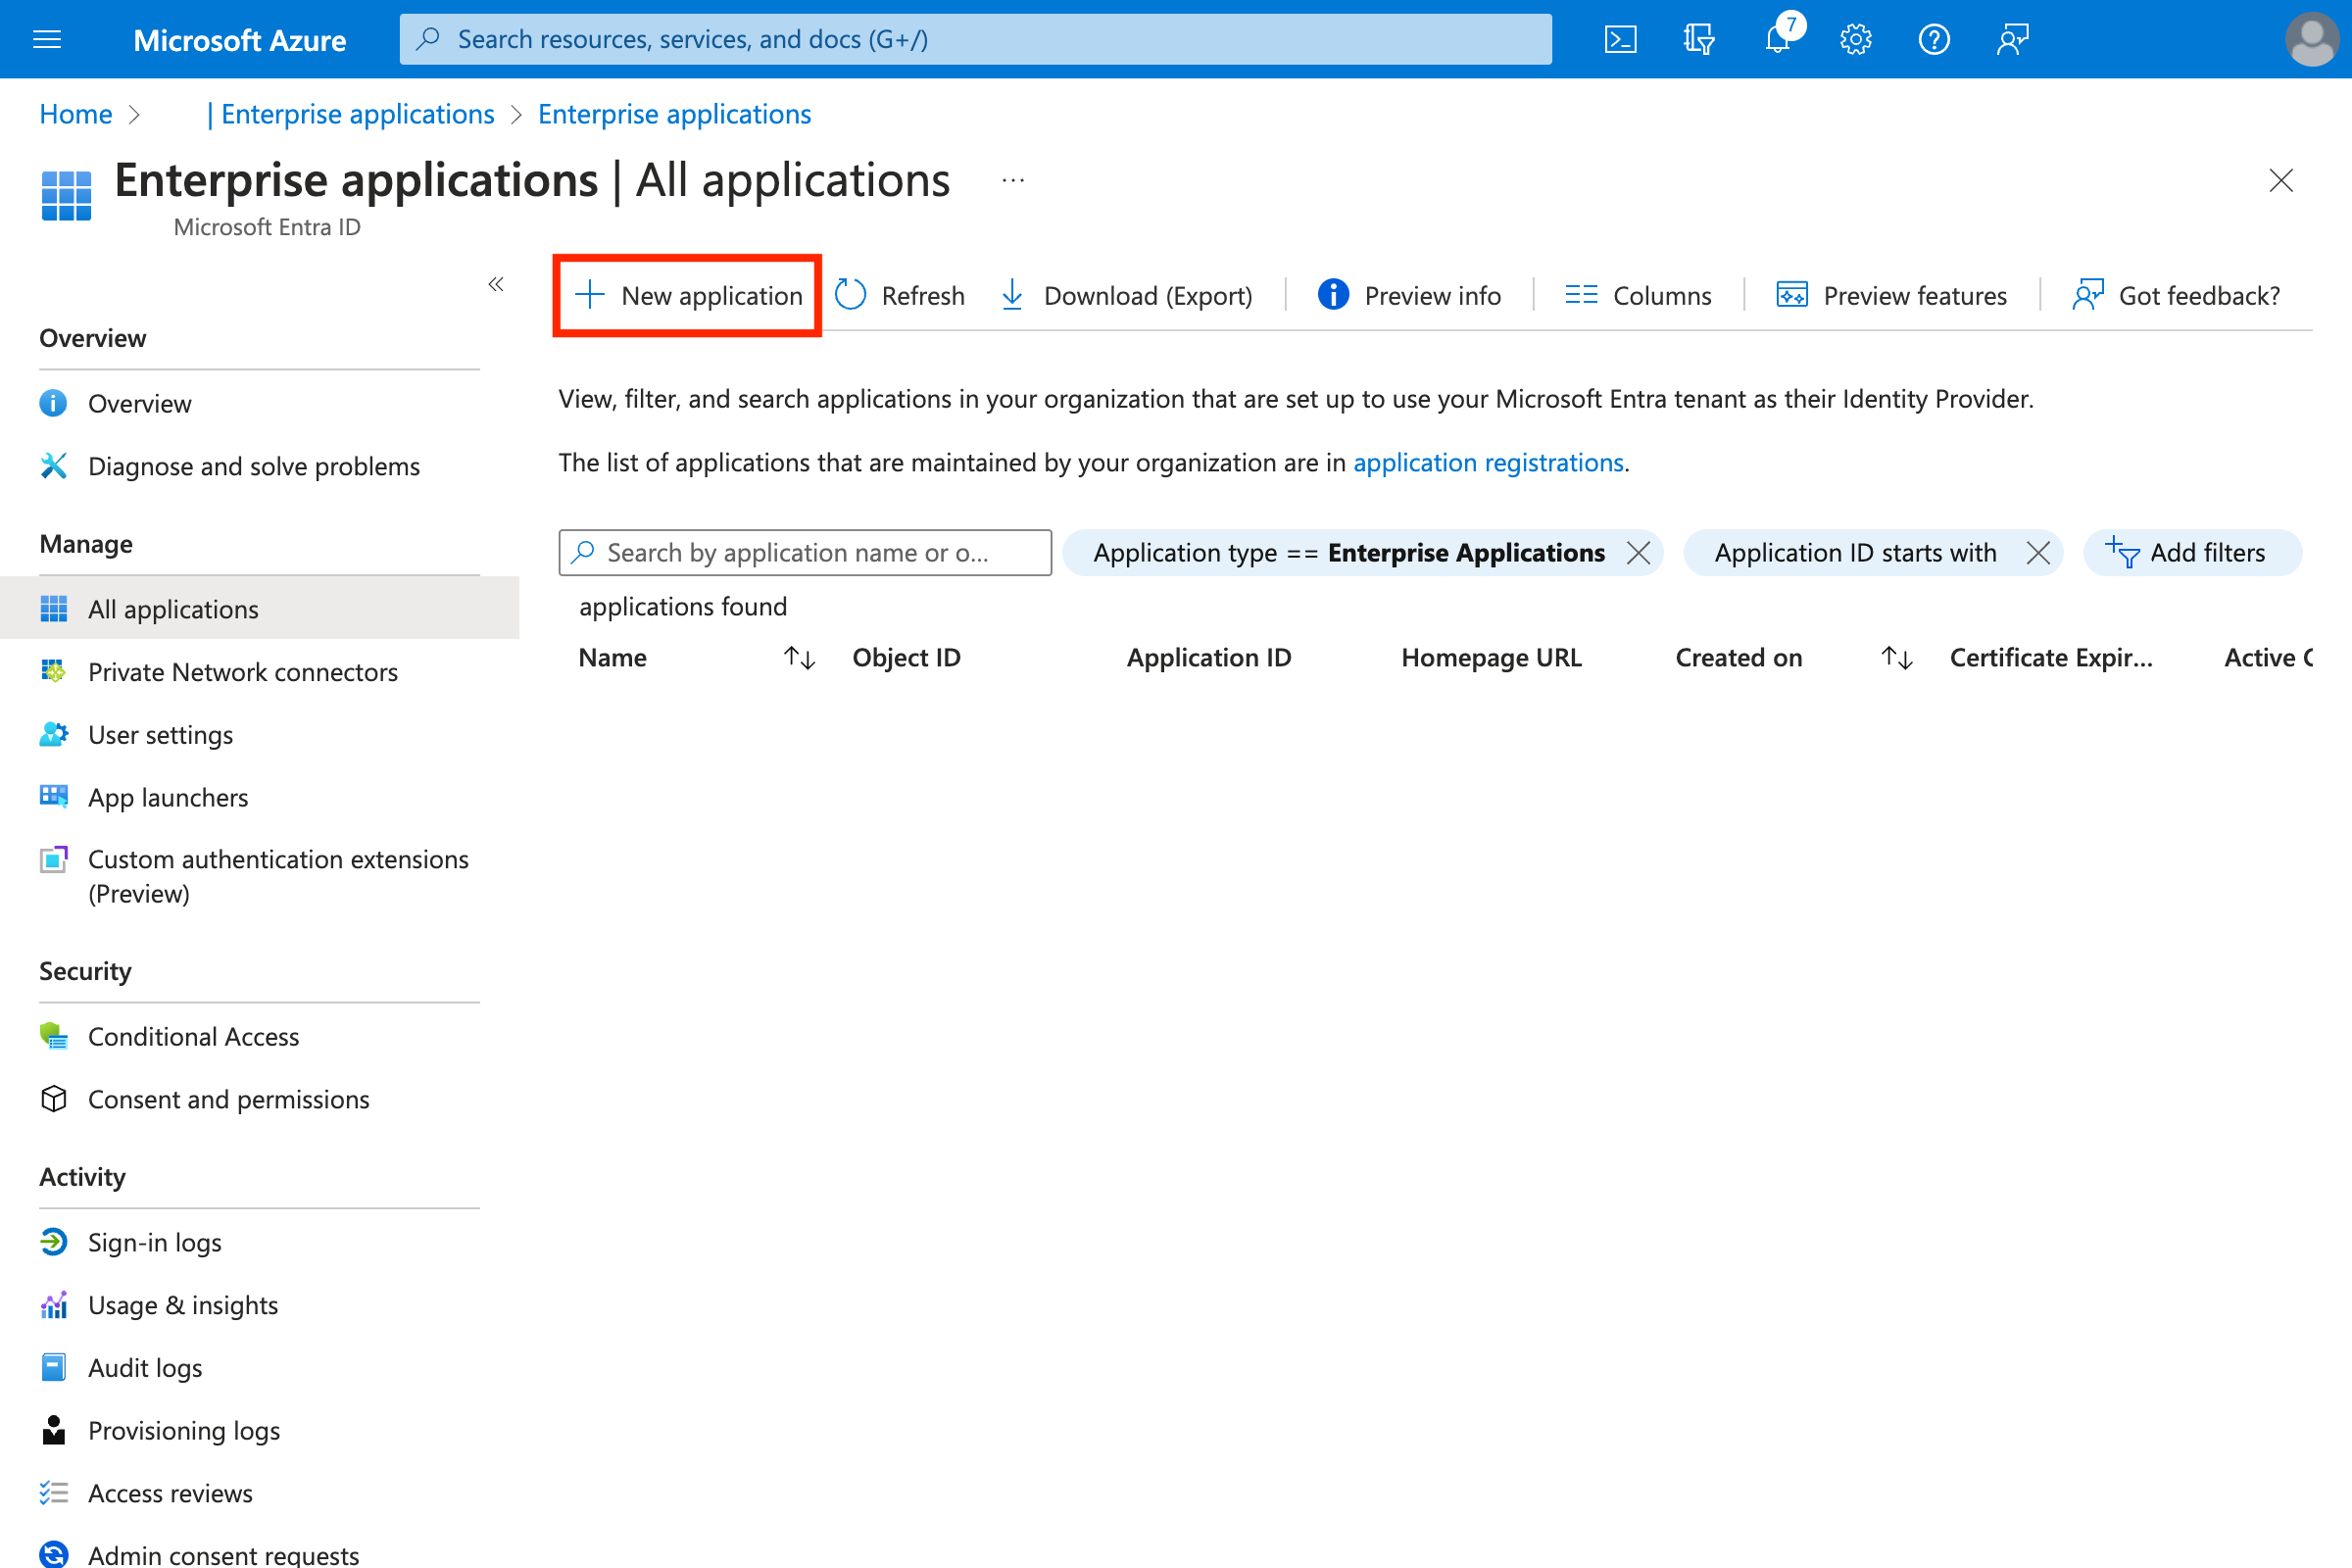
  3. Create a new application by clicking New Application.\ Azure Enterprise applications list with New Application button
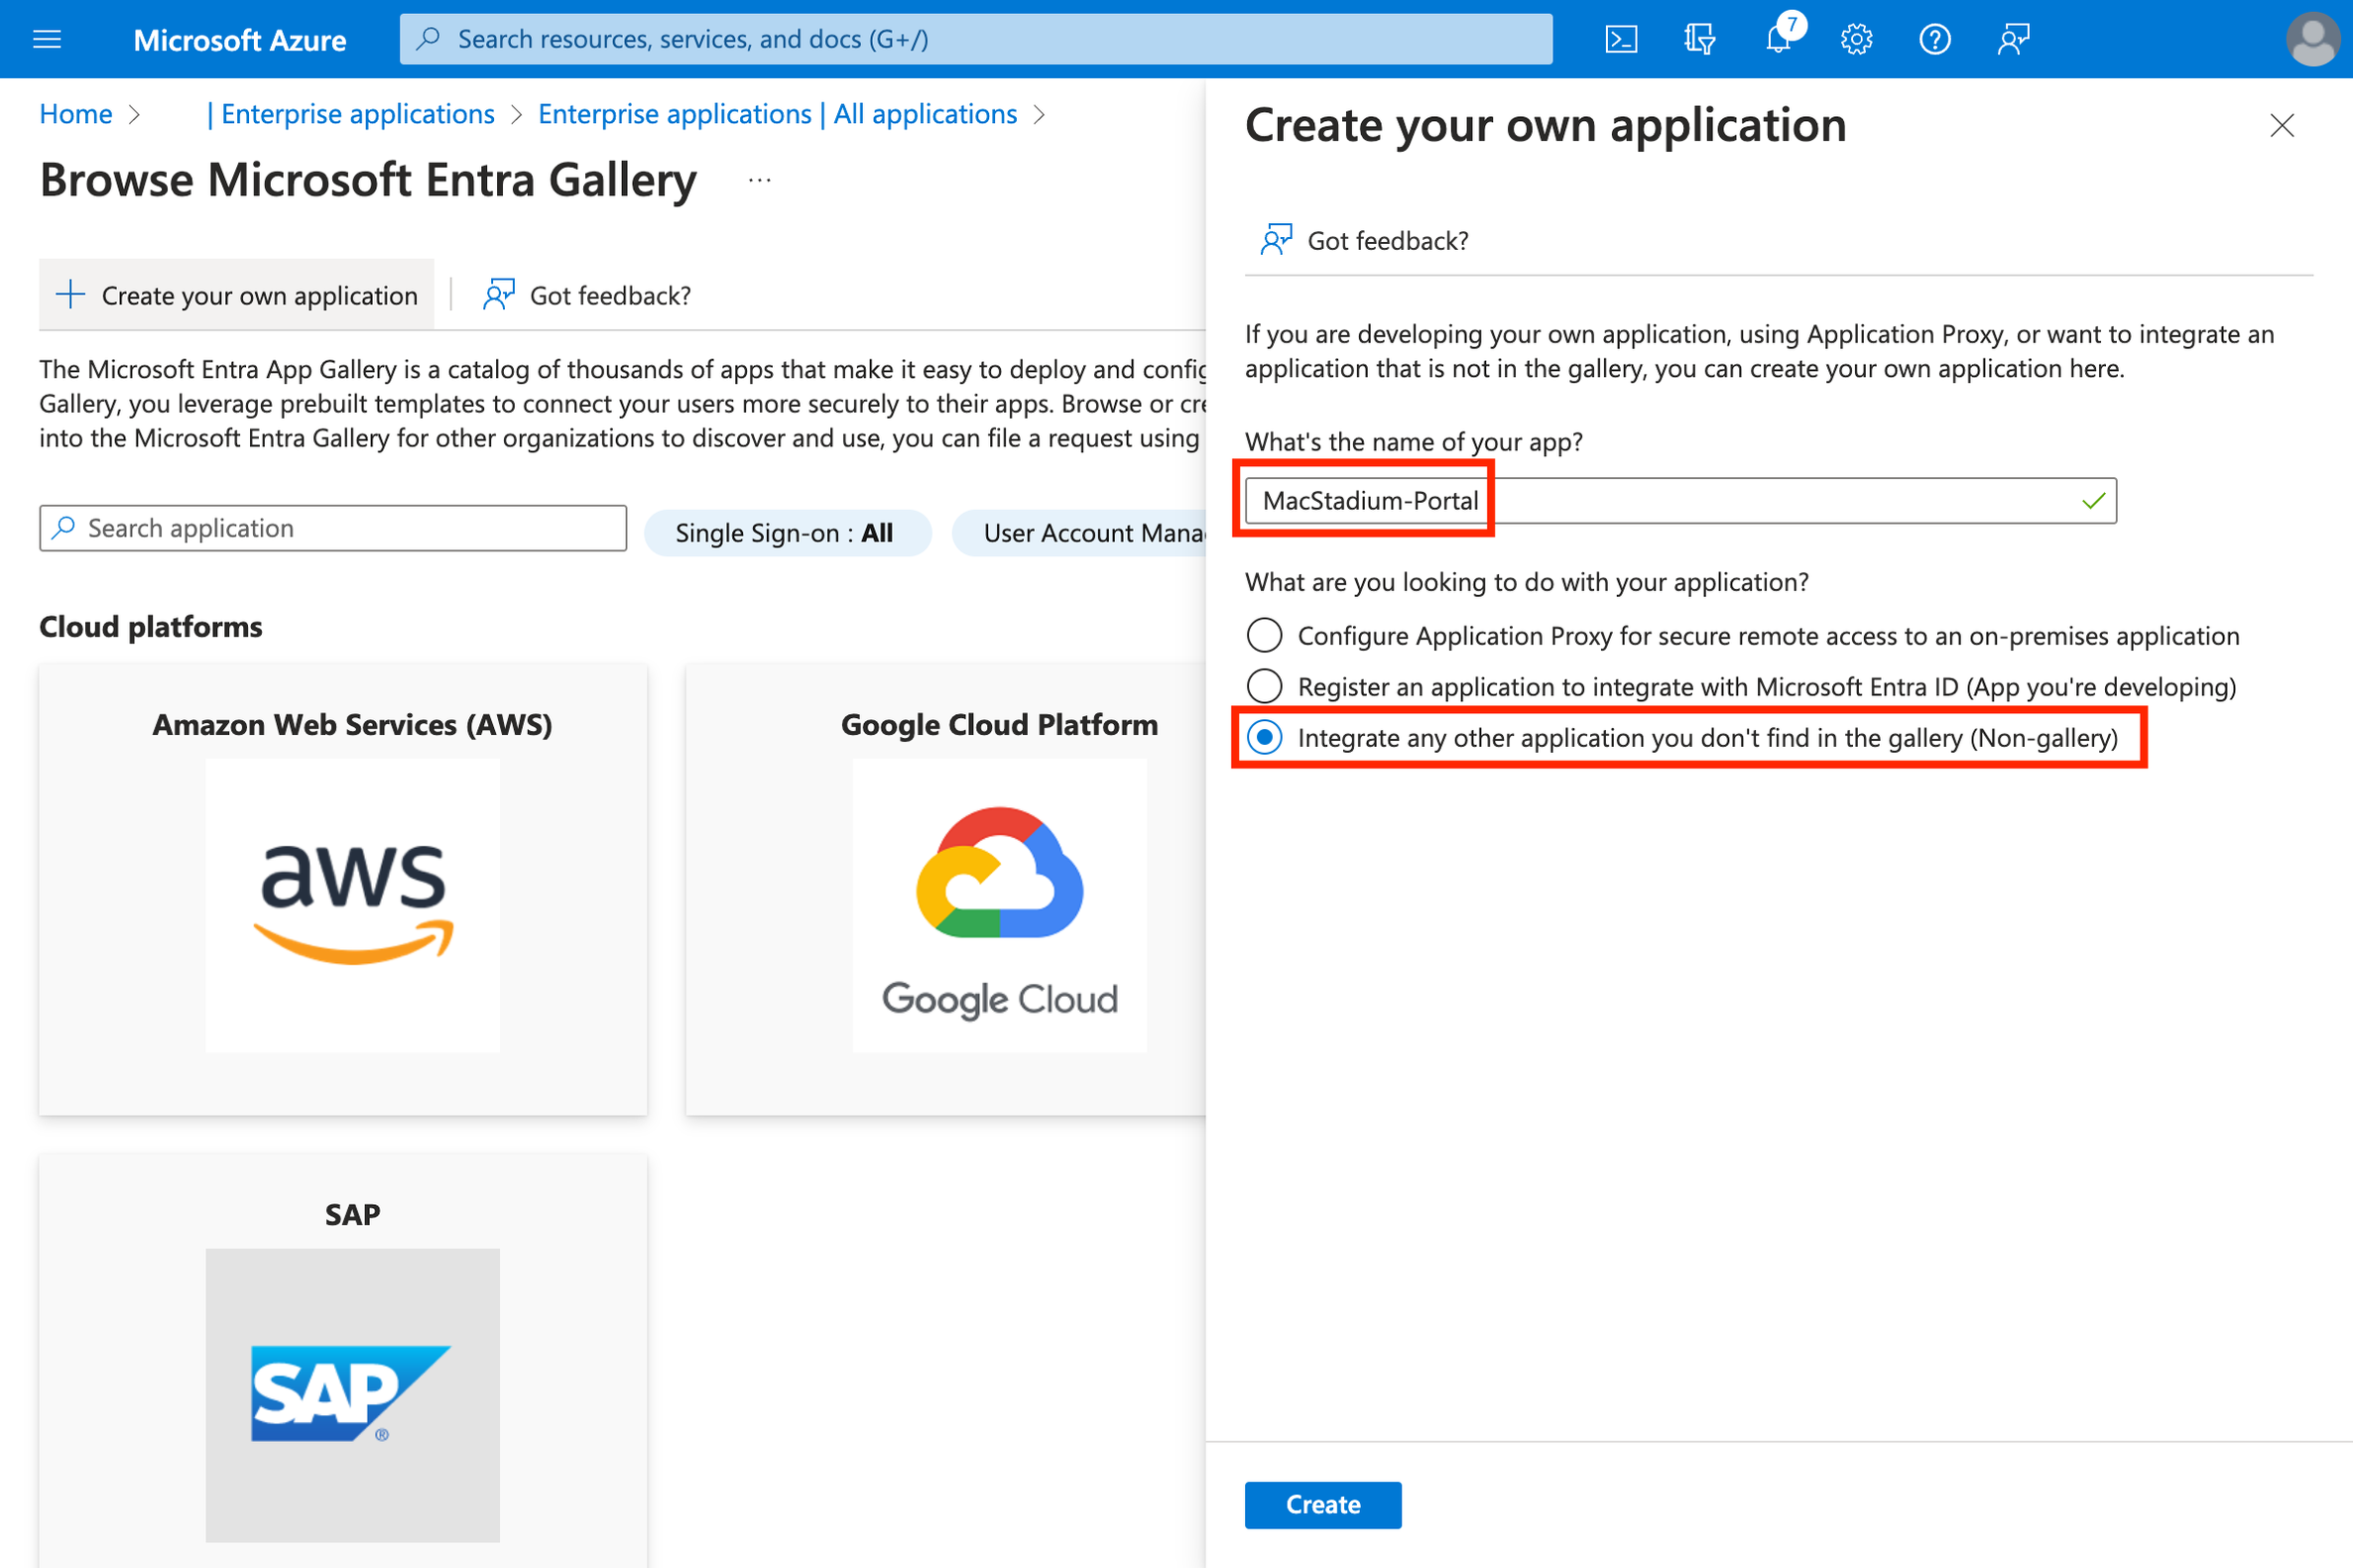
  4. Create an application by clicking Create your own application.\ Azure Browse gallery page with Create your own application button
    • Enter a name (for example MacStadium-Portal).
    • Select Integrate any other application you don’t find in the gallery (Non-gallery).\ Azure Create your own application form with name field and non-gallery option selected
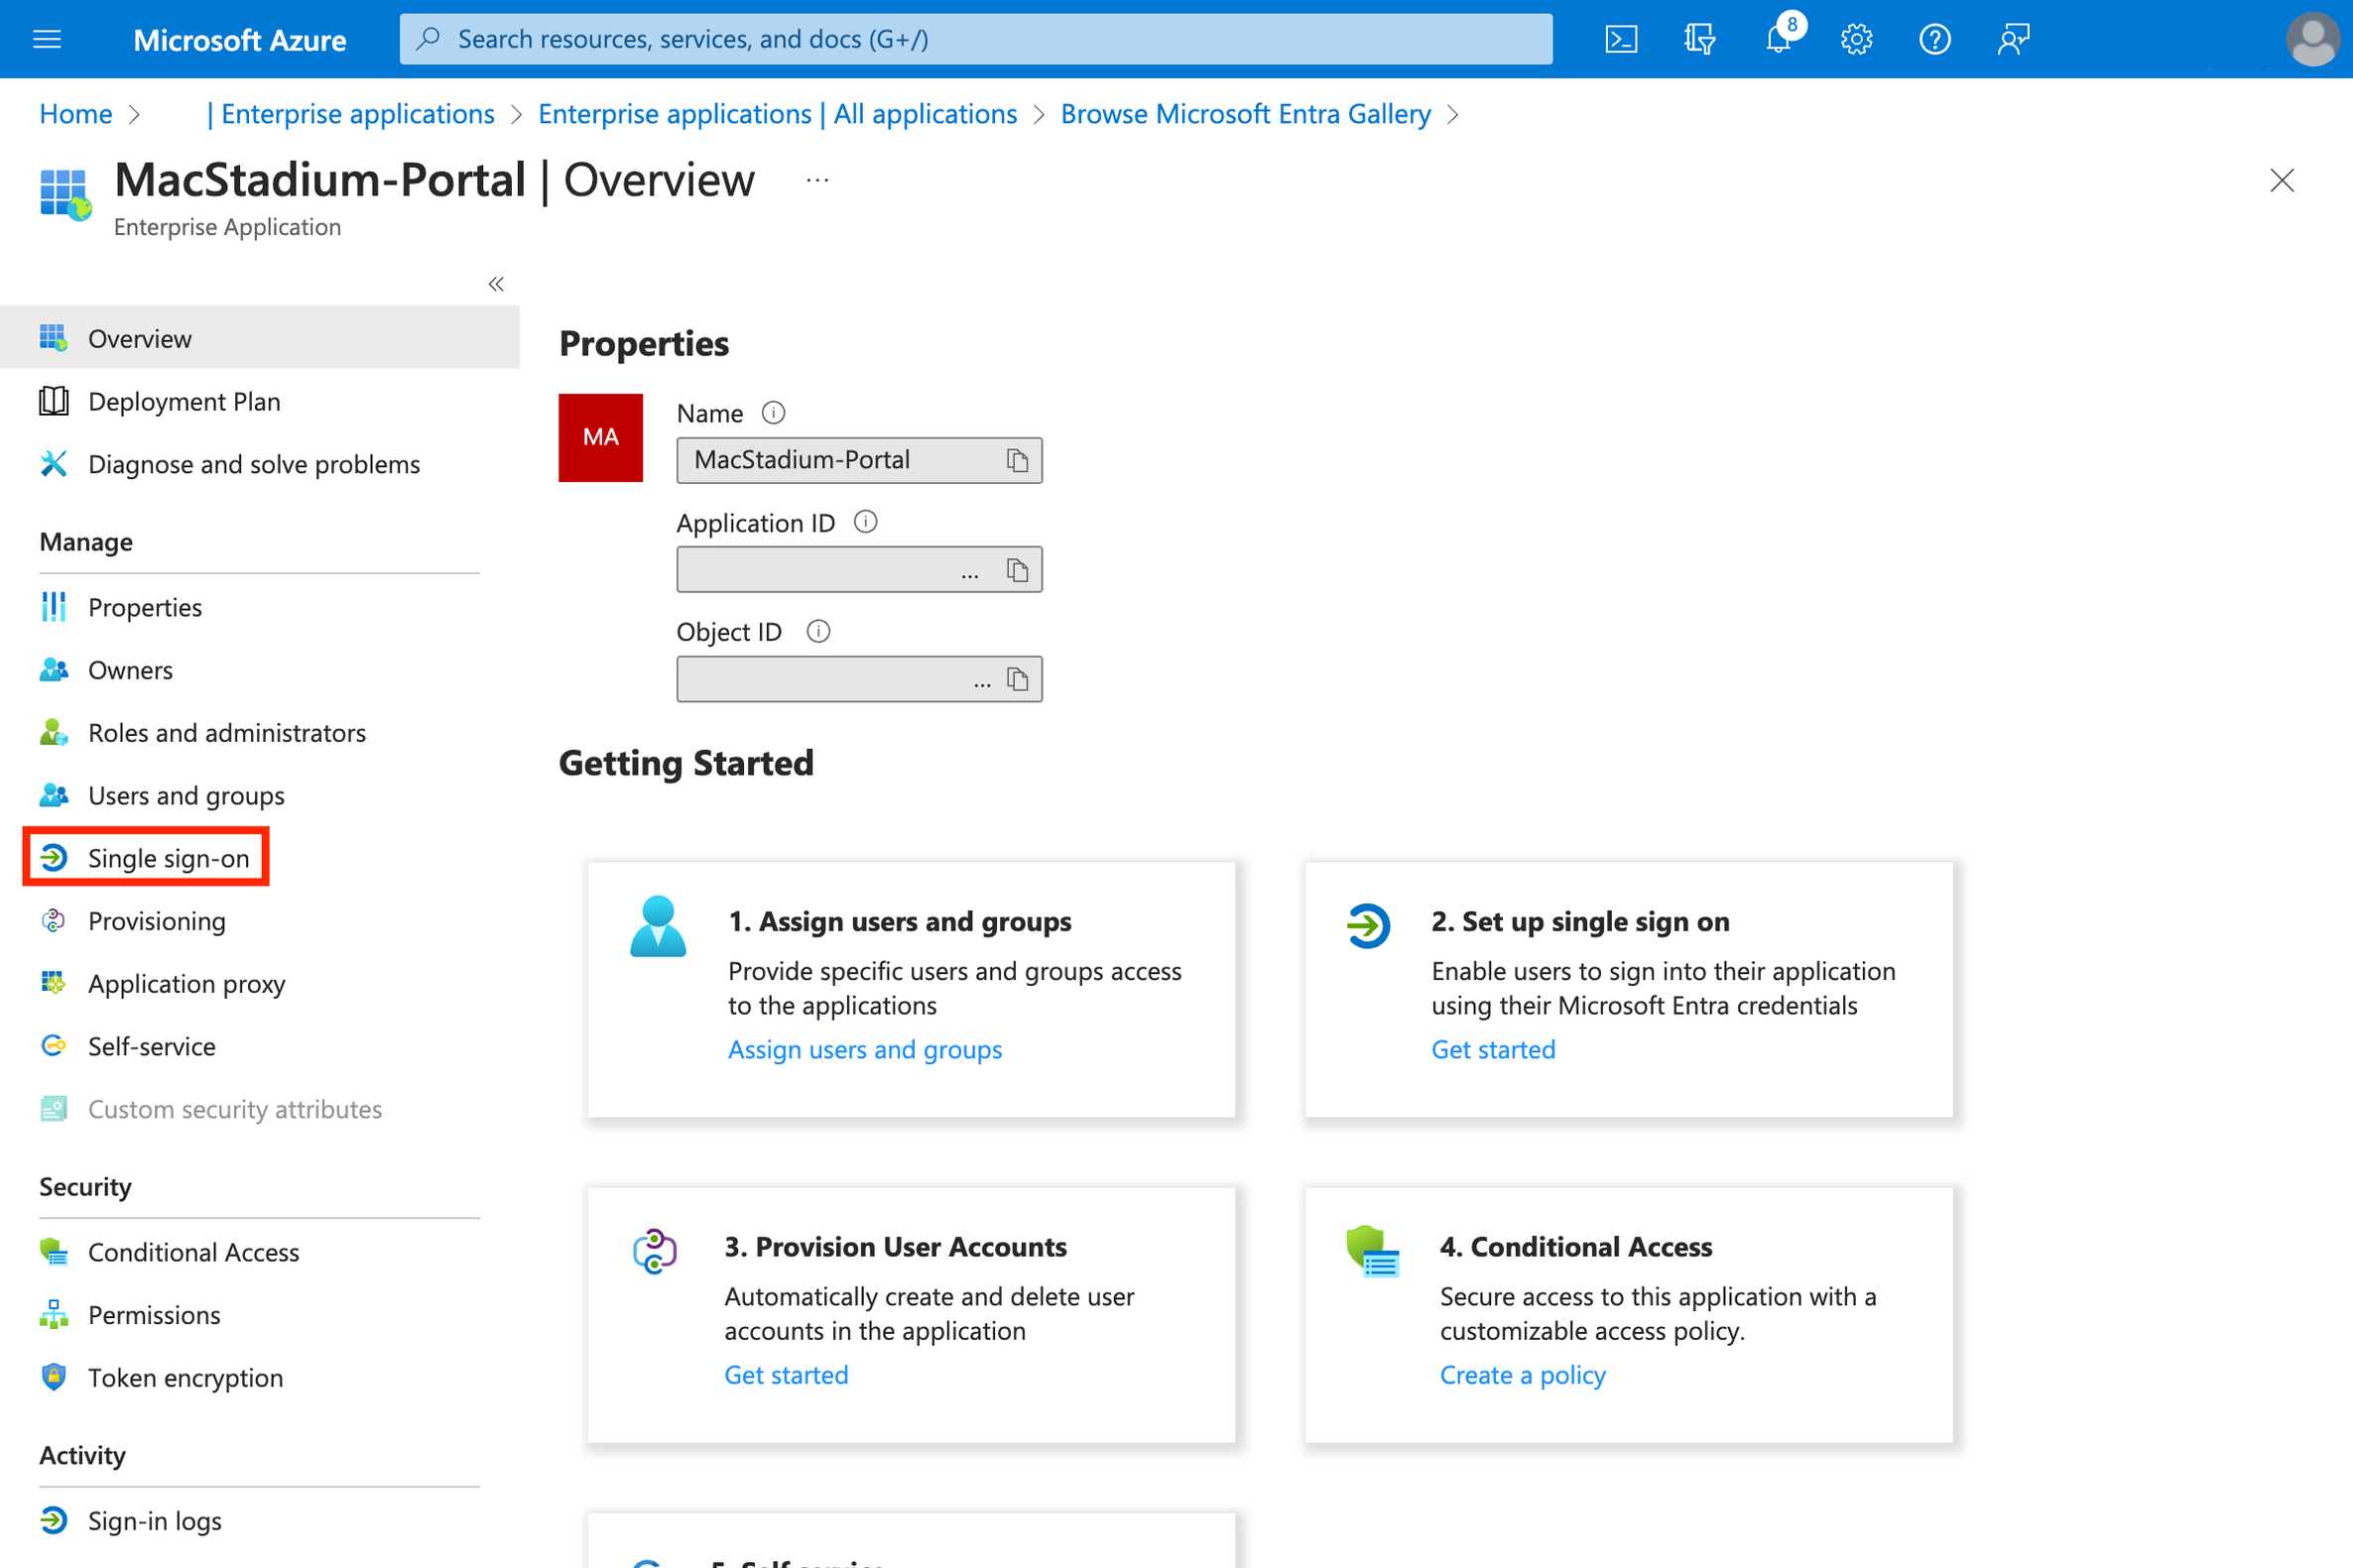
  5. Click Single sign-on.\
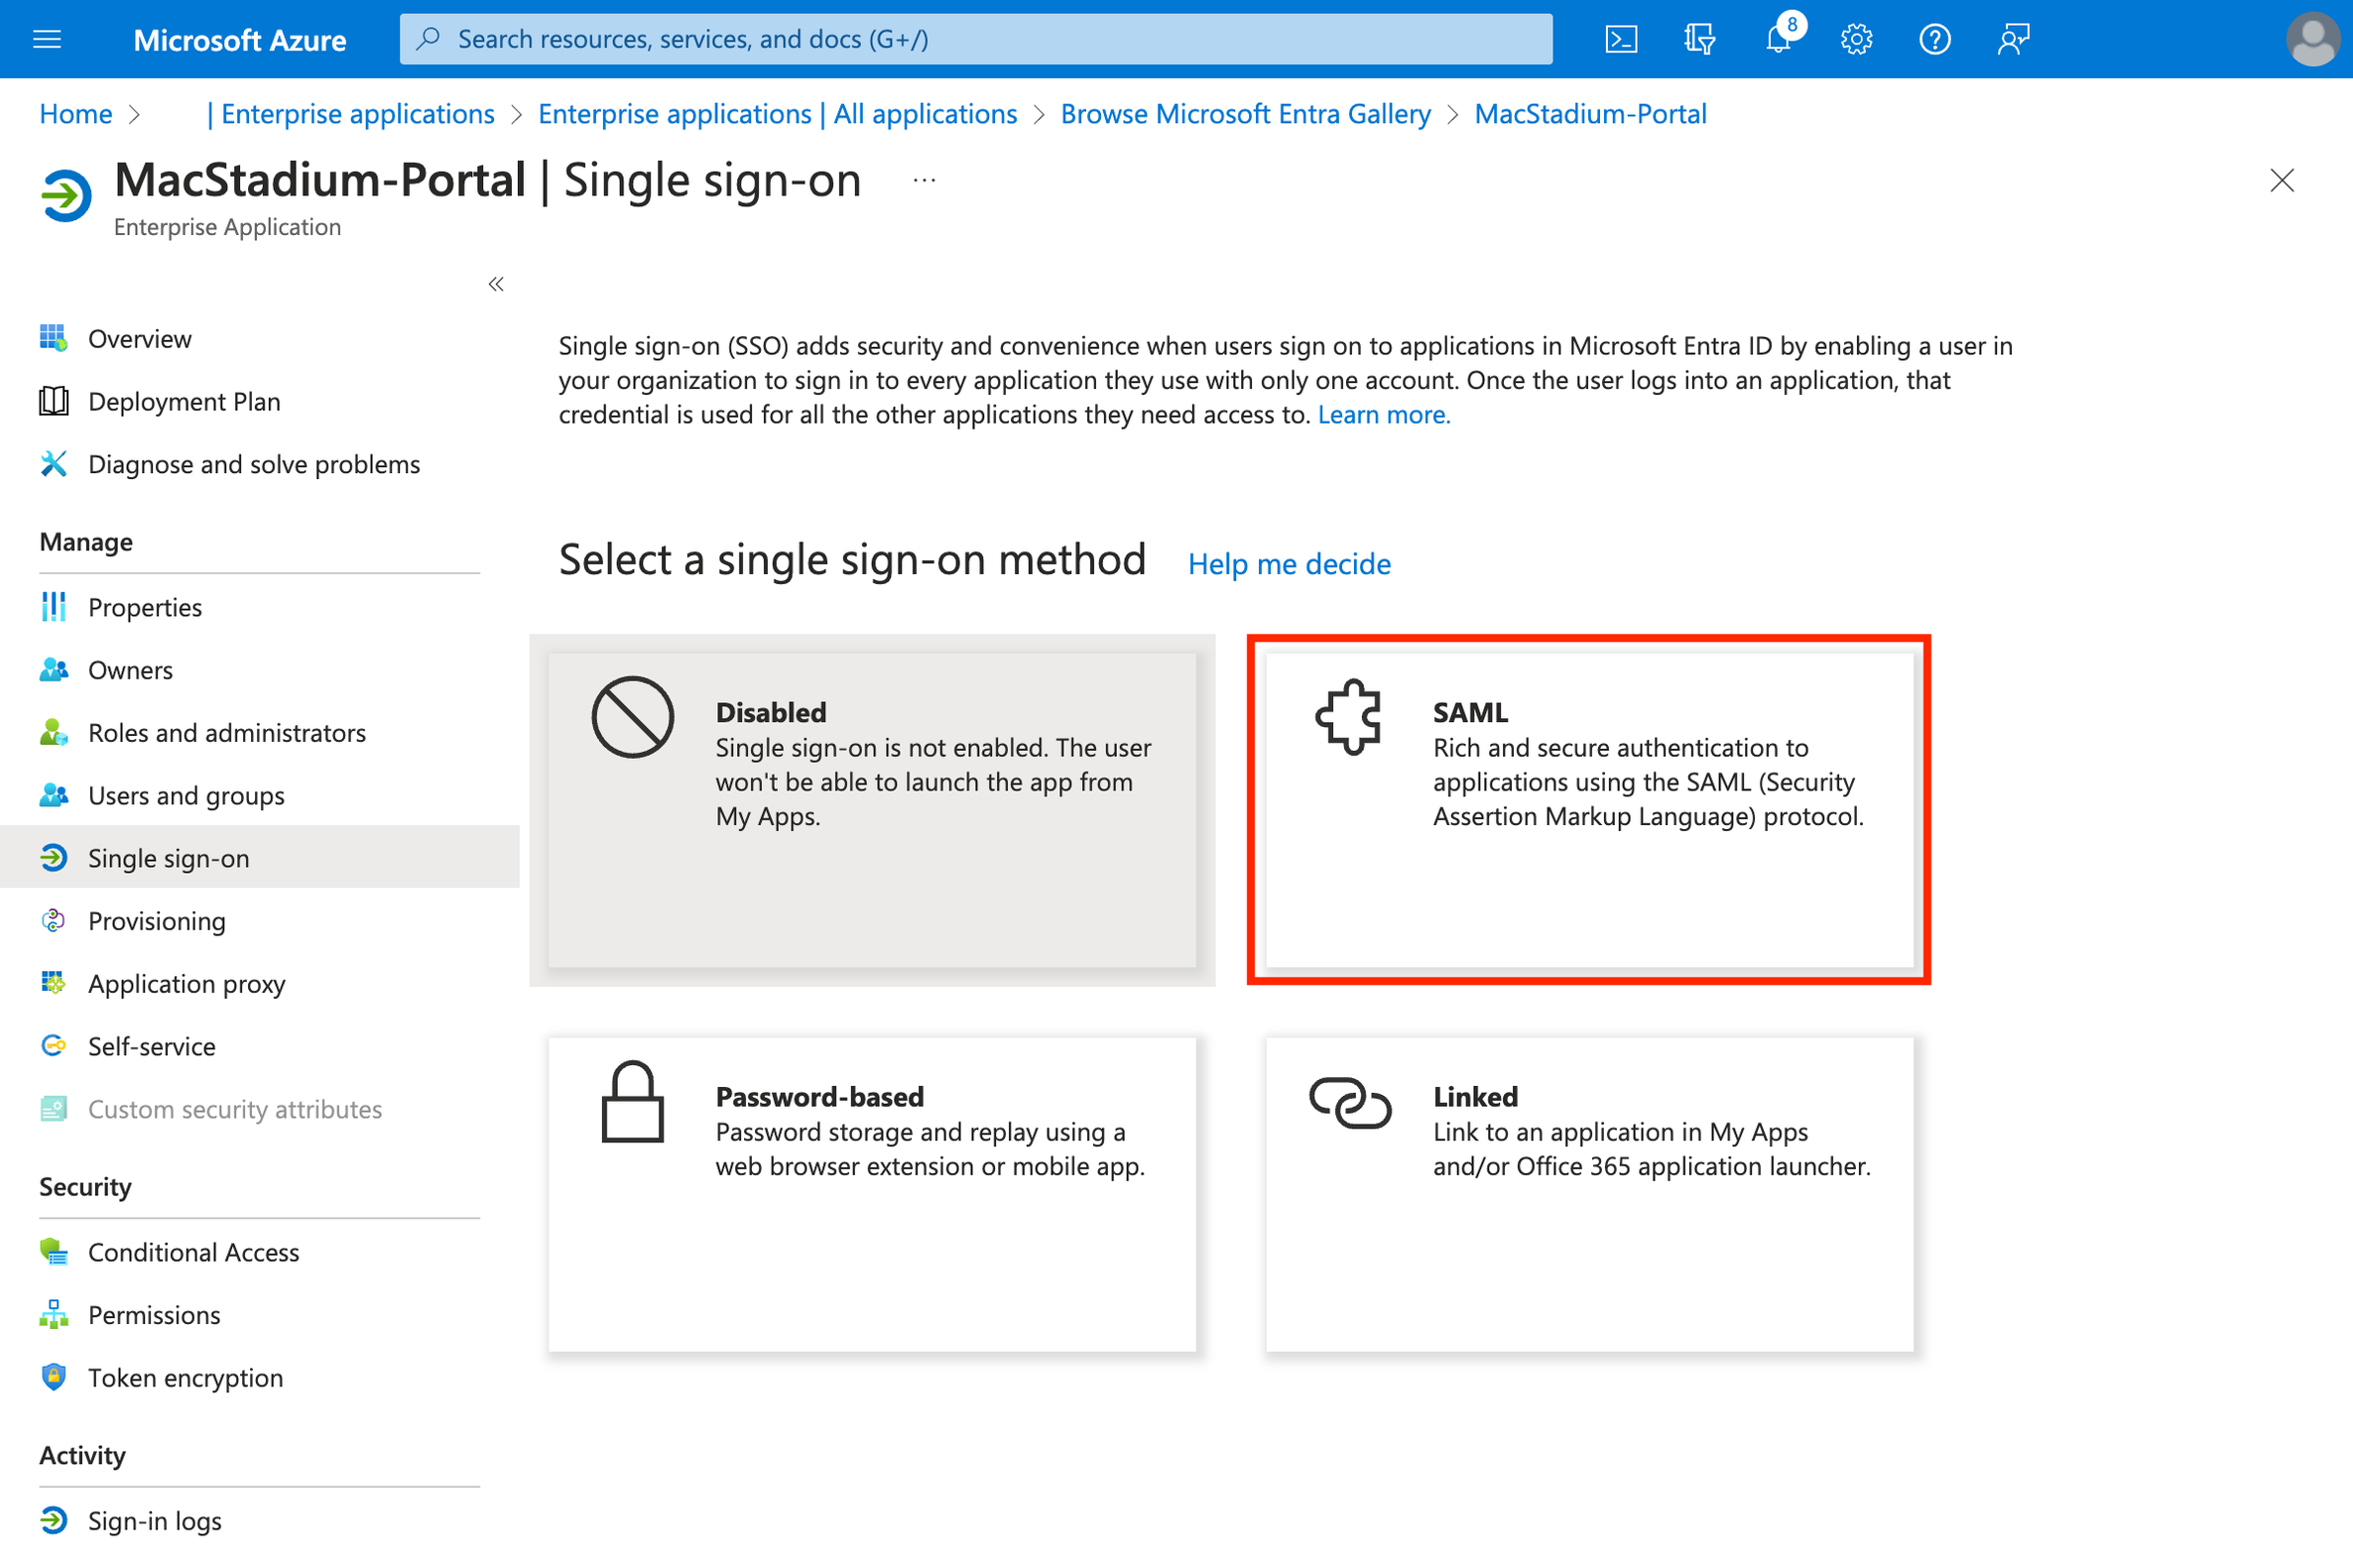
 Azure enterprise app overview with Single sign-on option in sidebar
  6. Select SAML.\ Azure Single sign-on method selection with SAML option highlighted
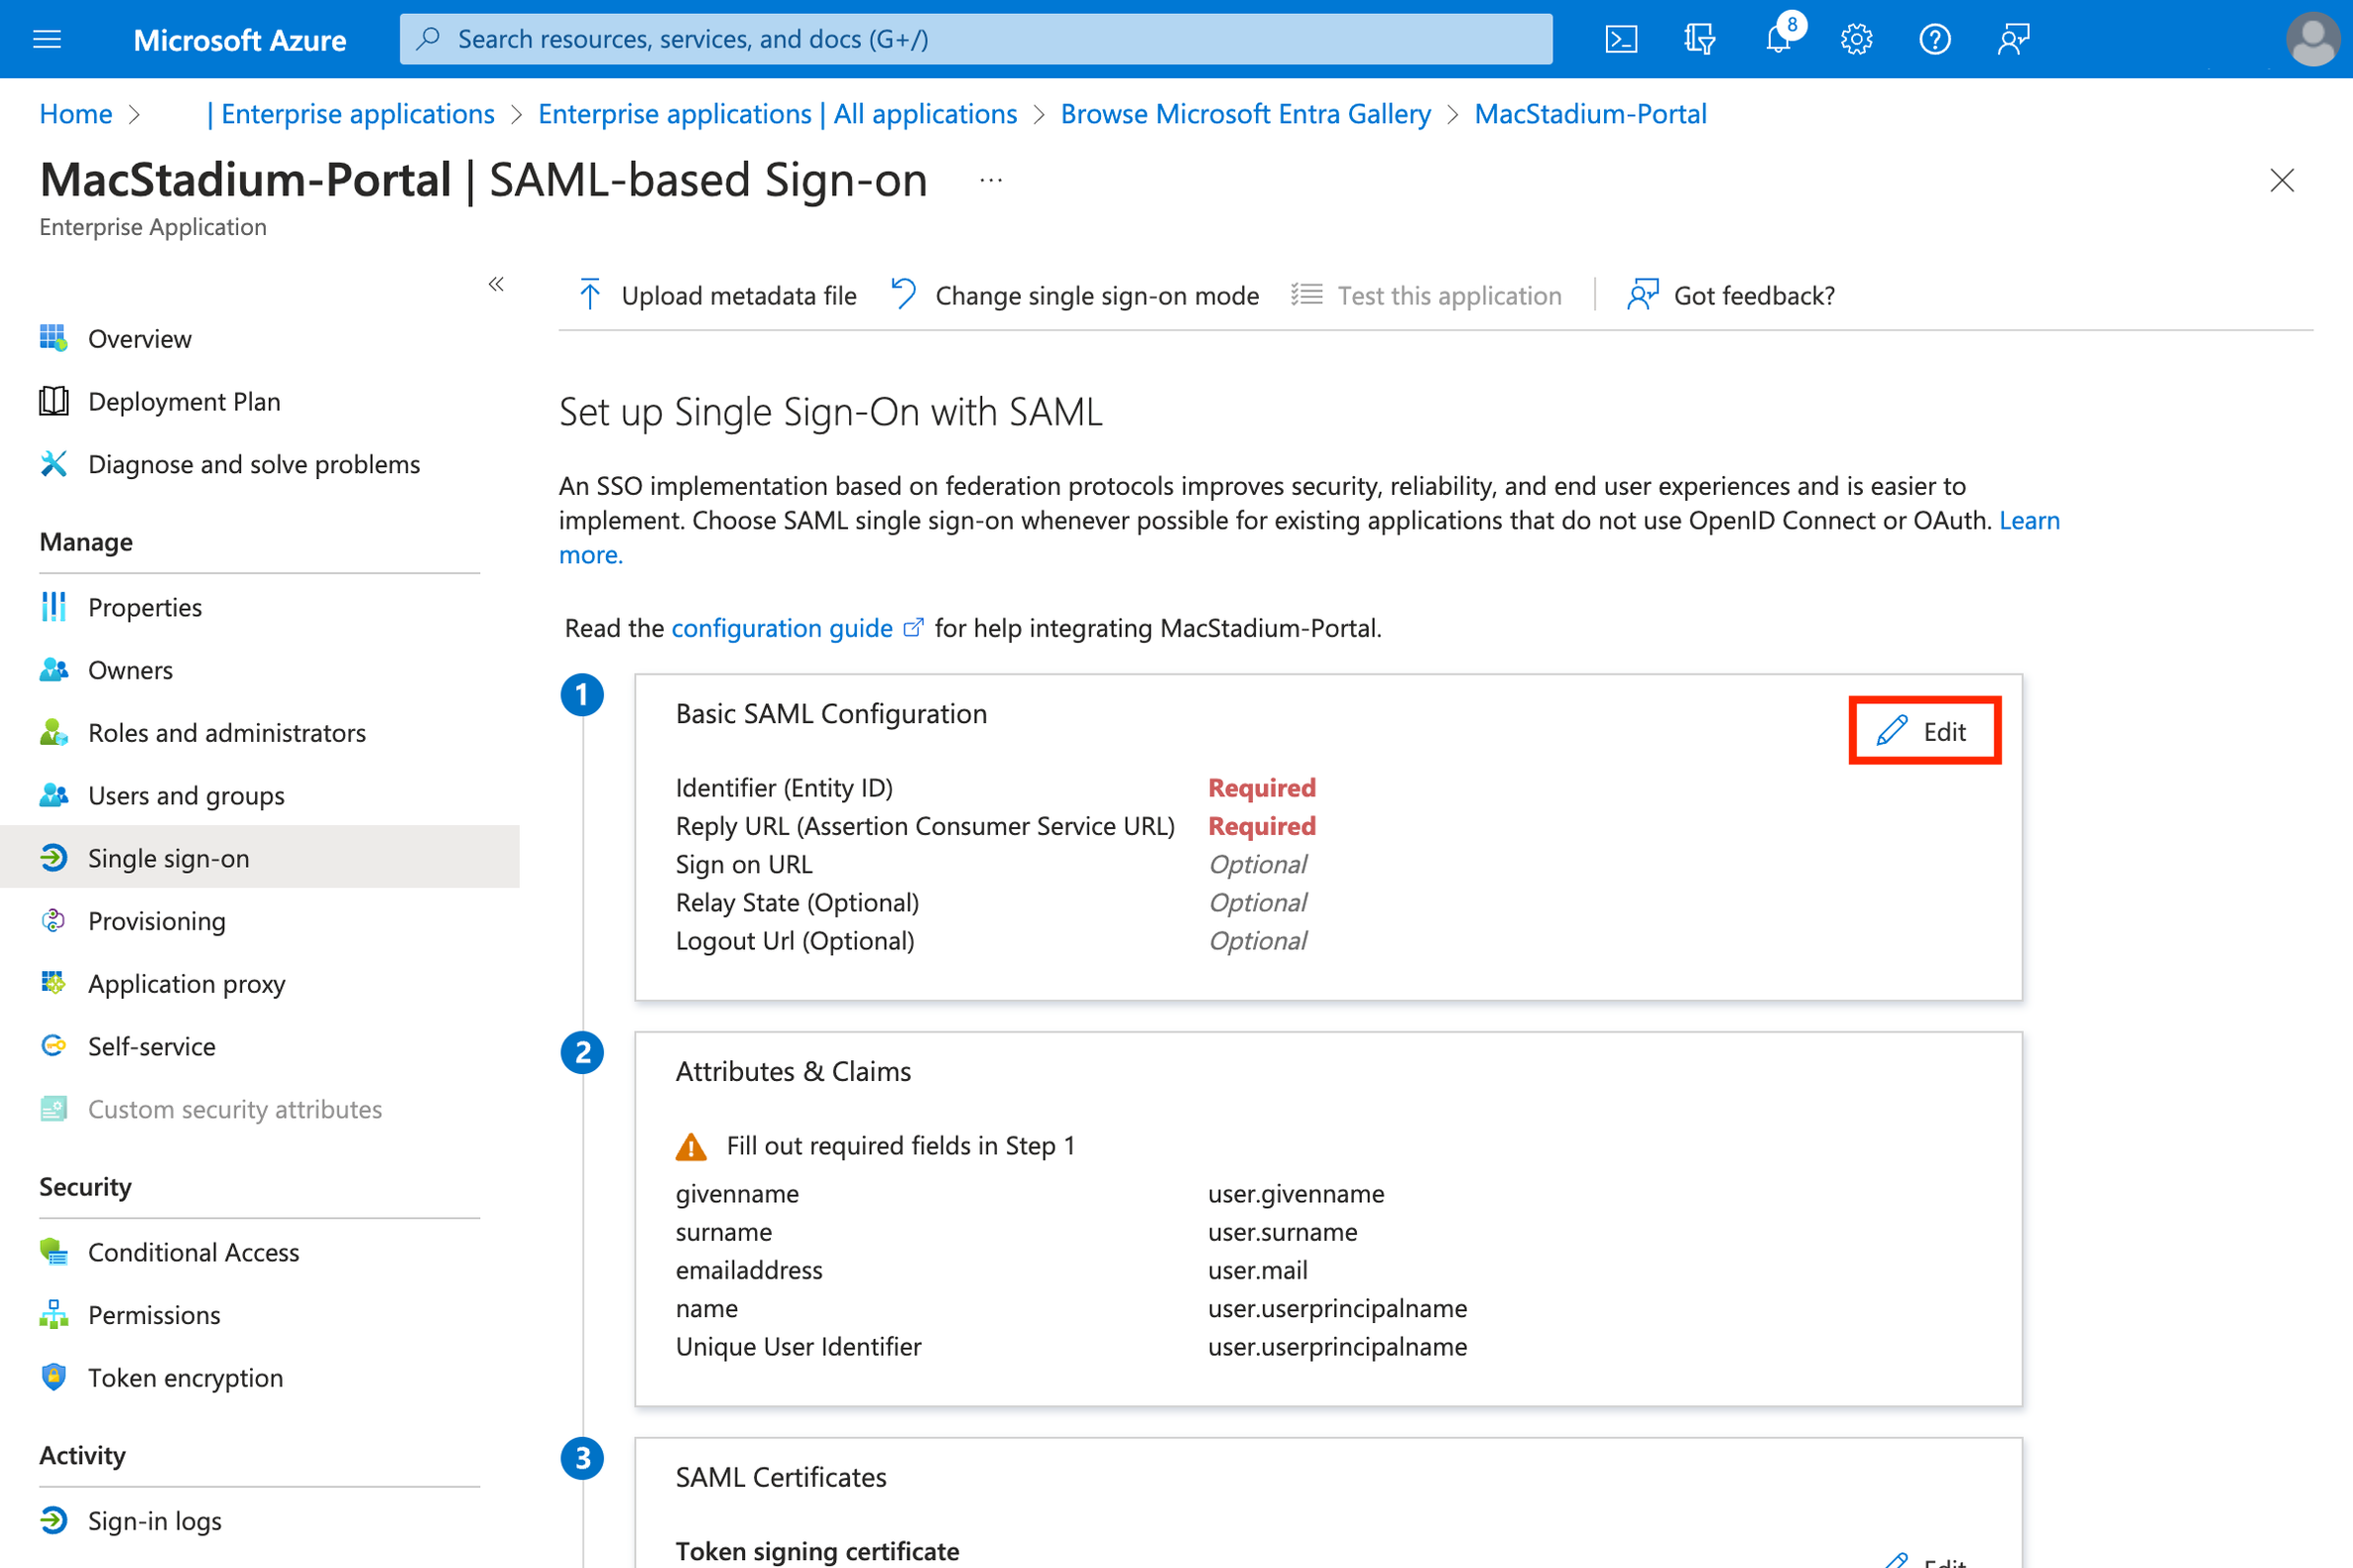
  7. Click Edit on the Basic SAML settings.\ Azure SAML-based Sign-on page showing Basic SAML Configuration section with Edit button
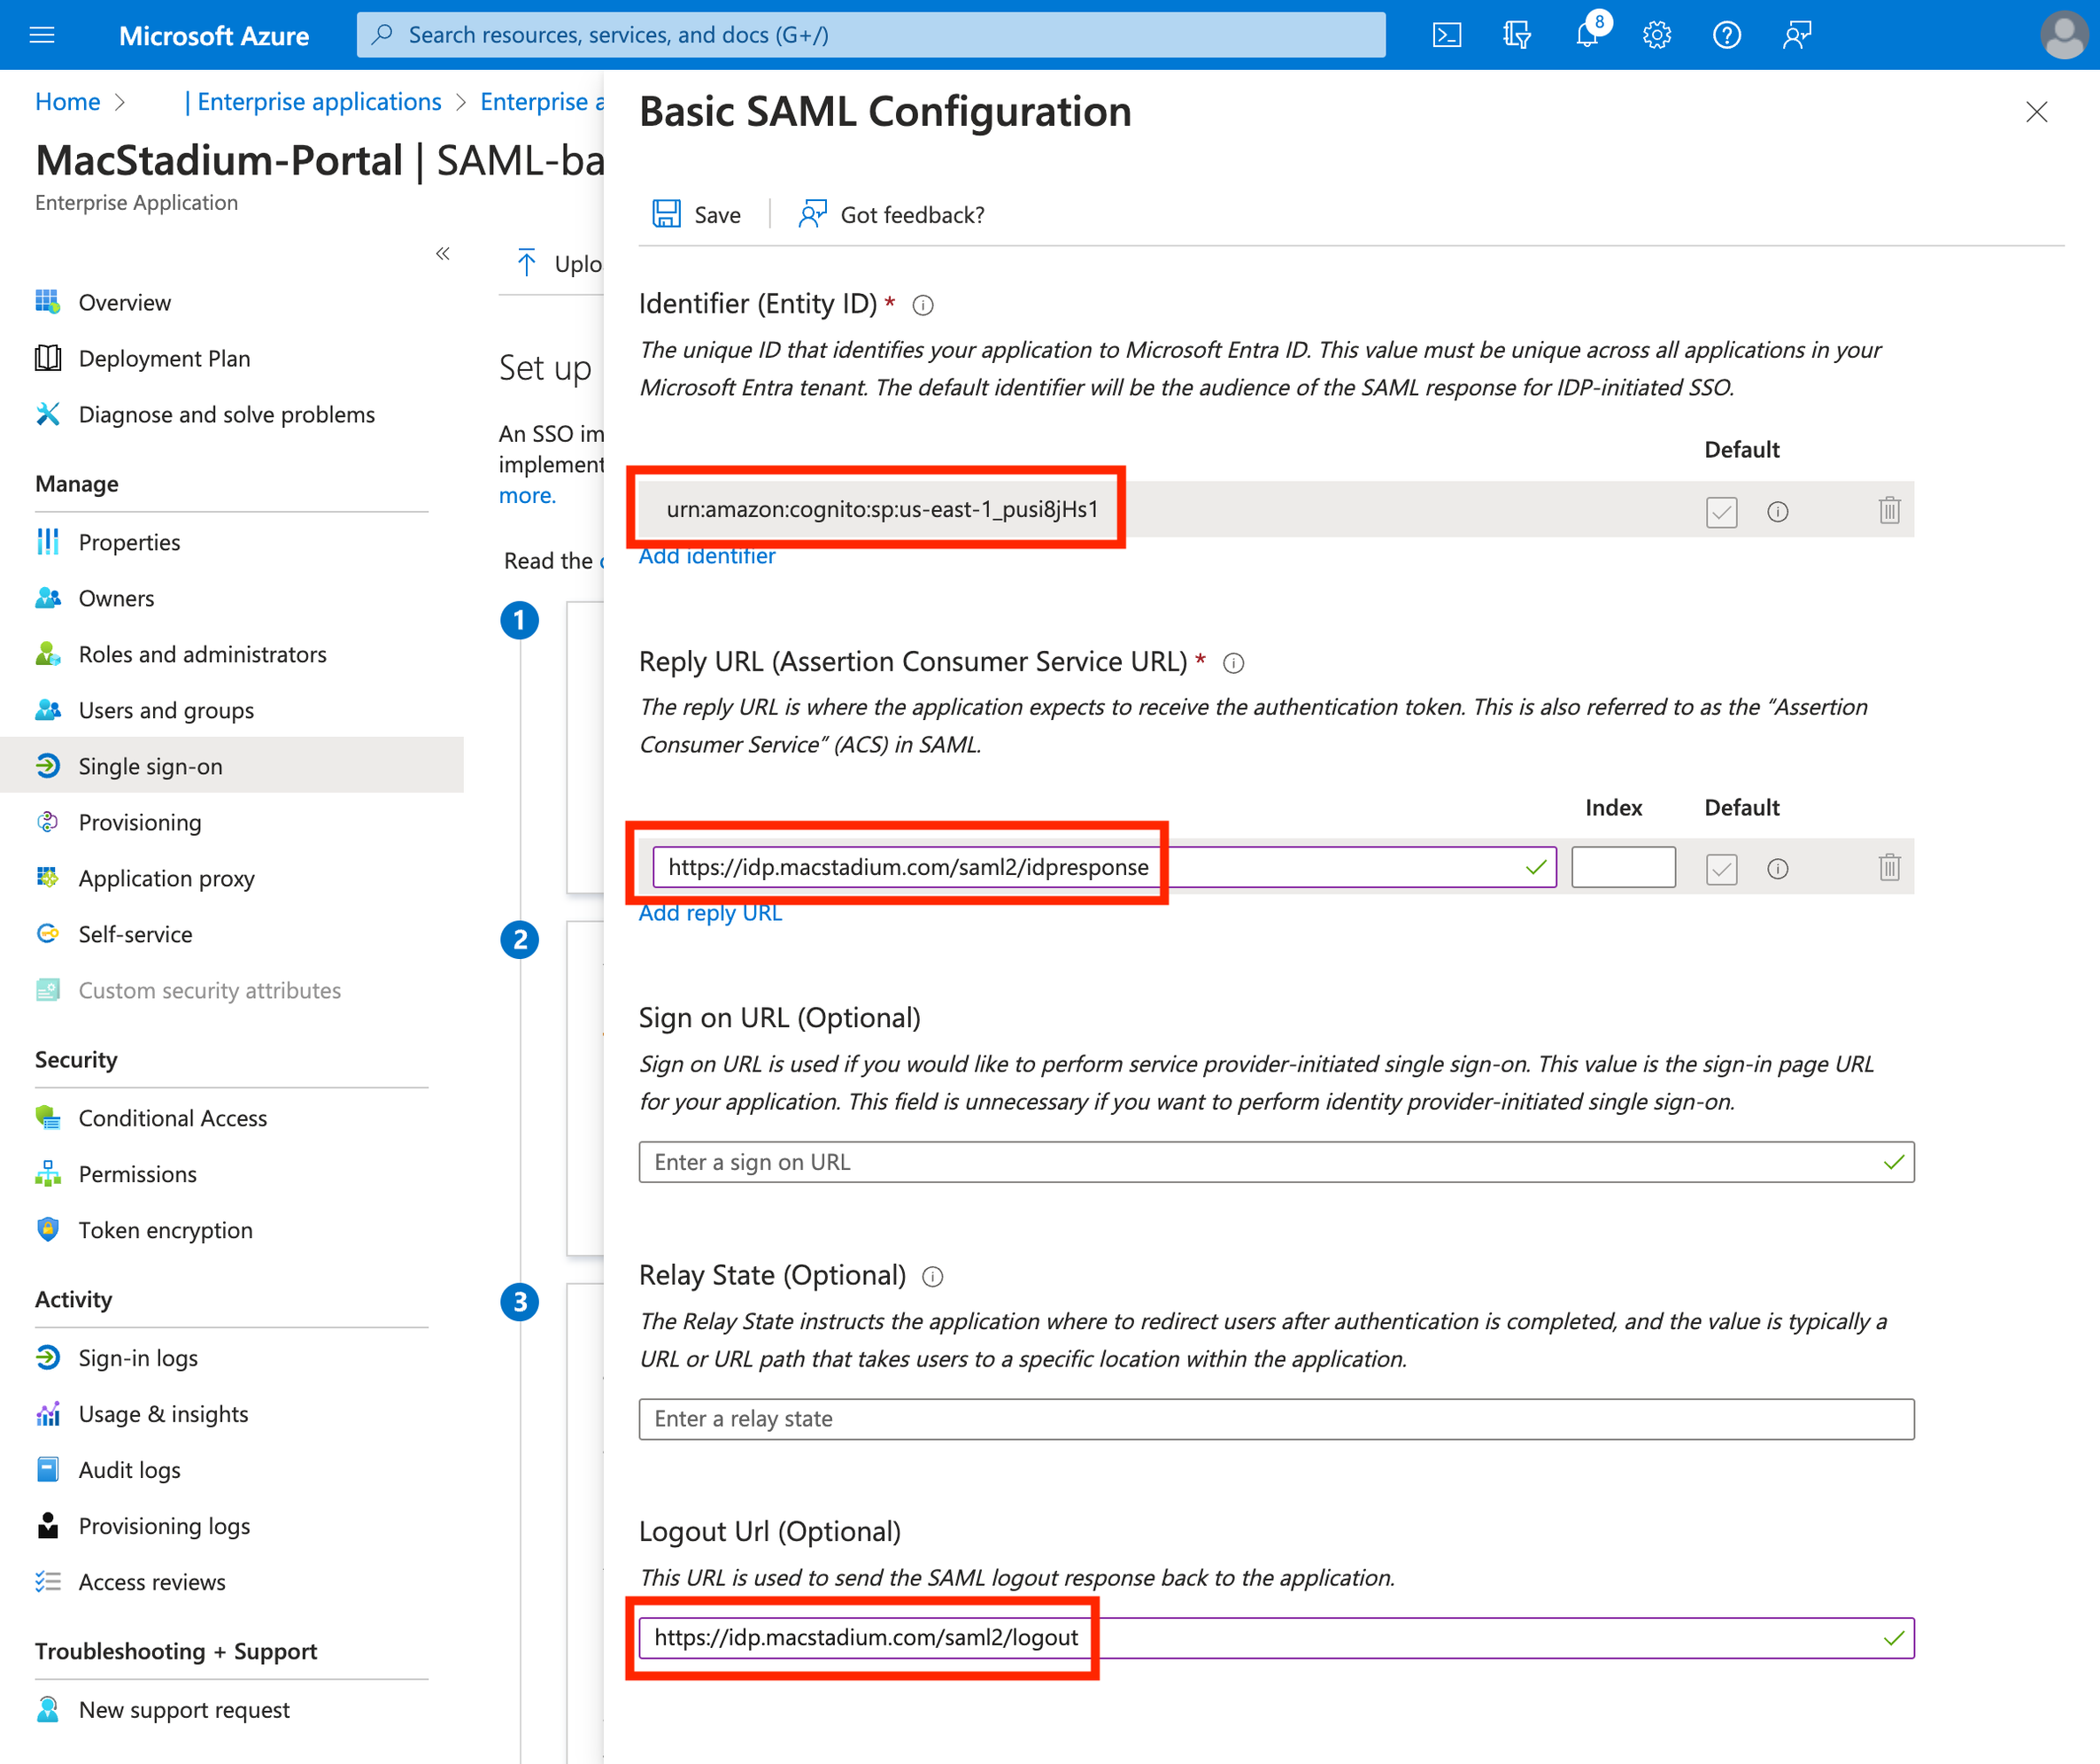
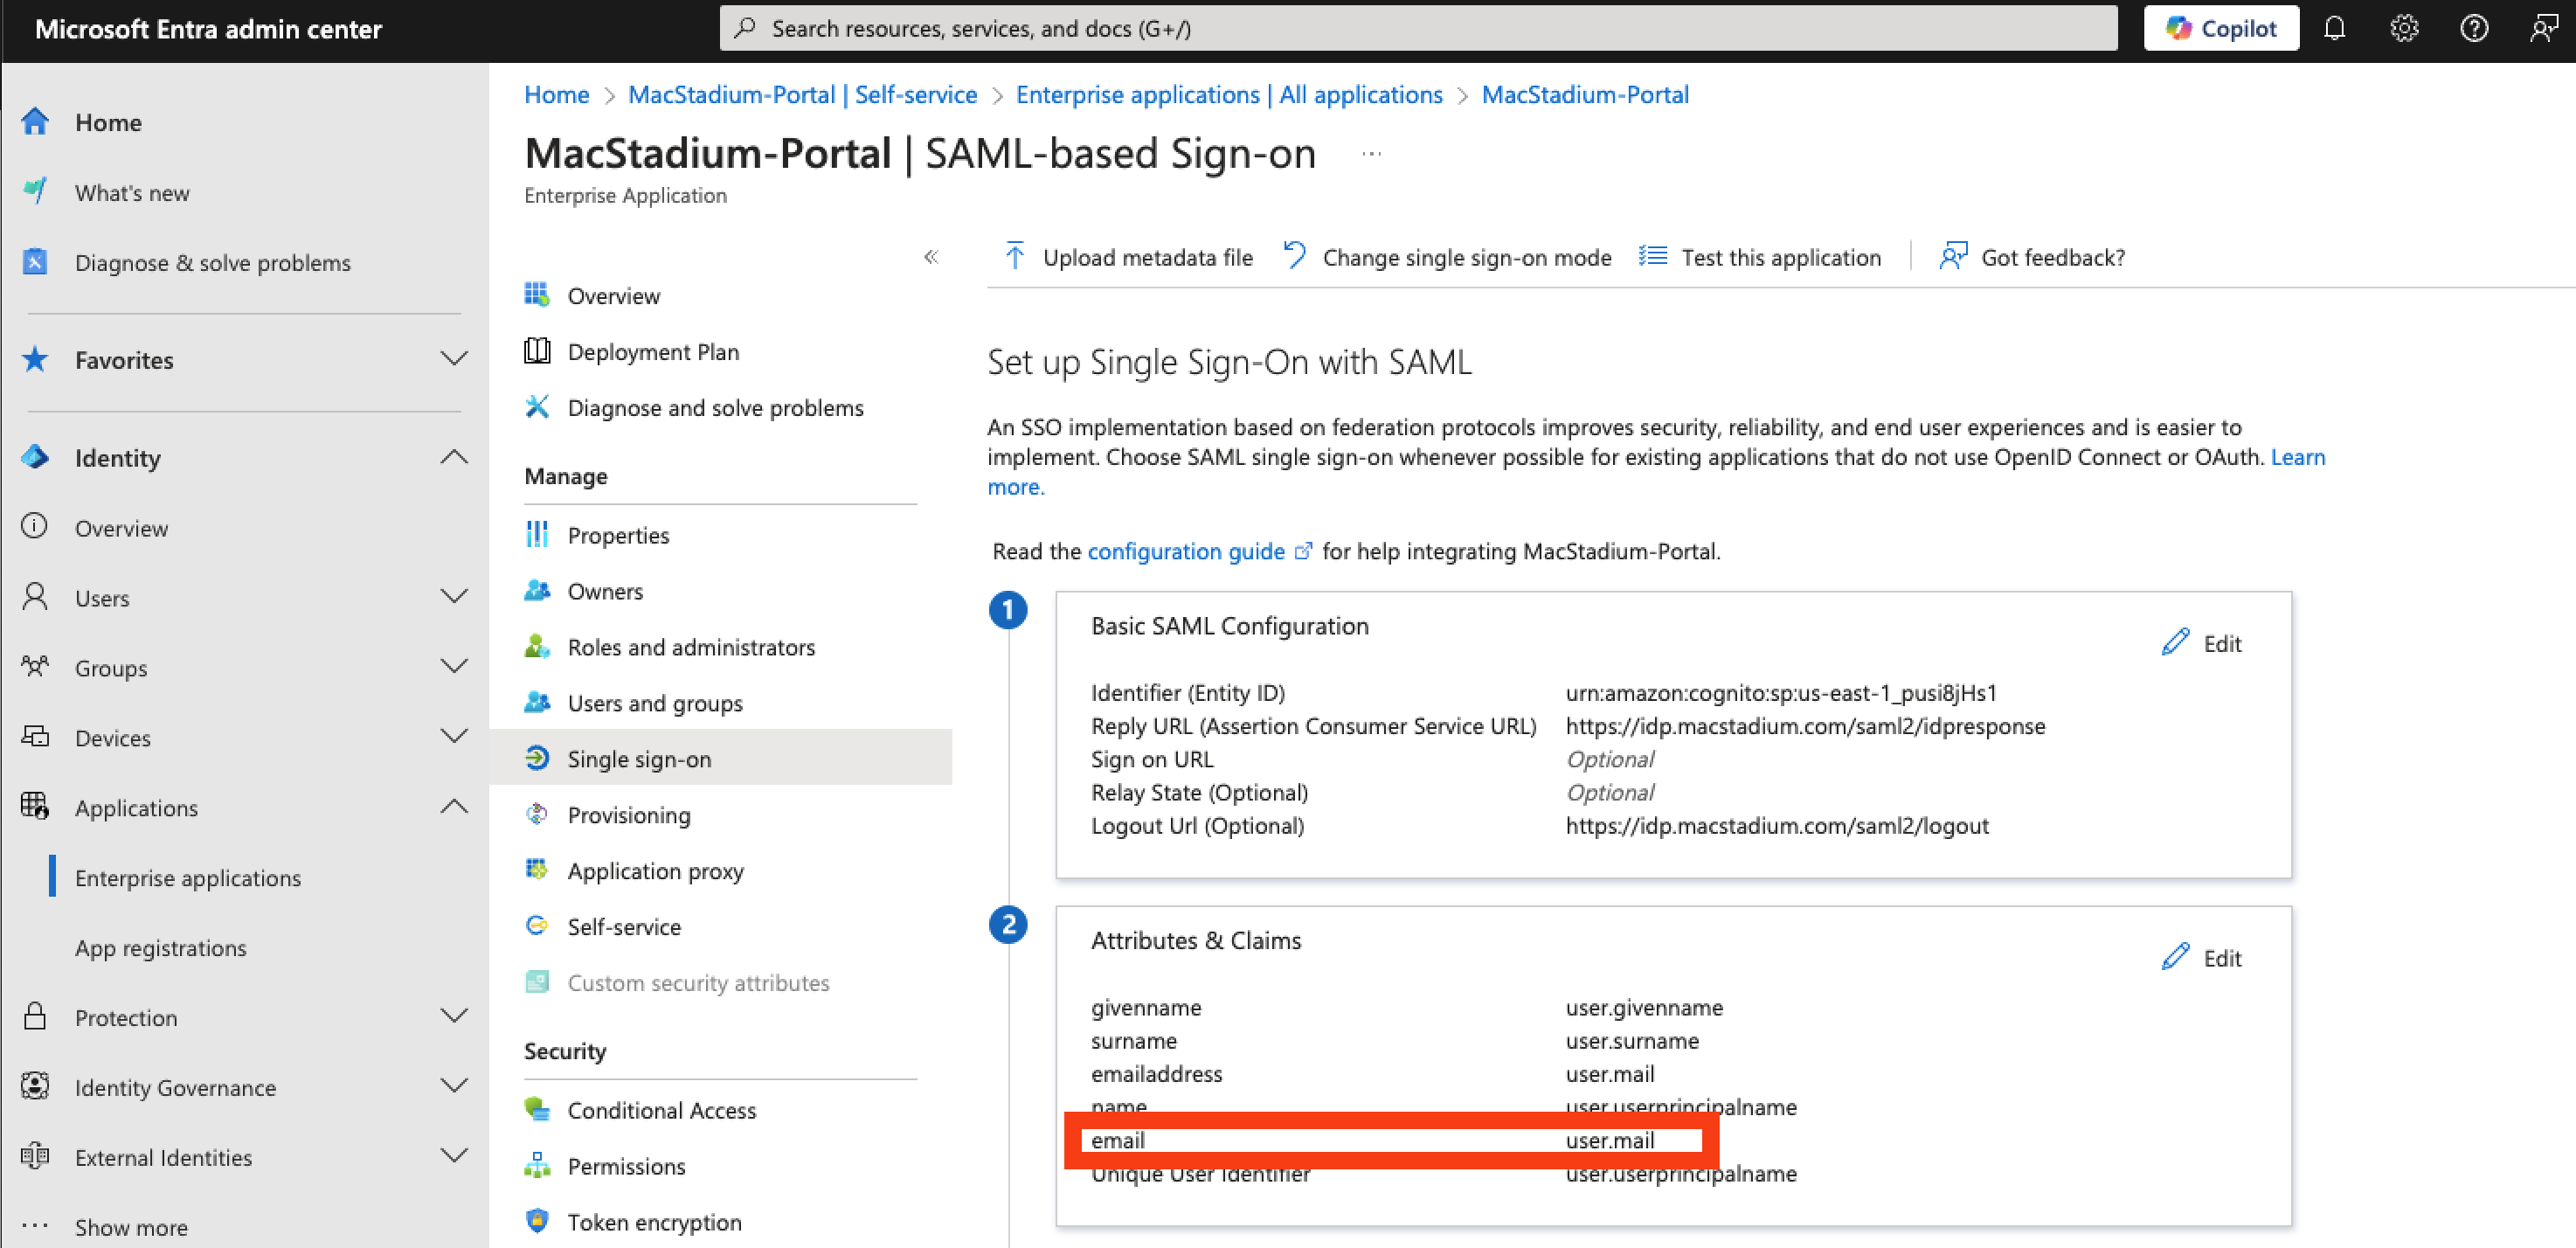
  8. Configure the SAML settings:
    • Identifier (Entity ID): urn:amazon:cognito:sp:us-east-1_pusi8jHs1
    • Reply URL (Assertion Consumer Service URL): https://idp.macstadium.com/saml2/idpresponse
    • Logout URL (Optional): https://idp.macstadium.com/saml2/logout
    • Click Save Azure Basic SAML Configuration with Entity ID, Reply URL, and Logout URL fields completed
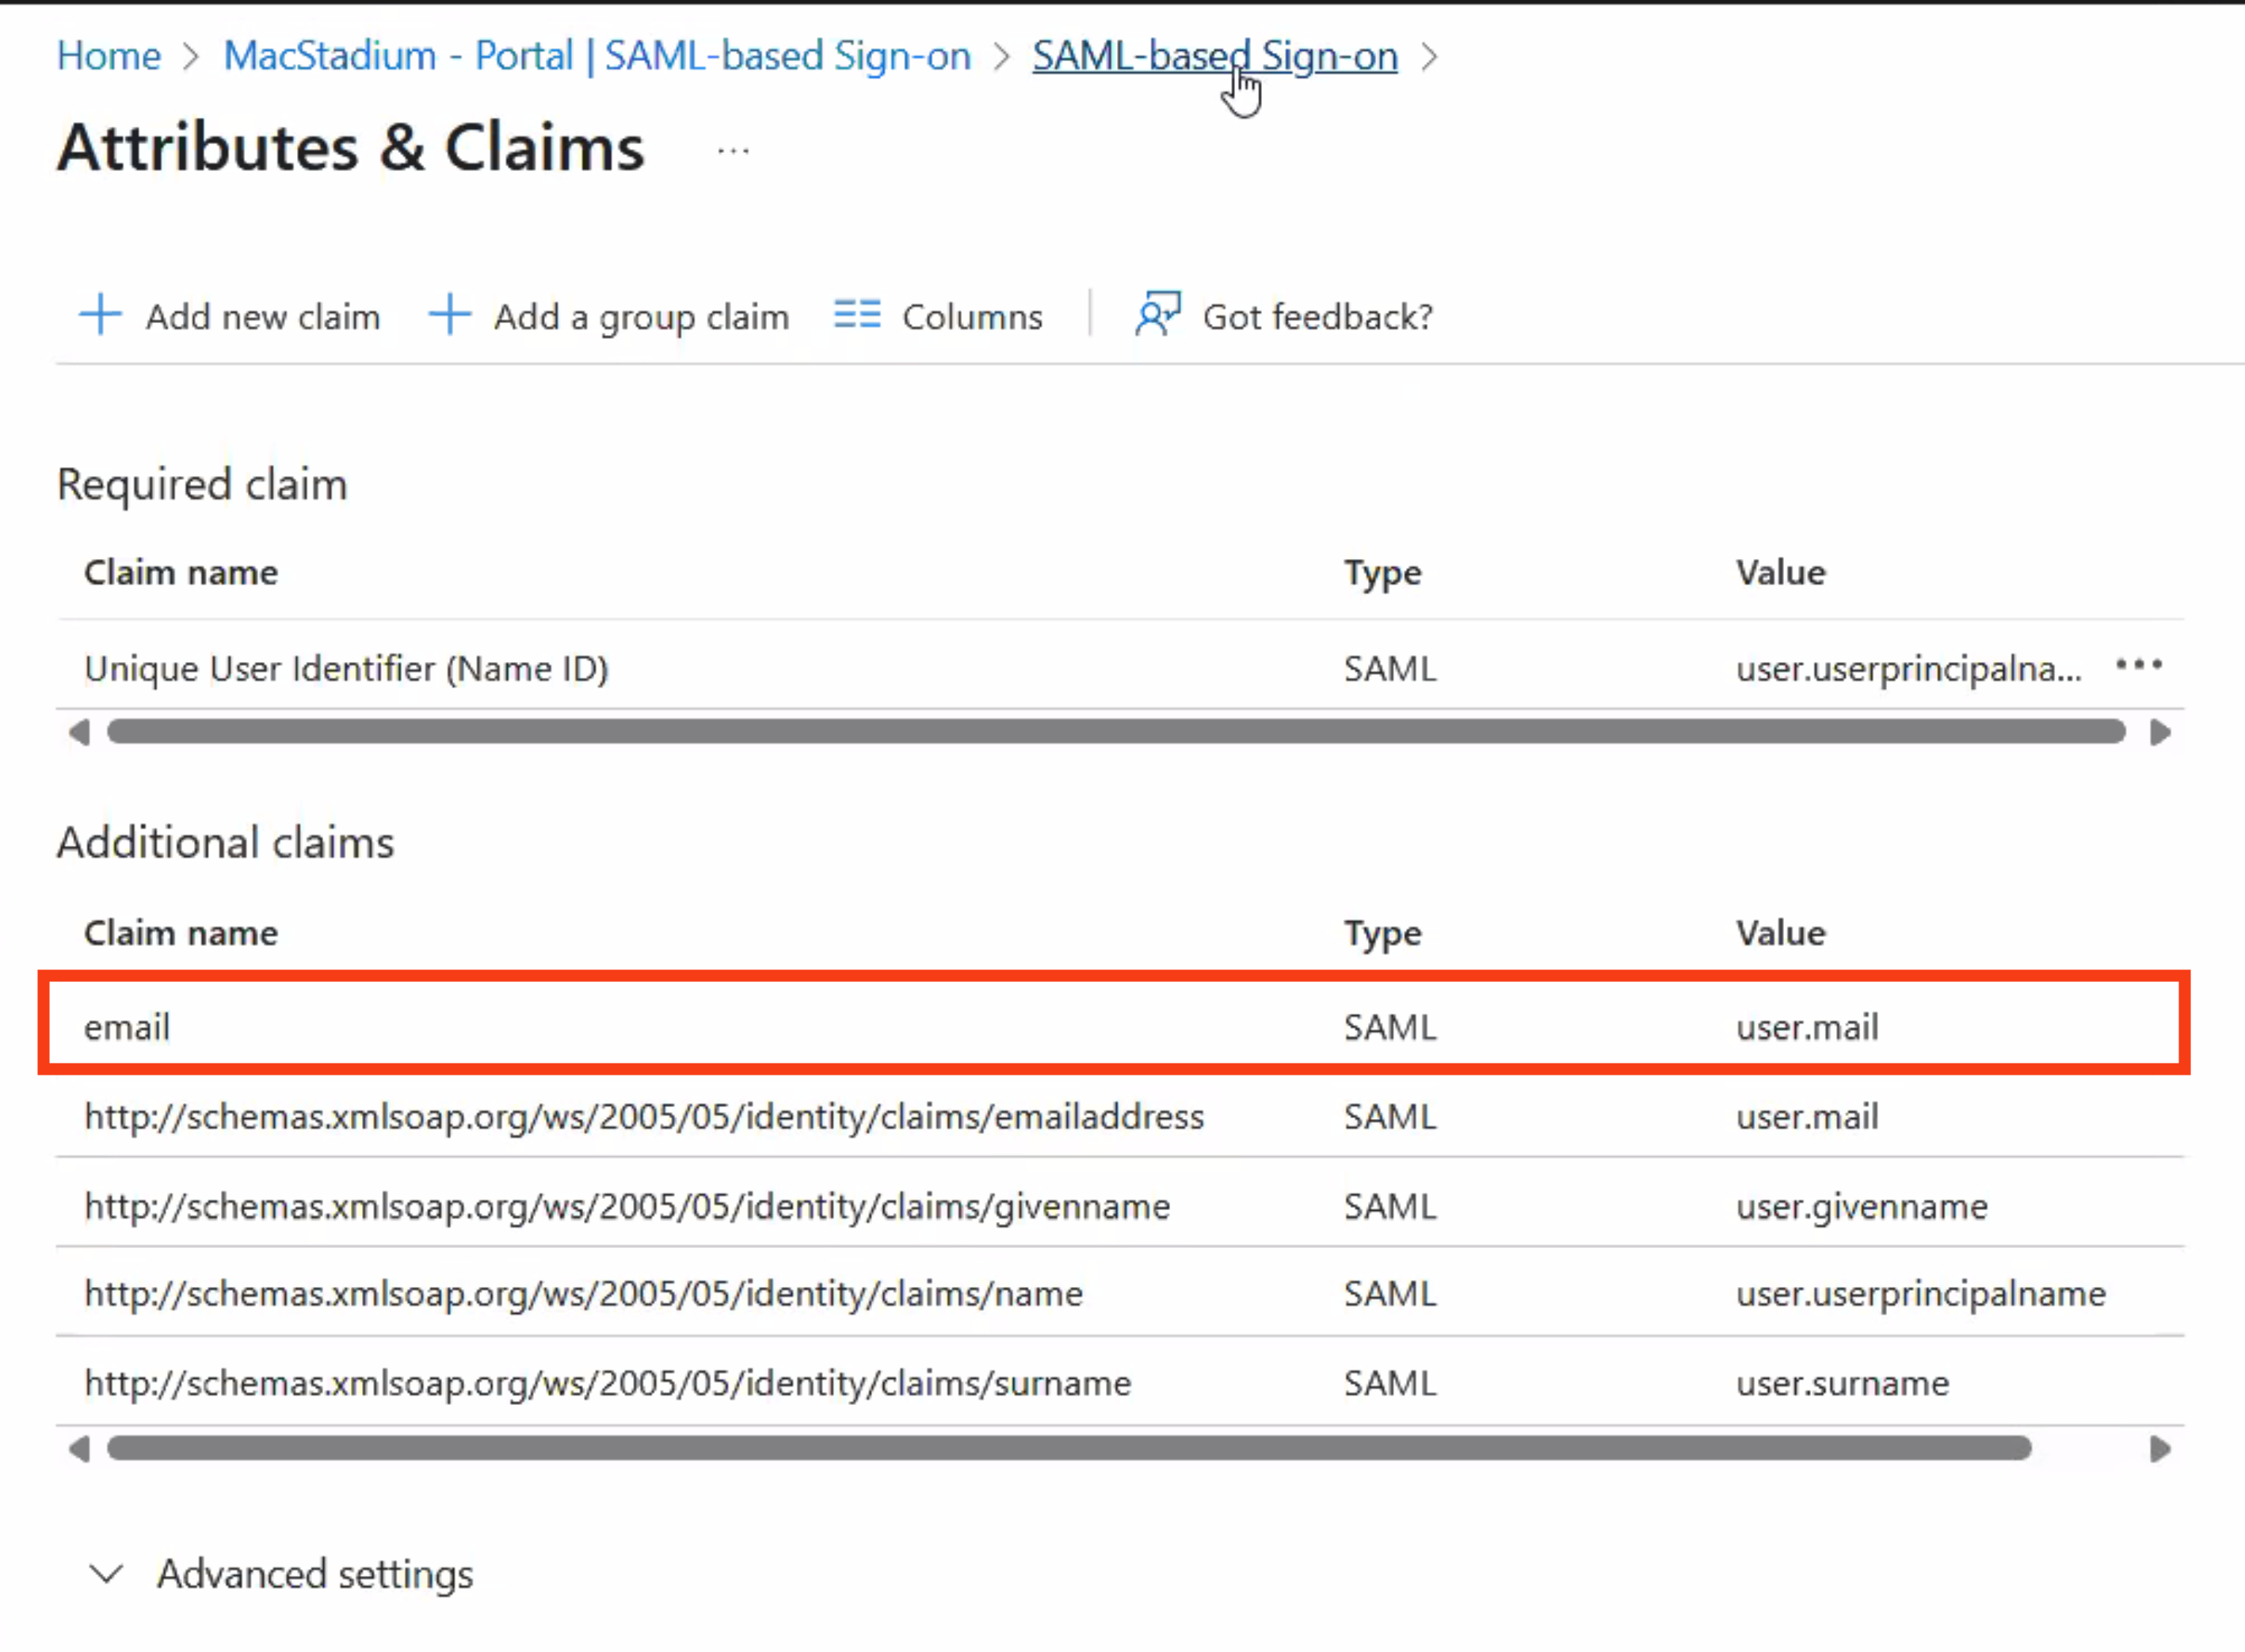
  9. Edit Attributes & Claims for your SAML app.
    The email field must be mapped to user.mail or login will fail.
    \ Azure Attributes and Claims configuration with email mapped to user.mail
Once configured properly, section 2 of your SAML app should look like the below screenshot.\ Azure SAML app section 2 showing correctly configured Attributes and Claims
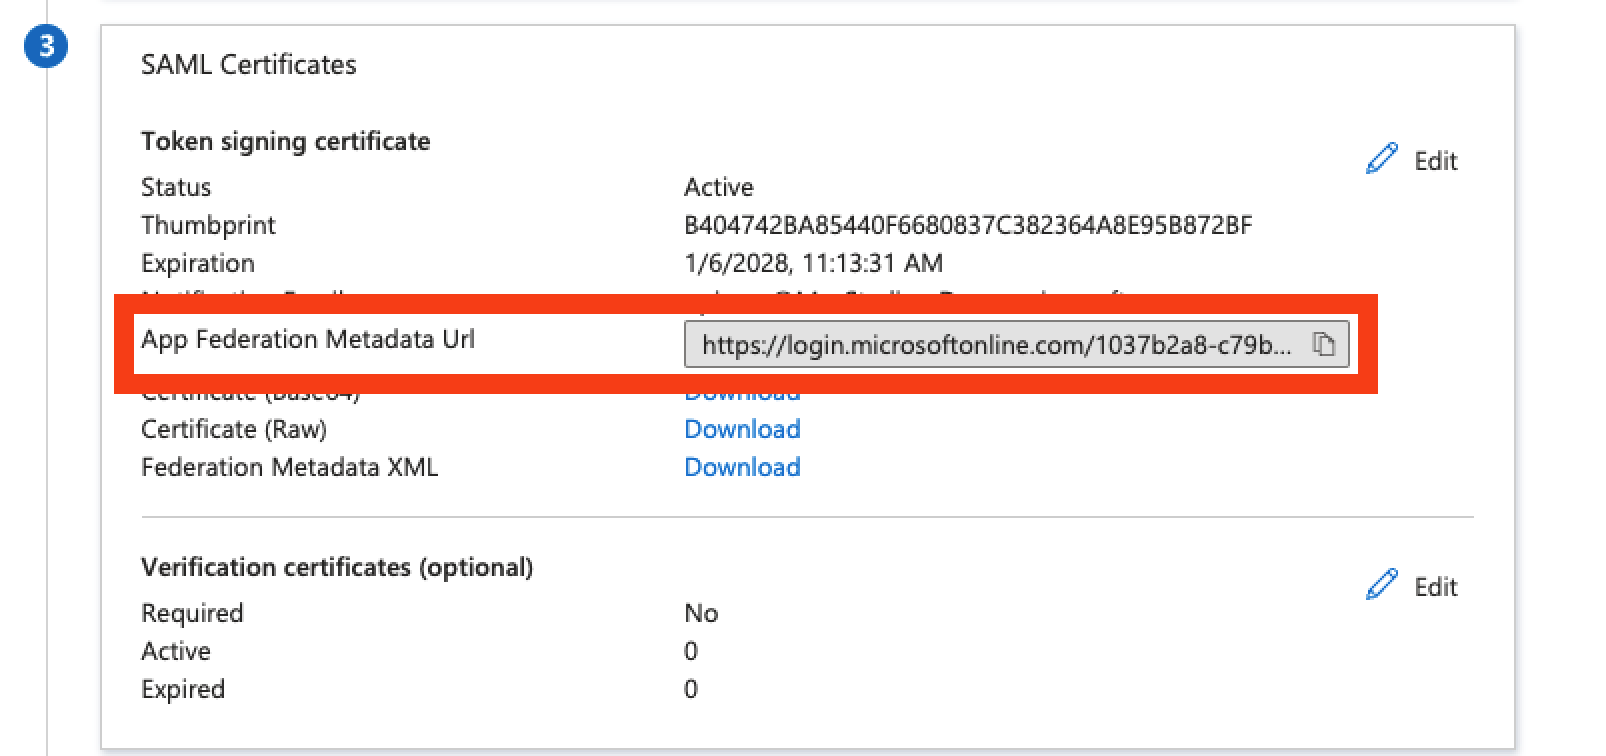
  1. Once the attributes & claims are updated, please provide our support team with the app federation metadata URL. You can copy the federation metadata URL in section 3 of your SAML app, as shown in the below screenshot.\ Azure SAML app section 3 showing App Federation Metadata URL to copy