Backup and Restore Firewall Config using ASDM
About
This process outlines how to backup and restore a configuration by executing line by line changes, while using a graphical user interface.
The backup files are stored on a local system as a ZIP file.
NOTE: It is important to store this ZIP file in an easily accessible place in case of an emergency. Plan a backup to be taken anytime changes are made to the firewall configuration.
Overview
If the firewall configuration is in an high-availability (HA) Pair, then ensure that the backup and restore to the Active firewall is enabled.
- This can verified on the Cisco Adaptive Security Device Manager (ASDM) Dashboard, under the Failover Status field.
- Look for Primary (Active). If this is not enabled, then login to the other firewall to perform these steps.
Prerequisites
*Access to MacStadium firewall
*MacStadium login information
*The ability to login to the firewall using the Cisco Adaptive Security Device Manager (ASDM) firewall software
NOTE: If a passphrase was set on the backup, then it needs to be available during the restore process.
Getting Started
Step 1 - Review the IP Plan information and gather the necessary computer and firewall information.
Step 2 - Create a Local User Account on the firewall to manage it.
Step 3 - Set up regular backup / restore testing.
Step 4 - Customize the firewall (for example, allowing IPs to access MacStadium via Internet).
Step 5 - (Optional) Site-to-Site configuration.
Backup Process
- Establish a VPN connection to the MacStadium environment.
- Connect to the firewall using the Cisco Adaptive Security Device Manager (ASDM).
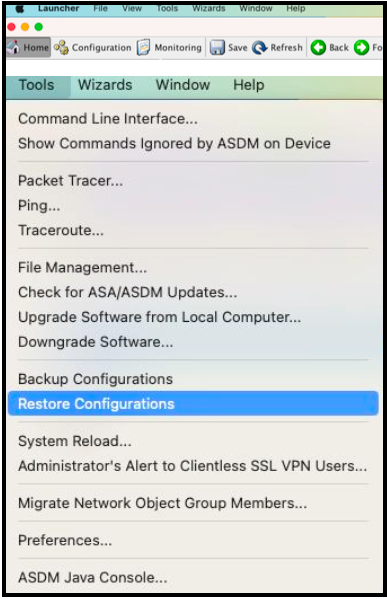
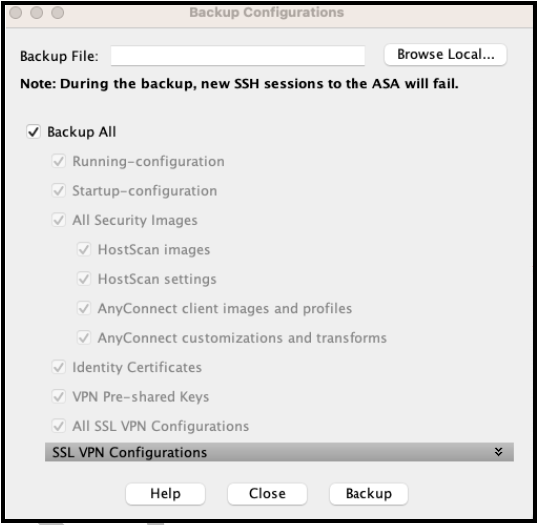
- Click the Tools menu, located at the top of the ASDM application and then select Backup Configuration.
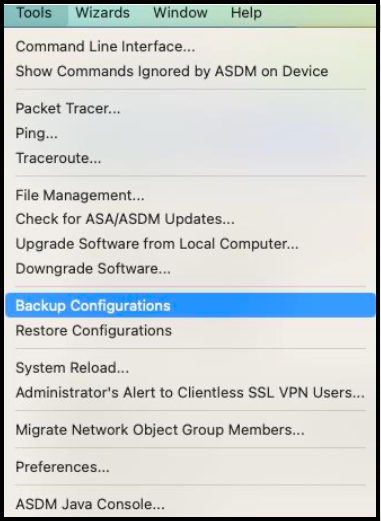
- Select a location to place the backup files.
- Enter a name for the backup file.
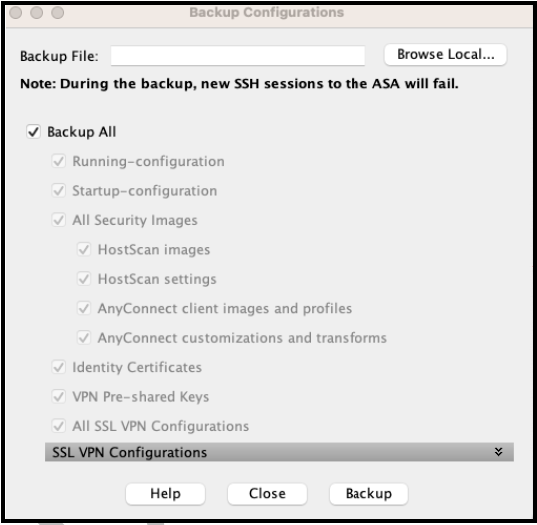
- The system shows the local file structure. Select an appropriate place and name for your backup.
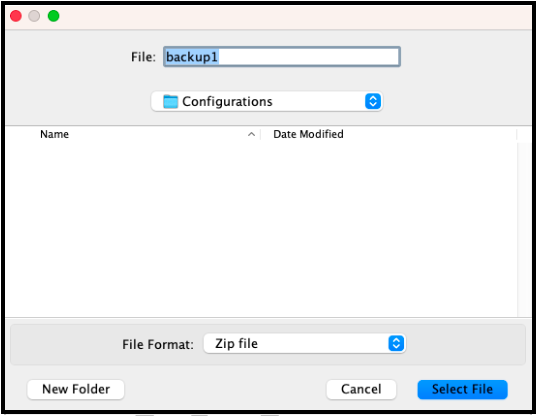
- Click Select File.
- Accept the defaults of Backup All.
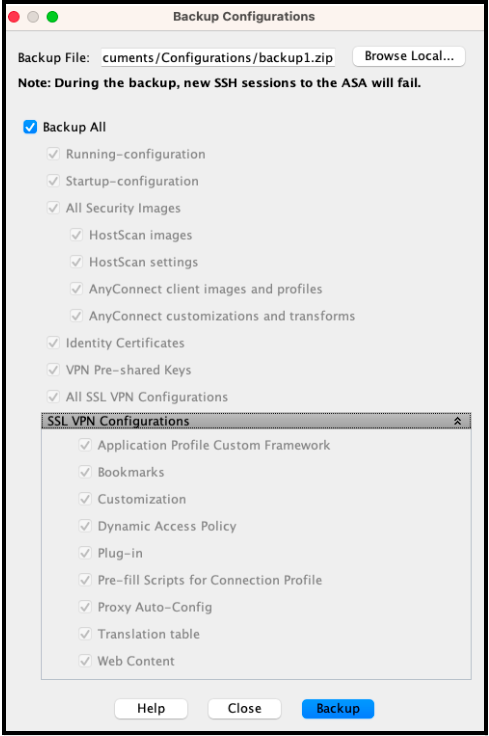
- Click Backup.
OPTIONAL: If the firewall is configured with identity certificates, then select a passphrase to encrypt identity certificates. Document the passphrase that is used as it is needed for future restores.
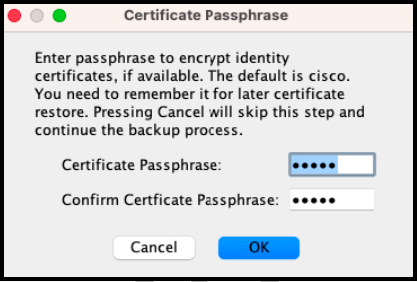
- Click OK.
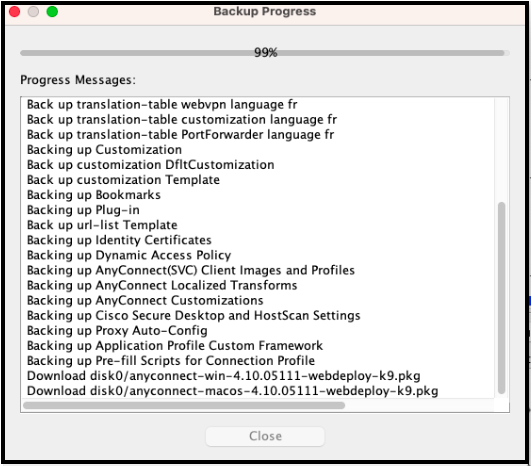
NOTE: The Progress Message can be copied to a text editor for review and validation.
- Click Close after backup is completed. A Backup Statistics window opens and displays additional information about the Backup process.
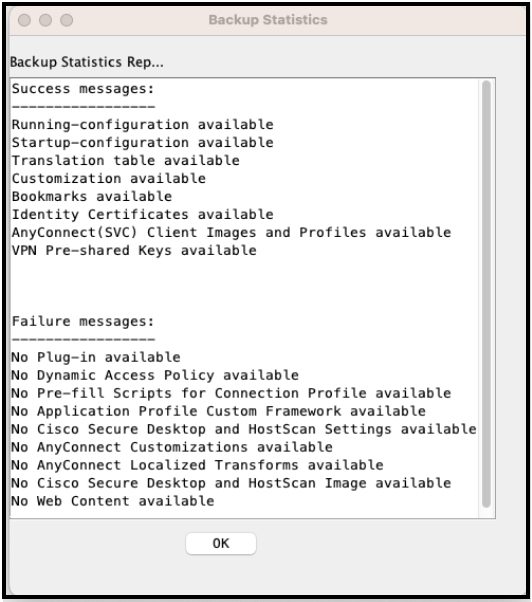
- Click OK.
Restore Process
- Establish a VPN connection to the MacStadium environment.
- Connect to the firewall using the Cisco Adaptive Security Device Manager (ASDM).
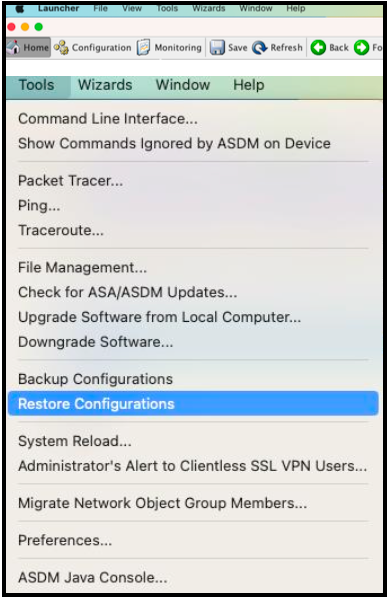
- Click on Tools and select Restore Configuration from the dropdown menu.
- Navigate to the location where the backup file was stored.
- Enter a name for the backup file.
- The system shows the local file structure. Select an appropriate place and name for your backup.
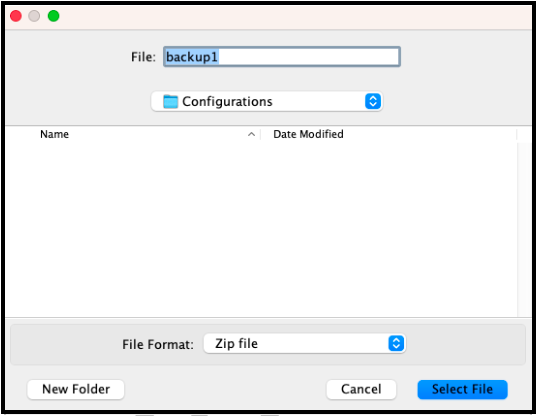
- Click Select File.
- Accept the defaults of Backup All.
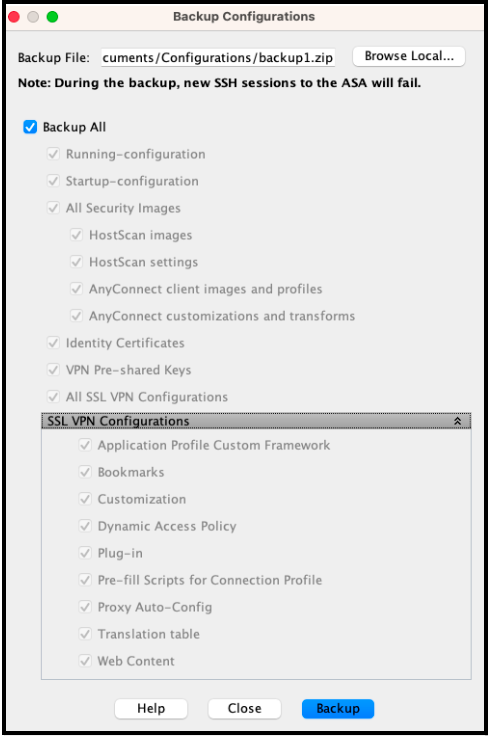
- Click Backup.
OPTIONAL: If the firewall is configured with identity certificates, then select a passphrase to encrypt identity certificates. Document the passphrase that is used as it is needed for future restores.
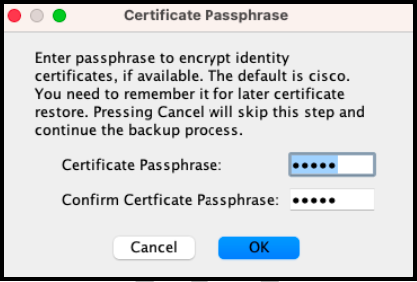
- Click OK.
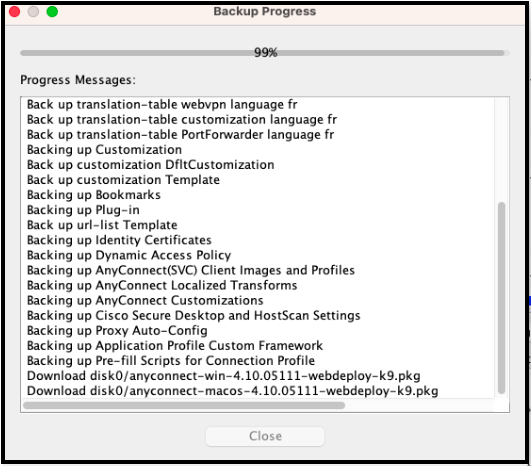
NOTE: The Progress Message can be copied to a text editor for review and validation.
- Click Close after backup is completed. A Backup Statistics window opens and displays additional information about the Backup process.
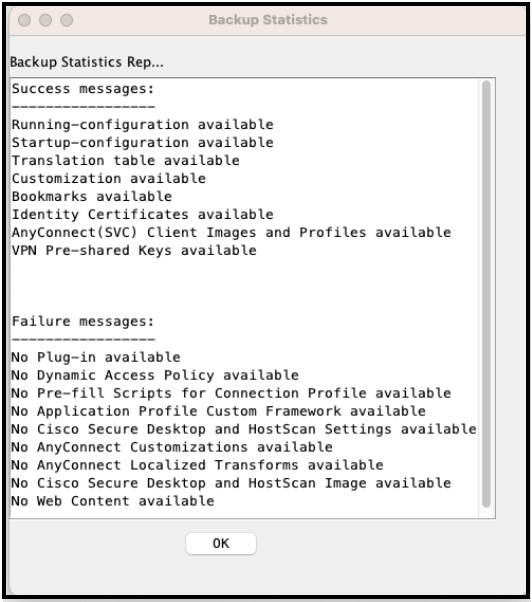
- Click OK.
Restore Process
- Establish a VPN connection to the MacStadium environment.
- Connect to the firewall using the Cisco Adaptive Security Device Manager (ASDM).
- Click on Tools and select Restore Configuration from the dropdown menu.
- Navigate to the location where the backup file was stored.
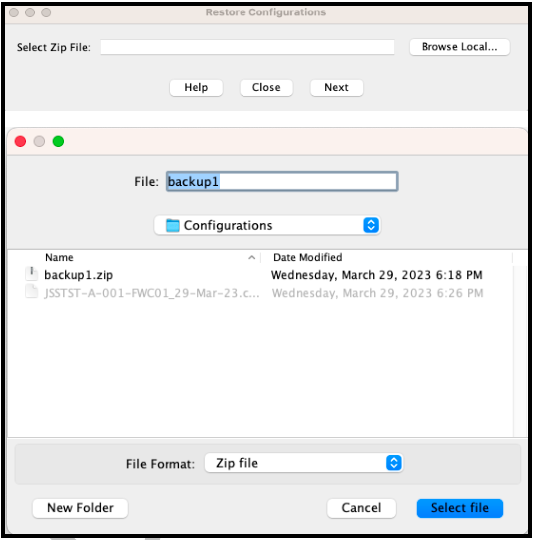
- Click Select file.
- Click Next to proceed.

- From the Restore Configurations pop-up page, select the options to restore.
RECOMMENDED SETTINGS:
*Running configuration
*Start-up configuration
*All Security Images
*Identity Certificates
*(Leave the remaining default options untouched)
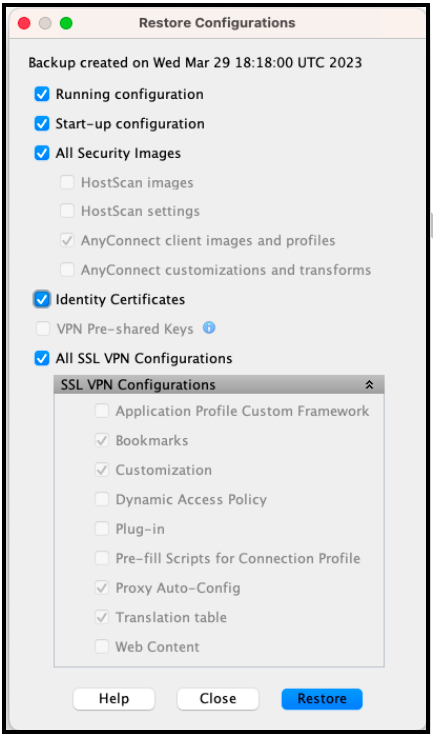
- Click Restore.

- Click Yes.
NOTE: If applicable, enter the Certificate Passphrase used to backup the identity Certificate, then click the OK.
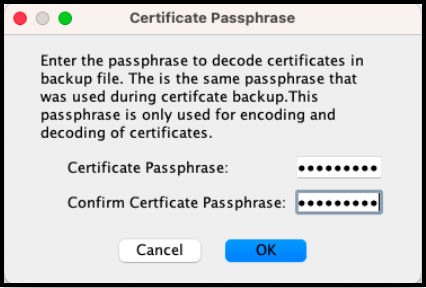
- Select Replace or Merge. Click the corresponding option.
NOTE: Click Replace to replace the current configuration or Merge to merge the backup with the current configuration. The recommended option is Replace.

- The following message may appear during the Restore Progress.
NOTE: Select Refresh Now or Cancel button. Choosing Cancel will not halt the Restore process.
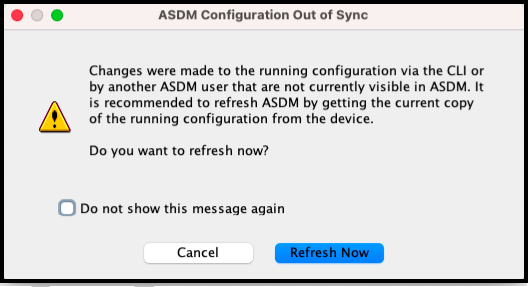
- Once the Restore process is complete, click Close.
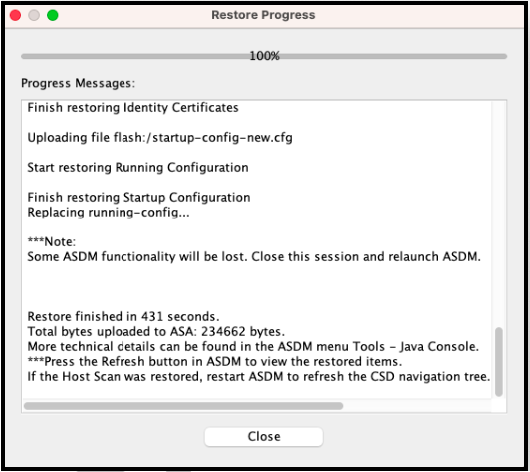
NOTE:The Progress Message can be copied to a text editor for review and validation.
- To verify the restore process, close the ASDM application and then relaunch it.
- Review the configuration that is loaded with the device manager.
- Close the application.
NOTE: The following Unapplied Changes message box may appear:
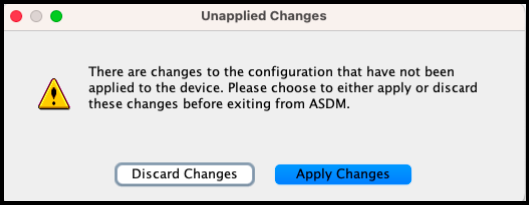
*If the Unapplied Changes message box appears, then click Apply Changes.
*If the Unapplied Changes message box does not appear, then click Save in the ASDM application.
NOTES:
*If firewall access prevents enables the backup process but does not enable the restore process, then open a MacStadium Support ticket.
*In the ticket, request that a restore take place for the firewall device.
*Provide the Firewall IP, the backup file, and permissions to perform the restore in the ticket.
*Request a specific time for the restore, or it will performed as soon as possible.
Updated 10 months ago
