To establish a stable, persistent connection between a Google Cloud Platform (GCP) private cloud and your MacStadium private cloud, you need to configure a policy-based IPsec site-to-site VPN between the two clouds.
Currently, you can create only a classic VPN connection with policy-based routing from GCP to MacStadium. It consists of one tunnel and one interface and does not provide high availability. For more information about this option, see Google Cloud Documentation: Classic VPN.
To create a site-to-site VPN from your GCP private cloud to your MacStadium private cloud, you need to go through the following high-level steps:
- Log into GCP
- Create the VPN connection
Log into GCP
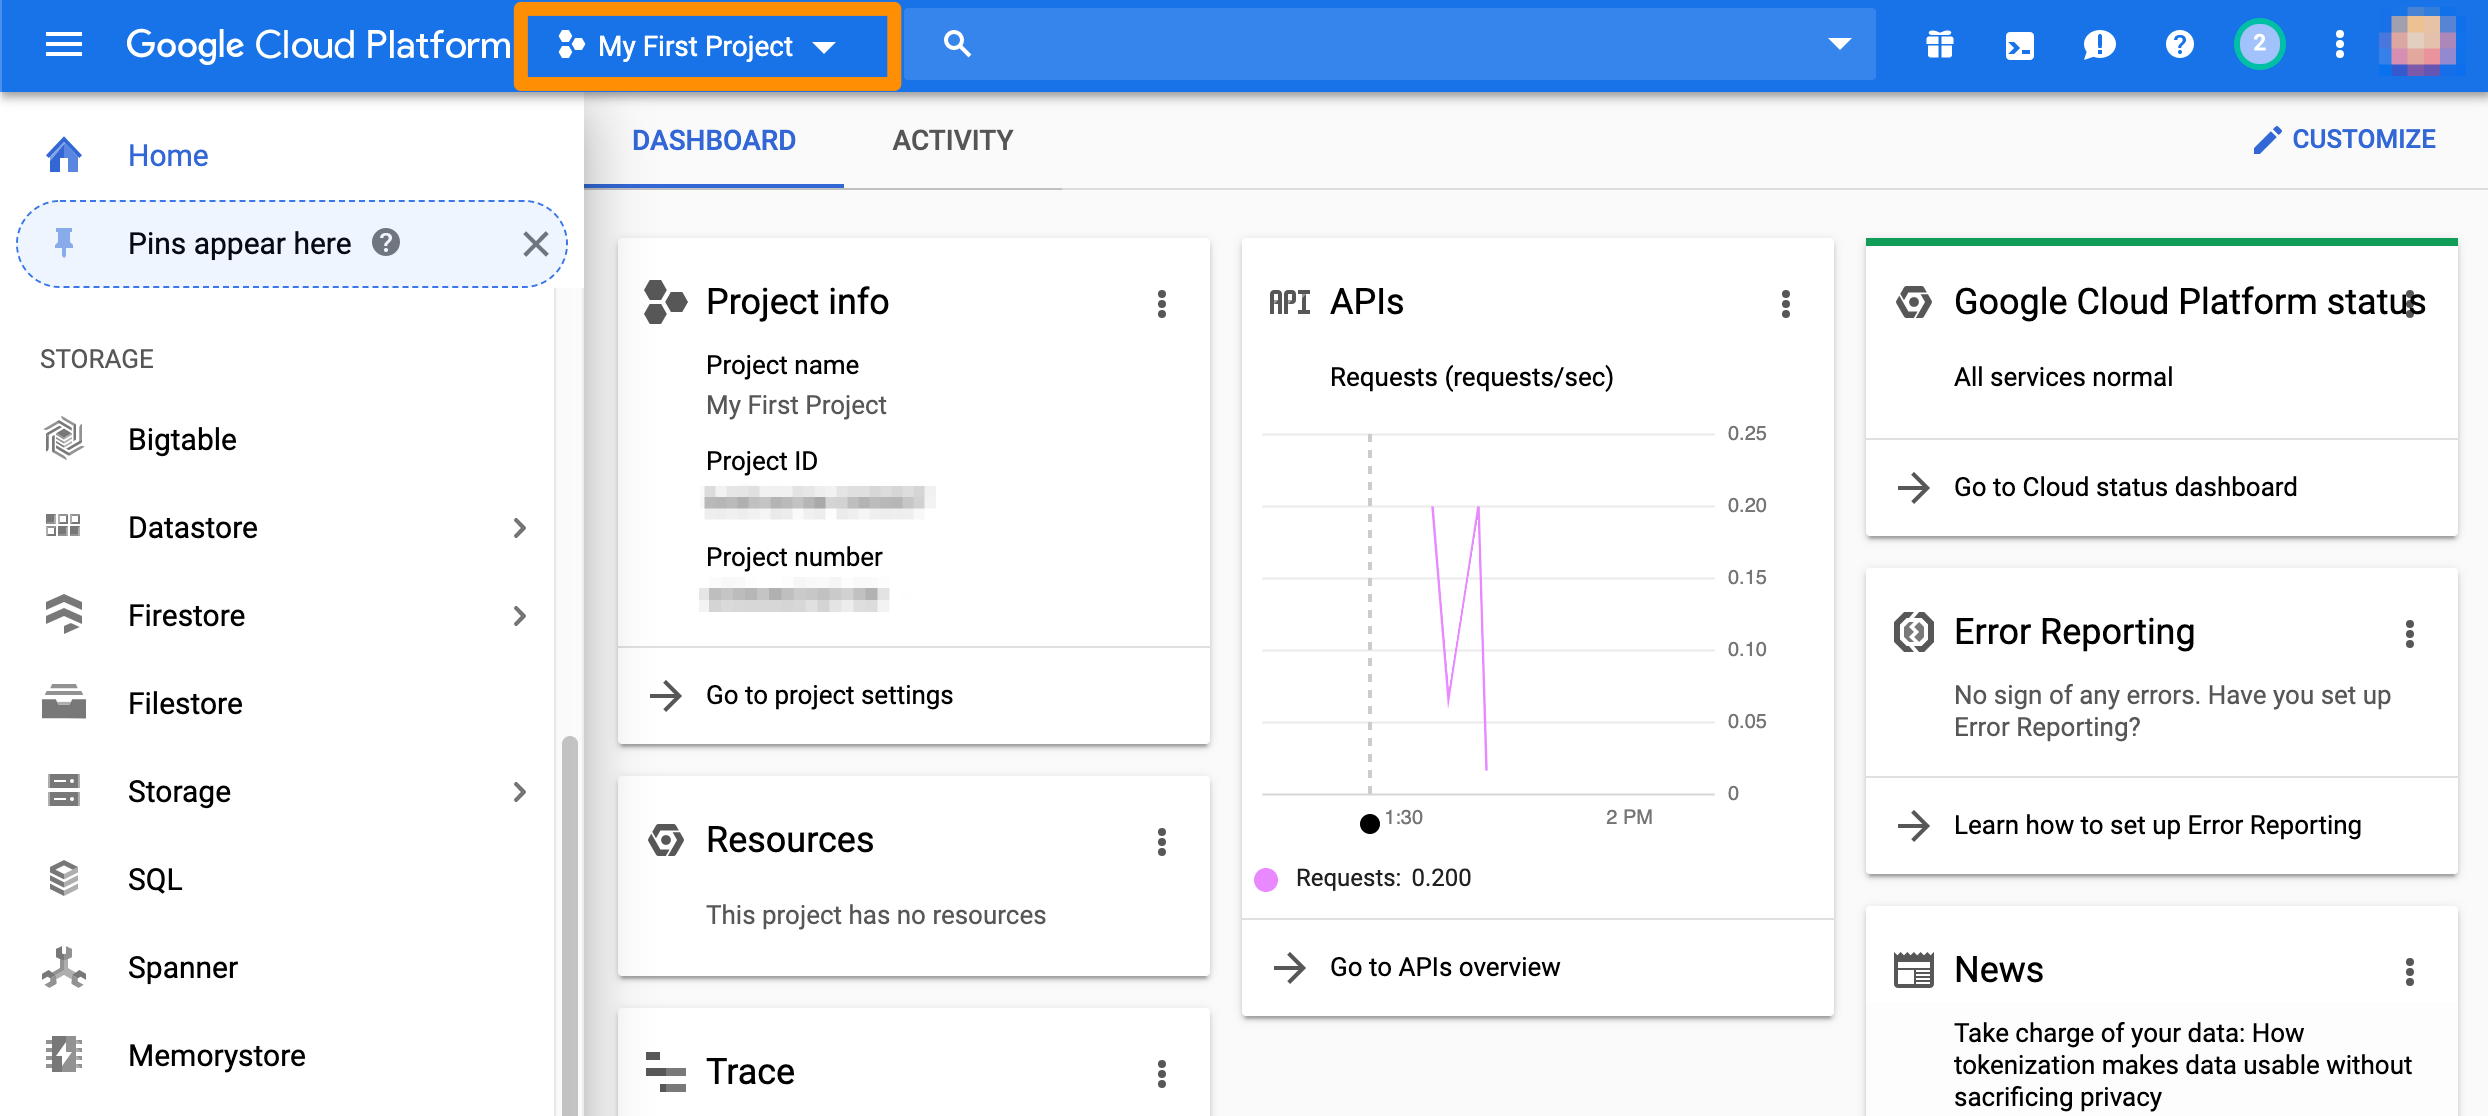
- Log in to the GCP console with your credentials.
- In the toolbar at the top, make sure that you’re working with the correct project.\
Create the VPN connection
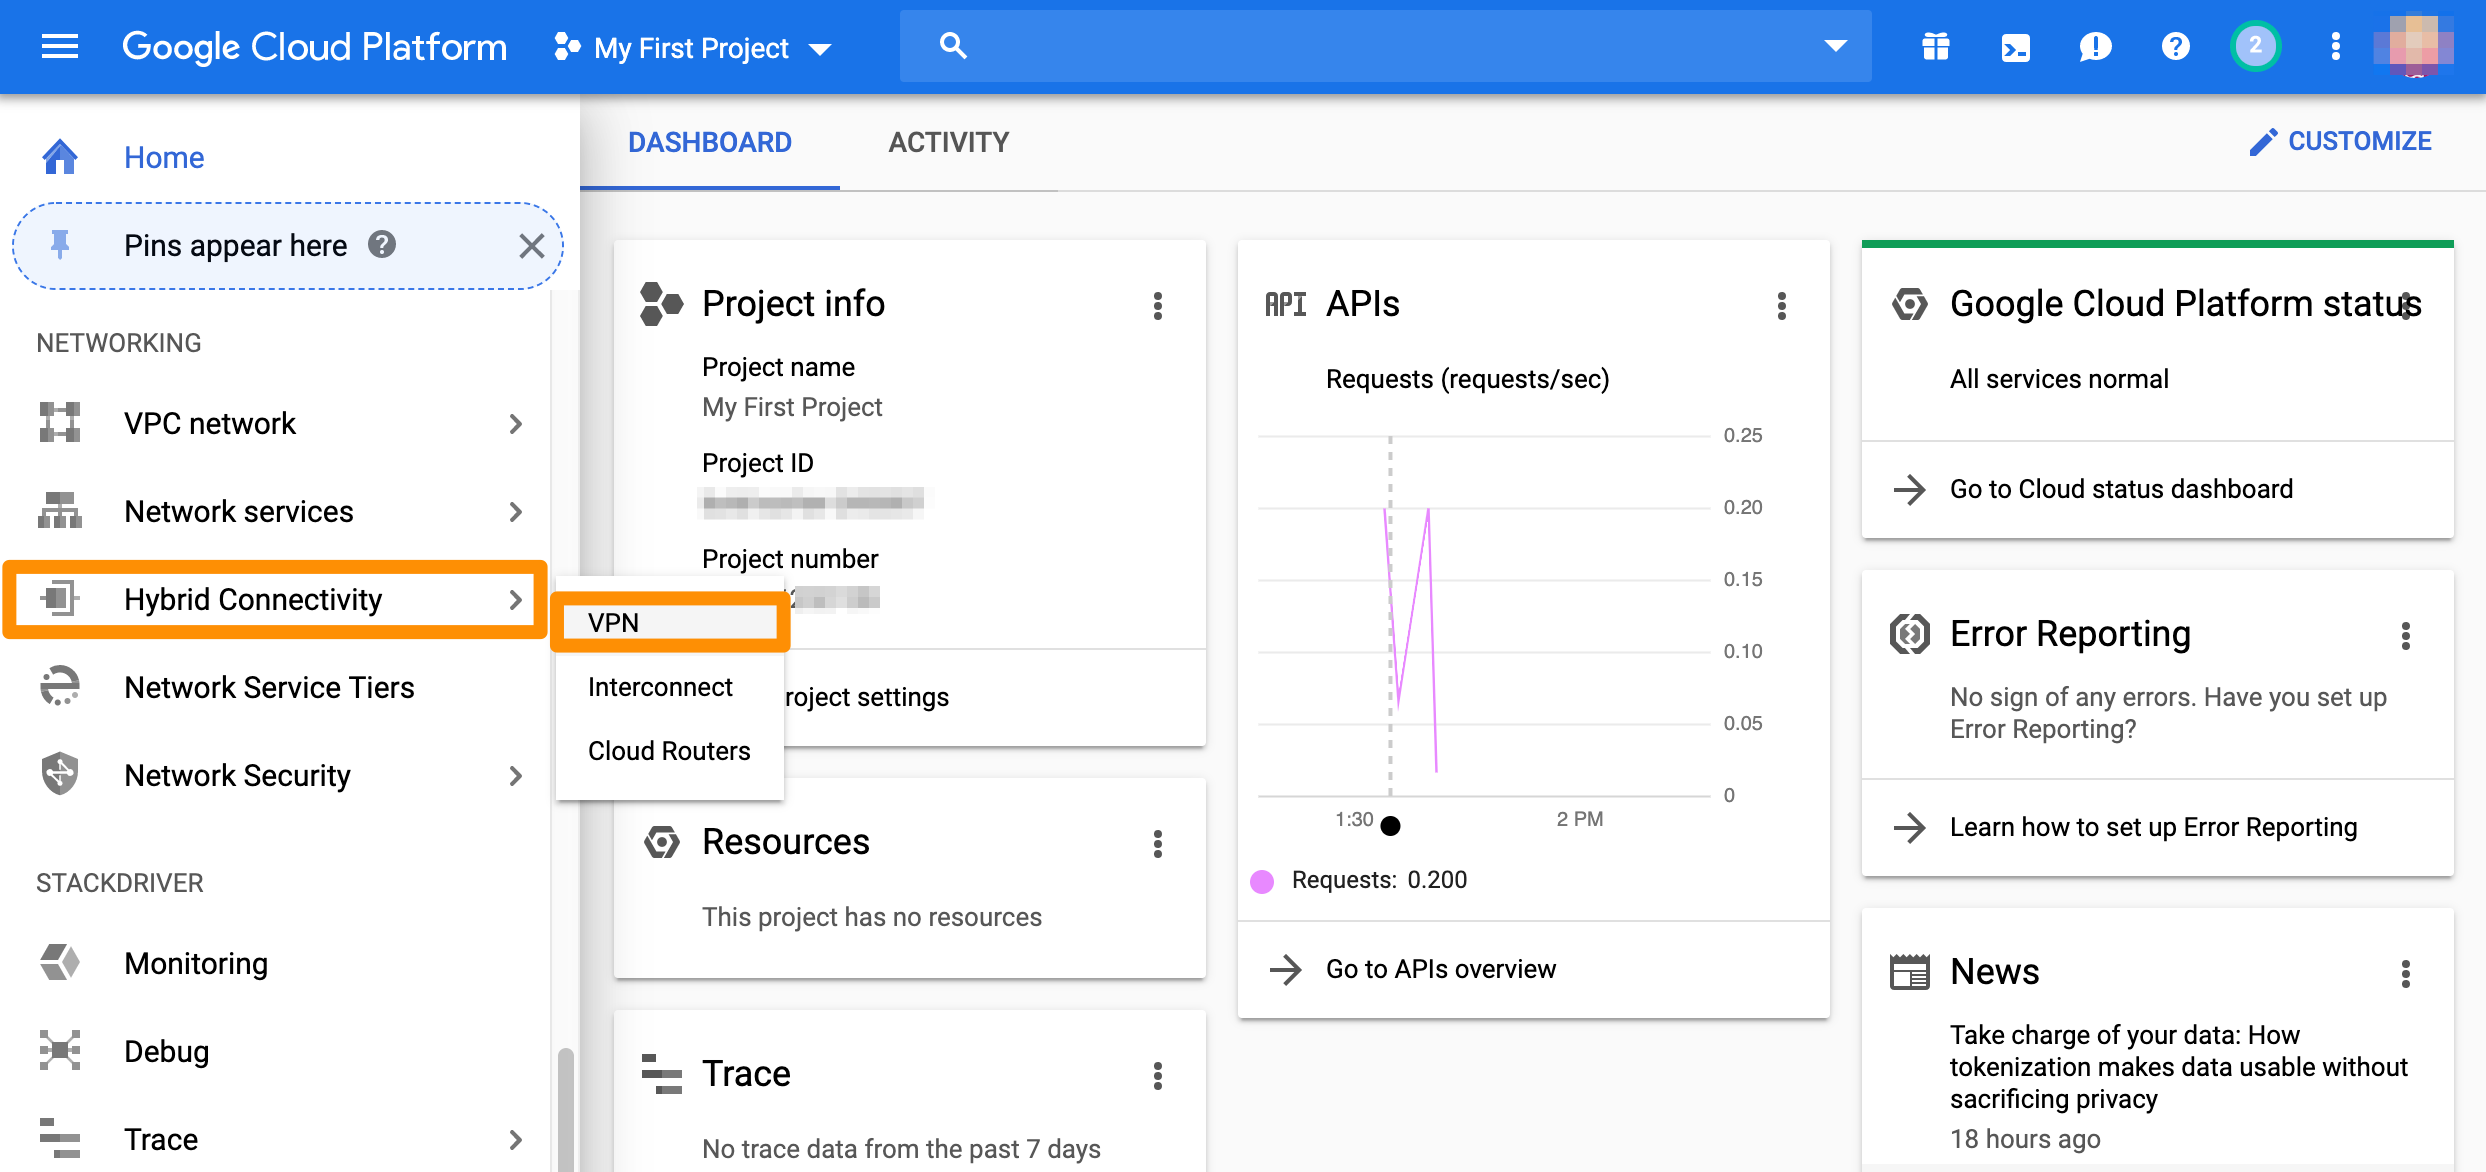
From the GCP console sidebar, scroll to the Networking section and select Hybrid Connectivity > VPN.
 Classic VPN connections in GCP consist of a gateway and tunnel. You can create a gateway and a tunnel at once or you can add a new tunnel to an existing gateway.
Create gateway and tunnel
If you don’t have a classic VPN gateway that you want to use, complete the following steps.
-
If you don’t have any VPNs created yet, click Create VPN connection.
-
If you have one or more VPNs created, click + VPN SETUP WIZARD.
-
Select Classic VPN and click Continue.
-
In the Google Compute Engine VPN gateway section, provide Name and Description.
-
For Network, select the GCP network that needs to be able to access MacStadium.
-
Select Region.
-
Select or create a reserved IP address for the connection.
- You will need this IP address when you configure the MacStadium side of the tunnel.
-
In the Tunnels section, provide Name and Description.
-
For Remote peer IP address, provide the IP address of the public network listed in Appendix B of the IP Plan.
- By default, this is the FW1-Outside network.
-
For IKE version, verify that IKEv2 is selected.
-
Provide or generate an IKE pre-shared key.
Keep a record of the pre-shared key. You will need it later.
-
For Routing options, select Policy-based.
-
For Remote network IP ranges, provide the IP range in CIDR notation of the private network listed in Appendix A of the IP Plan.
- (Optional) Select one or more GCP subnetworks to reduce latency between your GCP private cloud and your MacStadium private cloud.
-
(Optional) Provide one or more IP ranges within your GCP local network that needs to access MacStadium.
-
Click Done.
-
Click Create.
After the creation is complete, the VPN tunnel status is: First handshake.
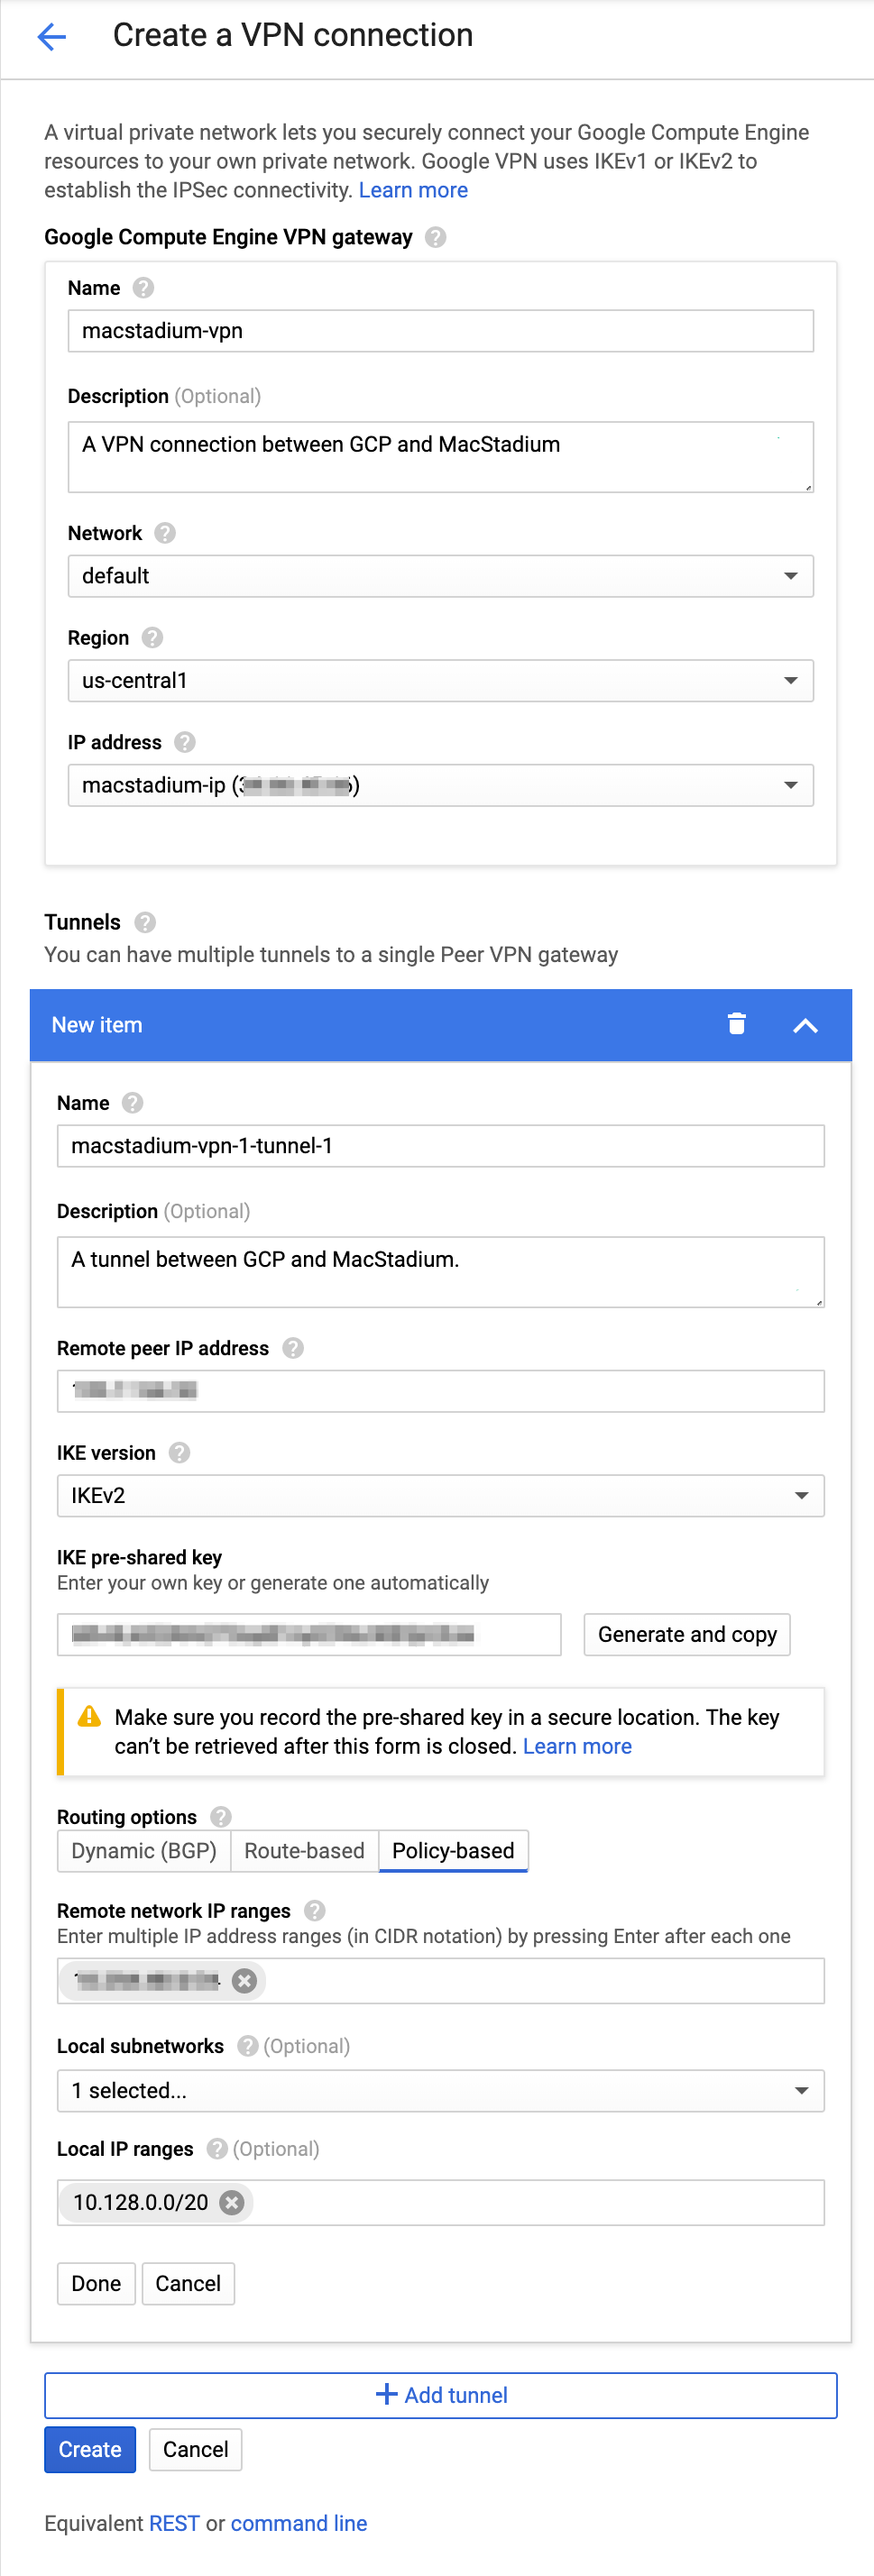
Example: Create gateway and tunnel
This image shows a sample configuration for the VPN gateway and tunnel.
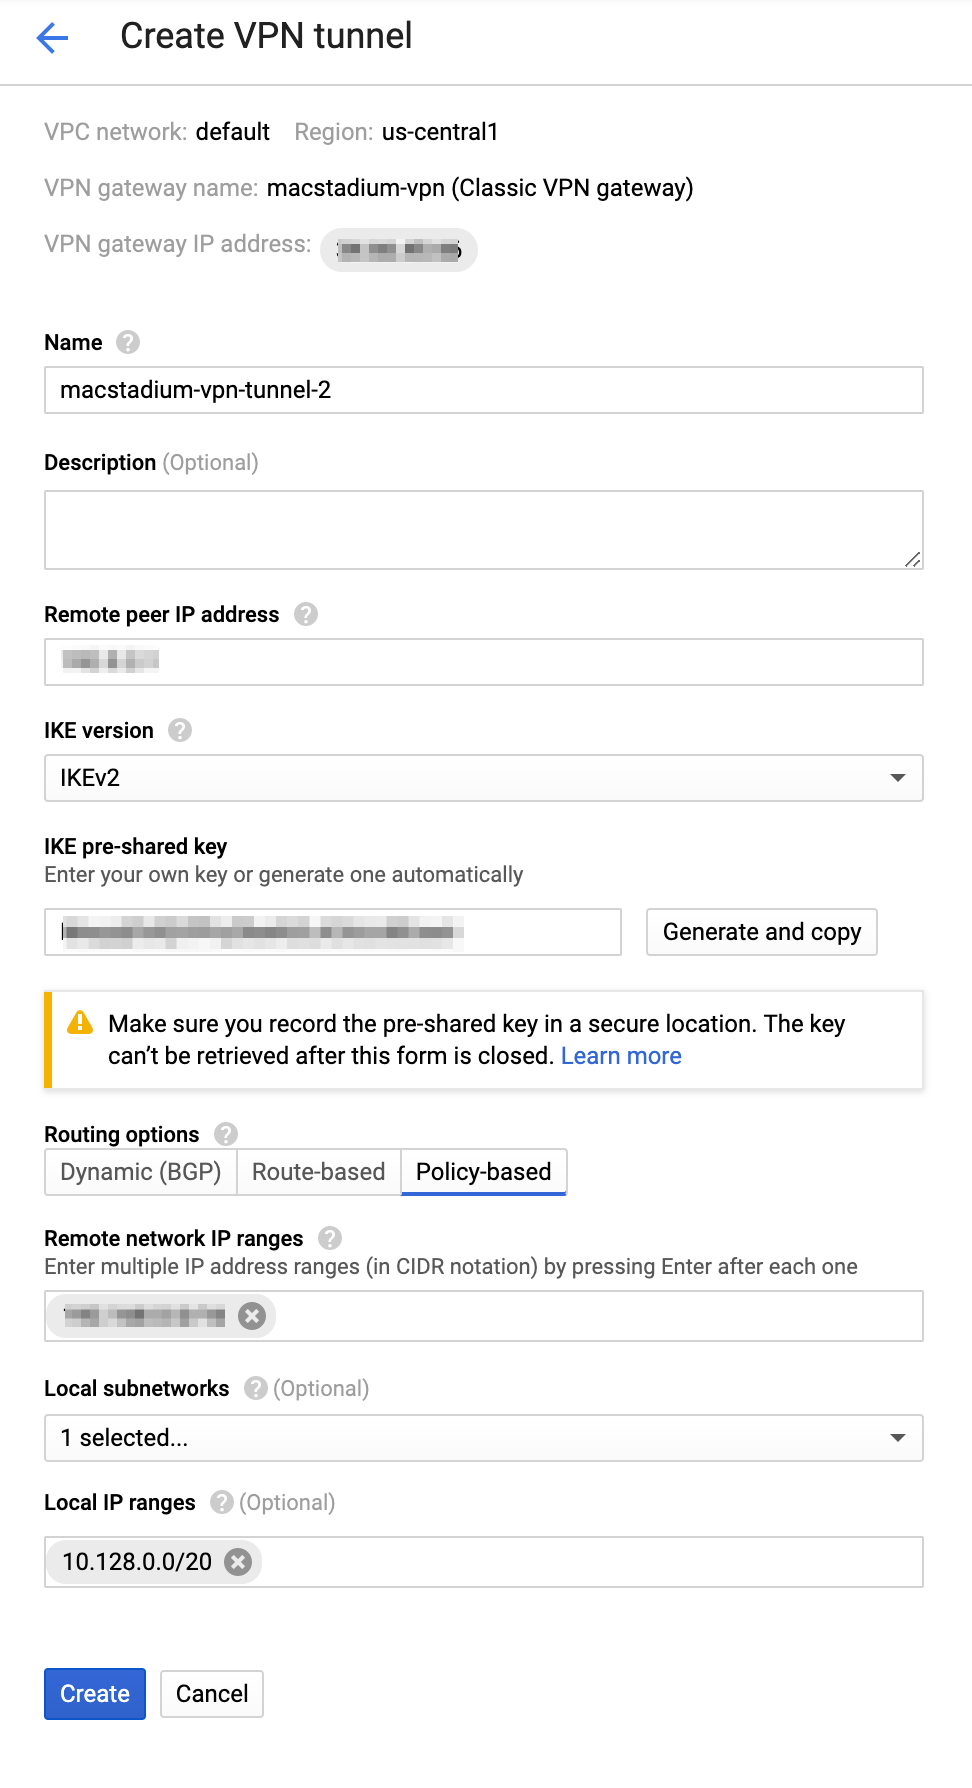
Add a new tunnel to an existing gateway
If you have an existing classic VPN gateway that you want to use for the connection, complete the following steps.
- Select Cloud VPN Tunnels and click Create VPN tunnel.\
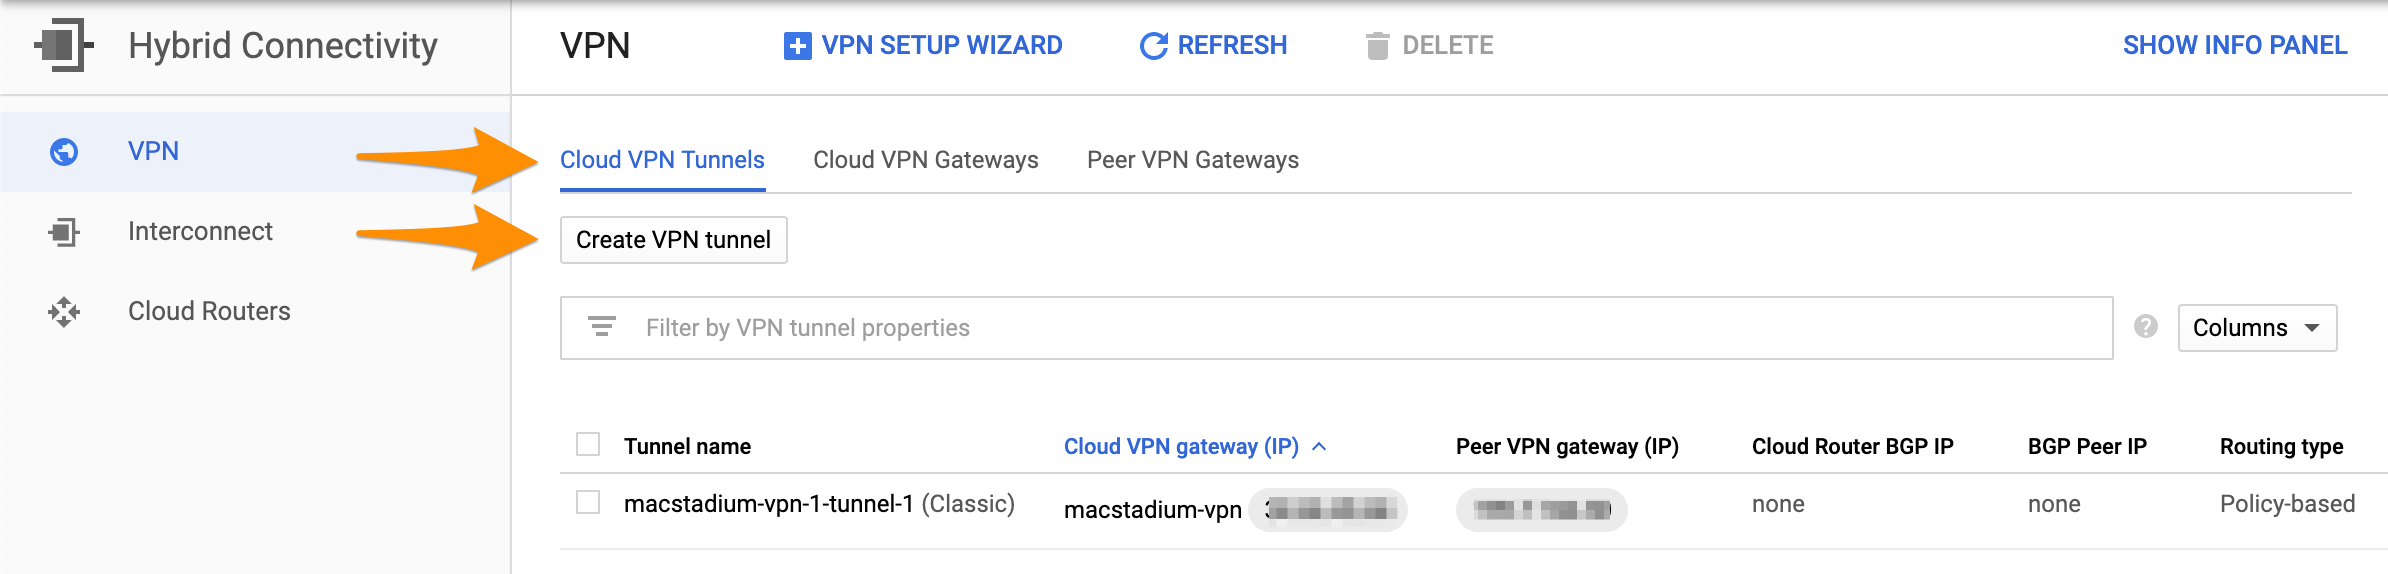
- Select the VPN gateway that you want to use and click Continue.
Make sure that you have selected a classic VPN gateway. High-availability gateways are not supported.
-
Provide Name.
-
(Optional) Provide Description.
-
For Remote peer IP address, provide the IP address of the public network listed in Appendix B of the IP Plan.
- By default, this is the FW1-Outside network.
-
For IKE version, verify that IKEv2 is selected.
-
Provide or generate an IKE pre-shared key.
Keep a record of the pre-shared key. You will need it later.
-
For Routing options, select Policy-based.
-
For Remote network IP ranges, provide the IP range in CIDR notation of the private network listed in Appendix A of the IP Plan.
-
(Optional) Select one or more GCP subnetworks to reduce latency between your GCP private cloud and your MacStadium private cloud.
-
(Optional) Provide one or more IP ranges within your GCP local network that needs to access MacStadium.
-
Click Create.
After the creation is complete, the VPN tunnel status is: First handshake.
Example: Create the VPN gateway and tunnel
This image shows a sample configuration for the VPN connection.
Ensure that the GCP firewall allows ingress traffic
Based on your requirements, you might need to enable ingress traffic from MacStadium to GCP in the GCP firewall. For more information, see Google Cloud Documentation: Configuring firewall rules > Example configurations.
Next steps
If you are ready to proceed with the MacStadium side of the configuration, see Preparing the VPN Configuration for Input into Cisco ASA/ASAv.