About
SAML SSO is a paid offering. Contact your account team through the Customer Portal for more information.
Overview
SAML SSO with Okta, allows customers to:- Enable users to be automatically signed in to MacStadium using their Okta accounts.
- Manage users in one central location – Okta.
Getting Started
- Save the public signature key below (for example, save to
macstadium-us-east-1_pusi8jHs1.pem)
-----BEGIN CERTIFICATE----- MIICvDCCAaSgAwIBAgIIdQAHcexaNC4wDQYJKoZIhvcNAQELBQAwHjEcMBoGA1UE AwwTdXMtZWFzdC0xX3B1c2k4akhzMTAeFw0yNDAxMTAxNDEzMThaFw0zNDAxMTAw MDI1MThaMB4xHDAaBgNVBAMME3VzLWVhc3QtMV9wdXNpOGpIczEwggEiMA0GCSqG SIb3DQEBAQUAA4IBDwAwggEKAoIBAQDiLAh9YbRaJFwq6wODIsJixW9sCPVbO6MR wtSXEqDp1oRuJ//c7DVsytJd3koj1WRtF9+Hg1lvhx9Of+D0l5hjltB4mbeaQpOx cwgdxCepba2OuzxpU4APOCyU++NBfqe3Be+GIkWnbygsYFo5Dq26dFTSzYq/UNam YBTRgPh28k3yv82A2cH96wqwWGuLg52TUc56AGSCAwTCqN5VlwNaMzAuYqxHW2zo tmeLtC9T8q0vS+/UWq/EckR7jV/R4ziyEYB/PWgkZNUnOp0TCYtiuoYdHuqzoazW jhQjil9W0TsUq6k6Vo2ISz+r3XxlXXQMk6blmfJDU7JcMEkPZybhAgMBAAEwDQYJ KoZIhvcNAQELBQADggEBAJ8QzPsFgF/prkw2/qsgfAs0nKJY+zAaIqYSGZlYY4pq pObs0q2O8R3ecsS8e1cpahn4GdstPad69CqgyqPVf7EZm5ZMfUY9s5P7ufDJ3neh /YTp6KX1yHG8PJwJuCPSbB6OxcQirrxOKwsT2tPUMOziYHPQuickpJ7WlxEso3Xj QlcU+F4L8tjhxxF3/T7+fOlzZmivLcBPVx7z+21VoARhJvetoqCqzRccrOitHWye Bma/C6JOtvFq3JPWH0rgmAV6IGhvCSro4ANaToEmK7JYXiOD13DlA44P0l6gV7L8 p5EbQgF1F9eBQpfvL2E3Ml/+ZrXf5zBr5EjSLKvj/NE= -----END CERTIFICATE-----
- Open Okta admin.
- Navigate to Applications → Applications.
- Create a new App integration by clicking Create App Integration.
- Select SAML 2.0.

- Click Next.
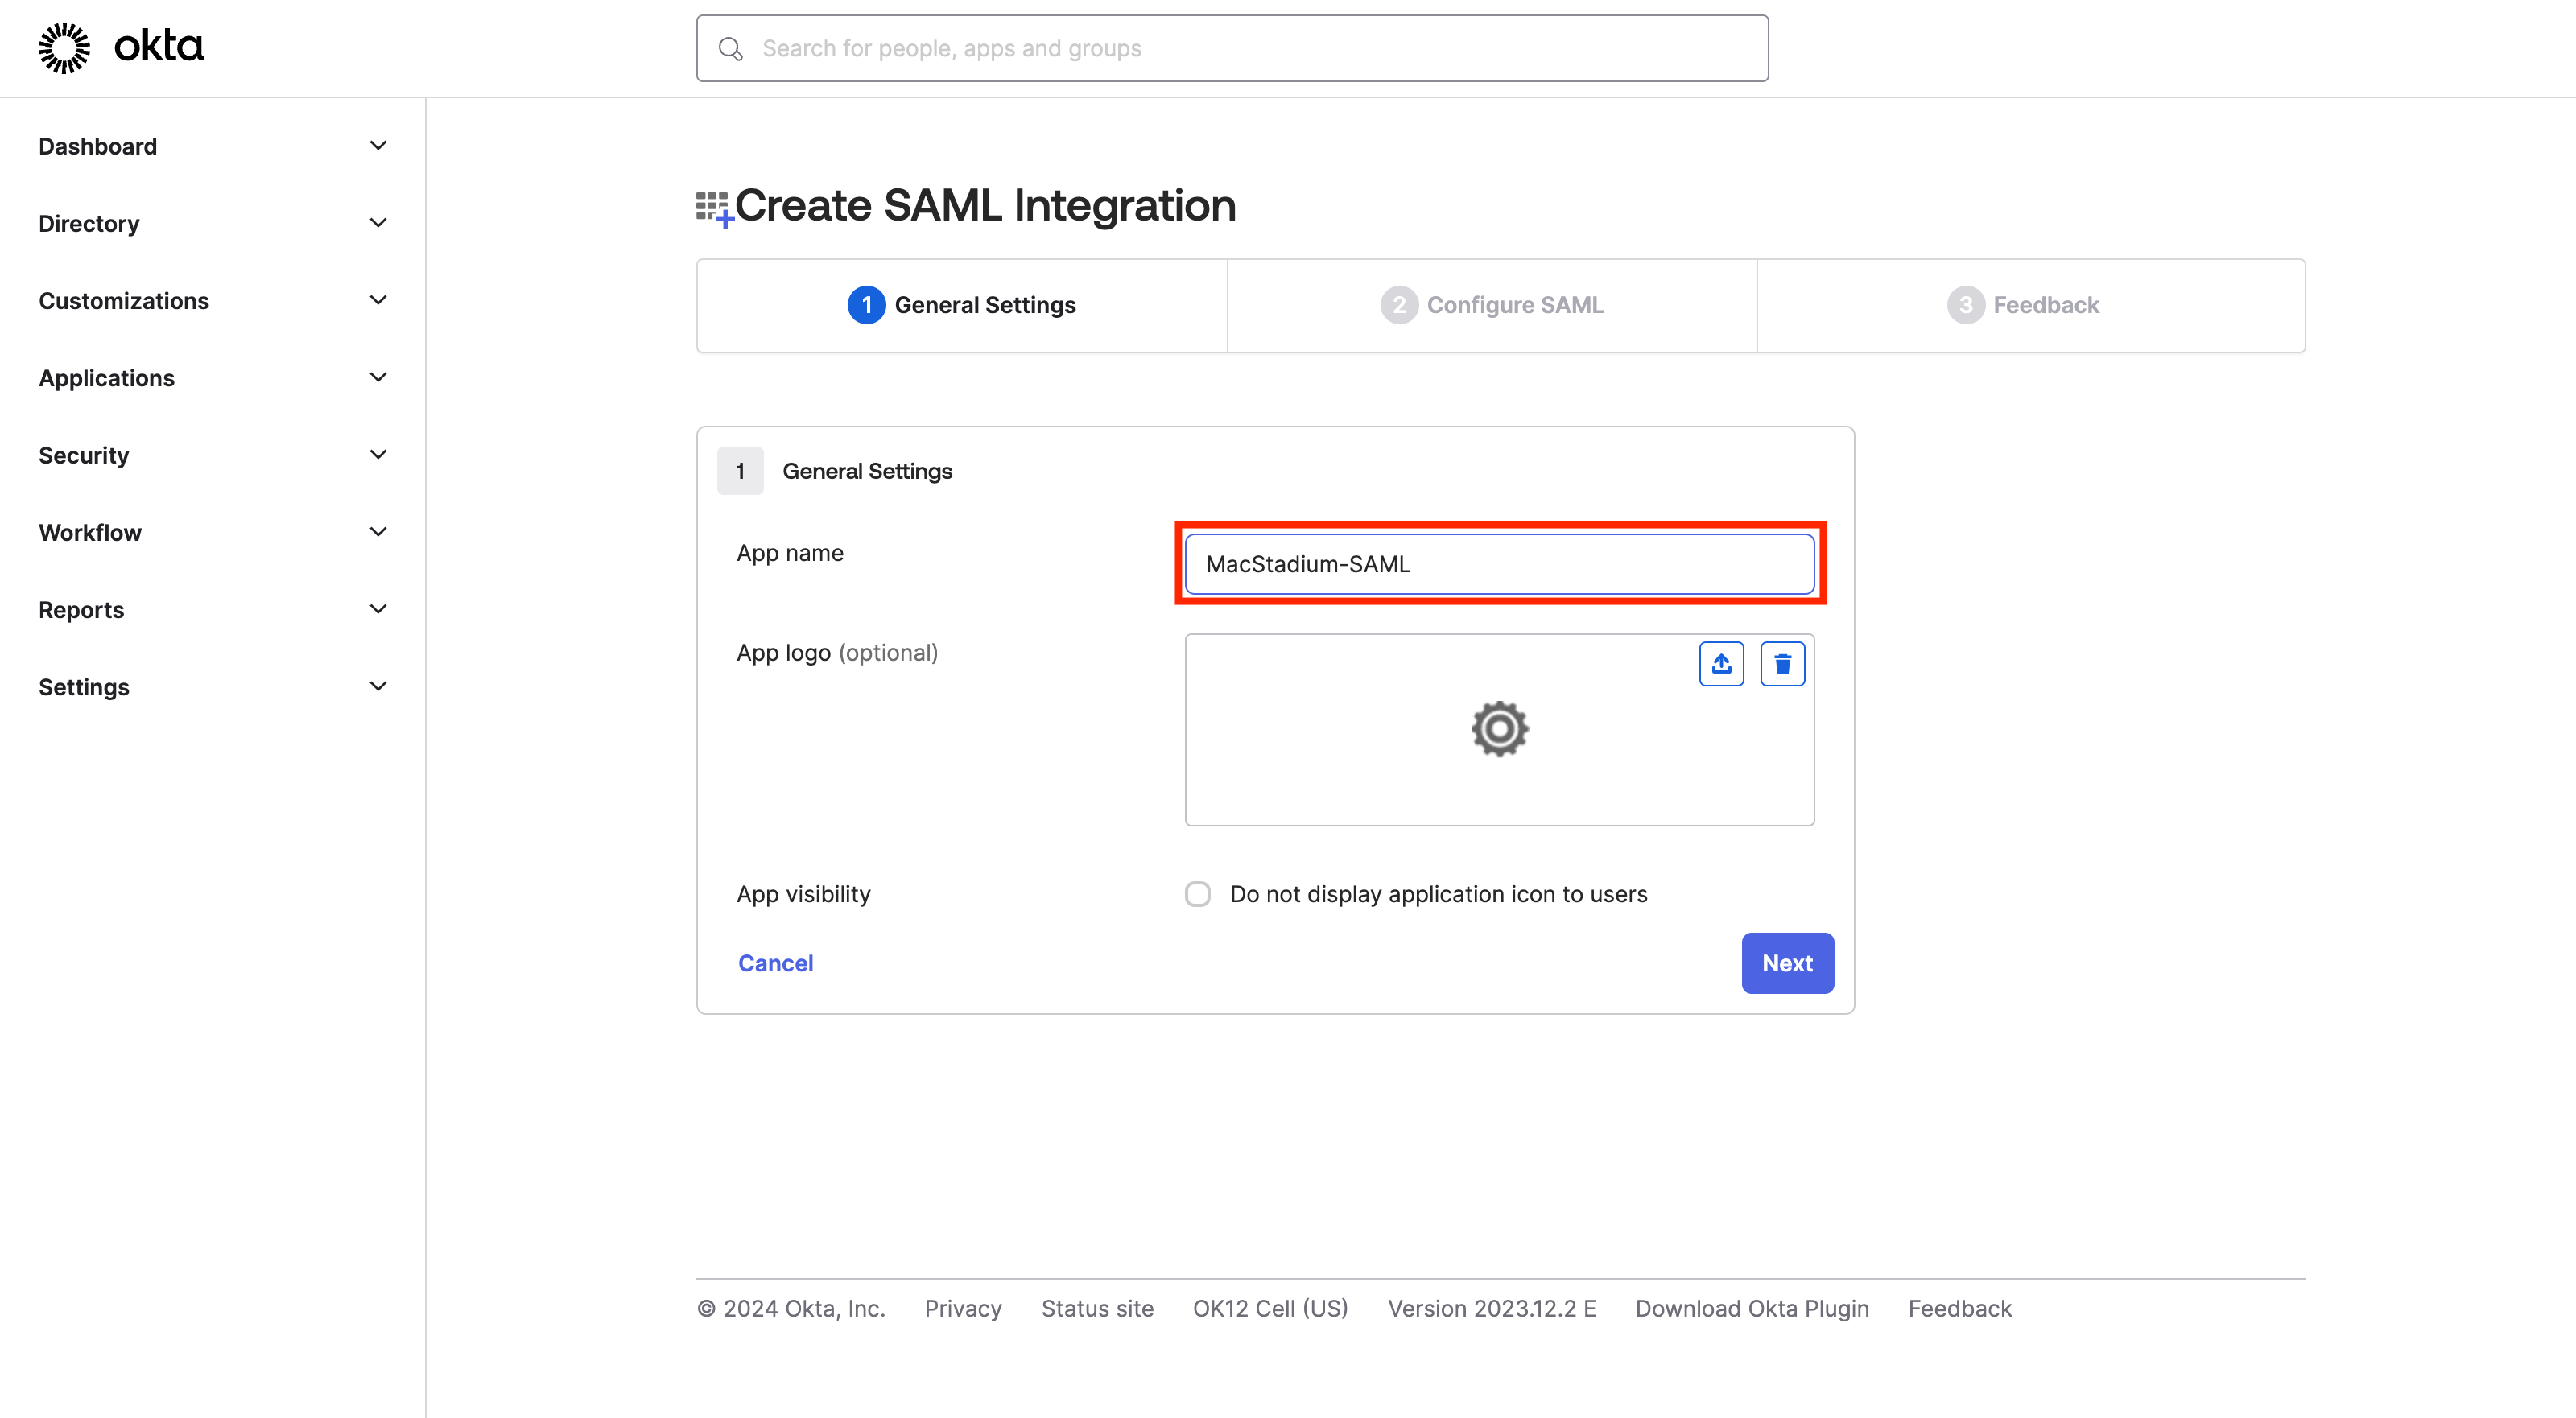
-
Enter app name (for example, MacStadium-SAML).
- Configure the SAML application.
-
Sign-on URL:
https://idp.macstadium.com/saml2/idpresponse - Use this for Recipient URL and Destination URL: ✔︎ (make sure it’s checked)
-
Audience URI (SP Identity ID):
urn:amazon:cognito:sp:us-east-1_pusi8jHs1 - Click Show Advanced Settings.
-
Upload the public certificate
(macstadium-us-east-1_pusi8jHs1.pem)from Step 1. - Single Logout.
- Allow application to initiate Single Logout - ✔︎ (make sure it is checked)
-
Single Logout URL:
https://idp.macstadium.com/saml2/logout -
SP Issuer:
urn:amazon:cognito:sp:us-east-1_pusi8jHs1 -
Attribute statements
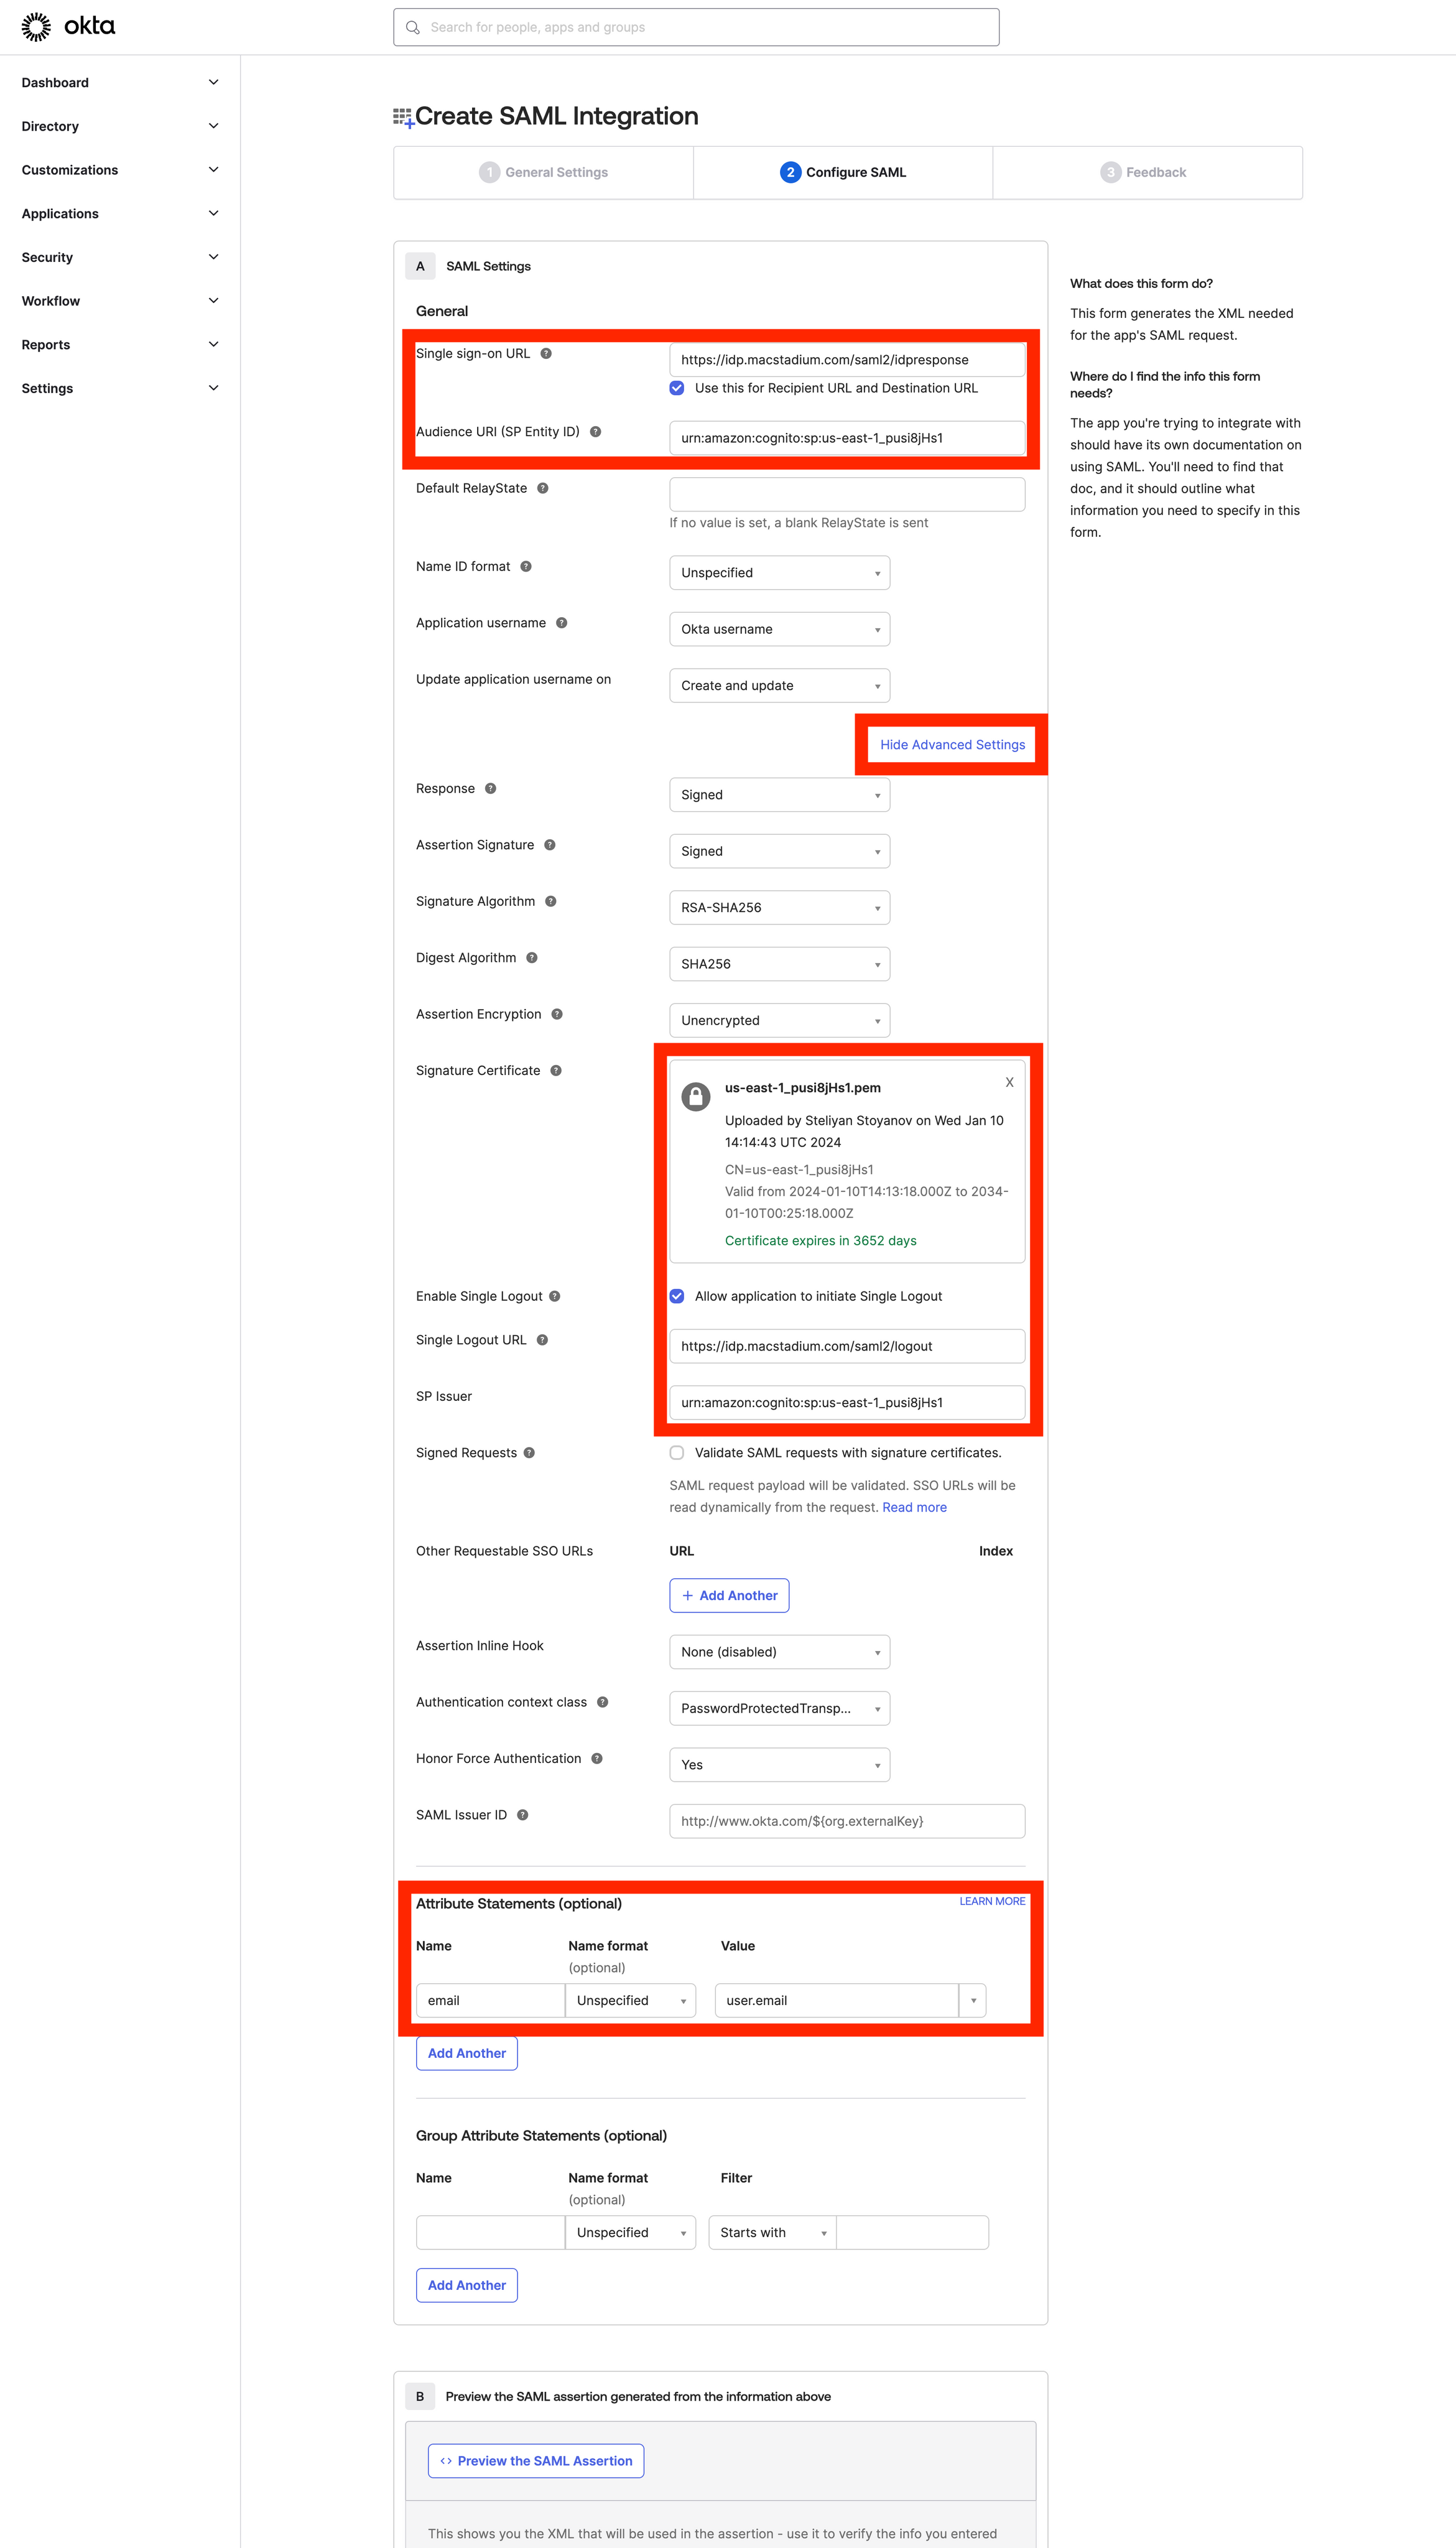
- Click Finish to complete the setup.
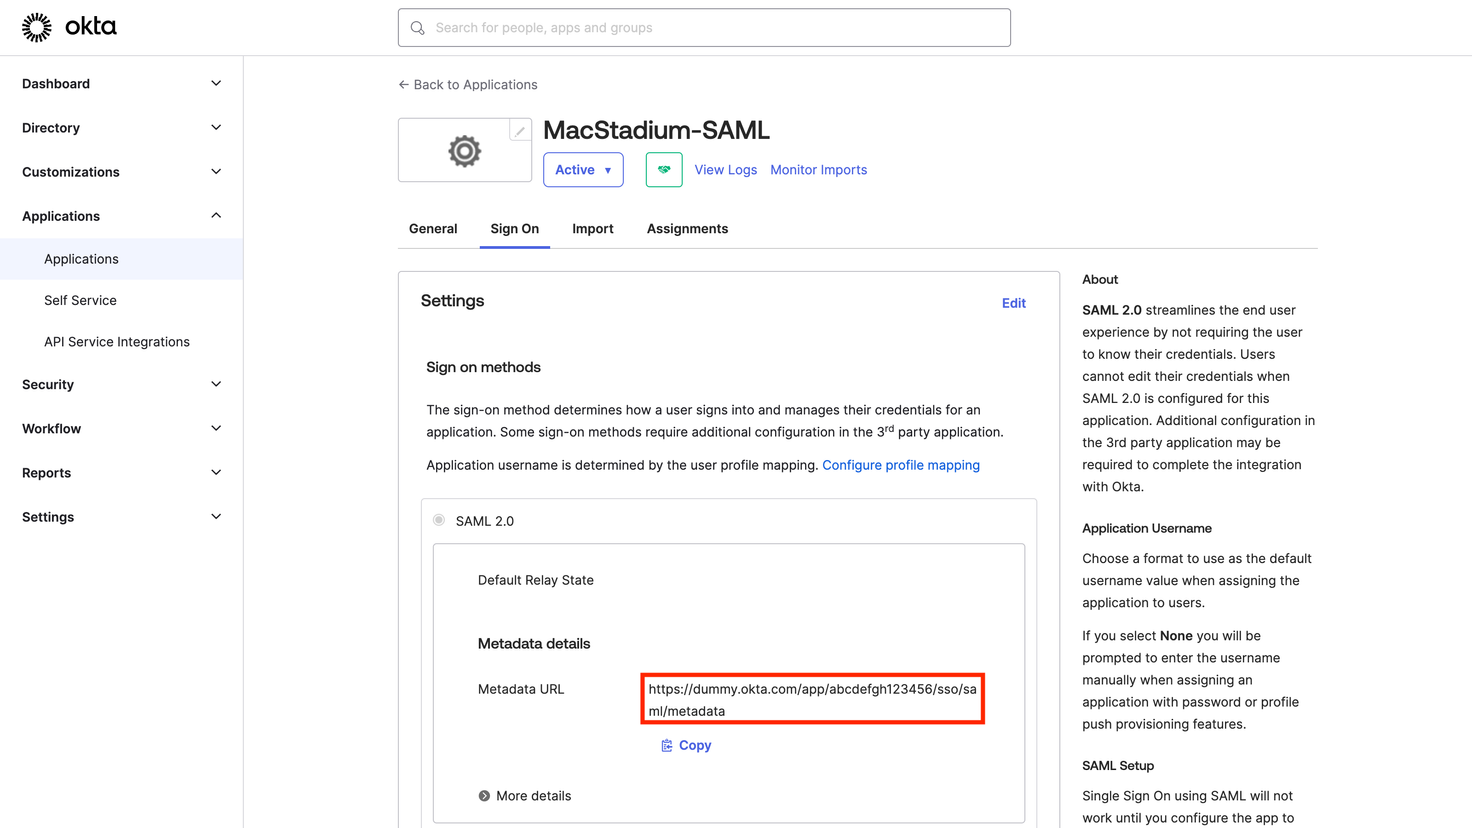
-
Provide the MacStadium support team the Metadata URL