Install Windows 11 on your MacStadium VMware Private Cloud
Installing Windows 11 requires certain system features that don't exist across all MacStadium hardware. To overcome this obstacle, we will mock those features in VMware, so that the OS can be successfully installed on a VM in VMware, regardless of the underlying hardware configuration.
Prerequisites to installing Windows 11 in VMware
- VMware version 7.0.2+
- Configured Native Key Provider
- Configured trusted platform module (TPM)
Configure Key Provider
NOTE: If you already have your own Key Management system in the vCenter, you can skip this step.
NOTE: In order to use VMware's Native Key Provider, the vCenter and all ESXi hosts must first be patched to Update 2.
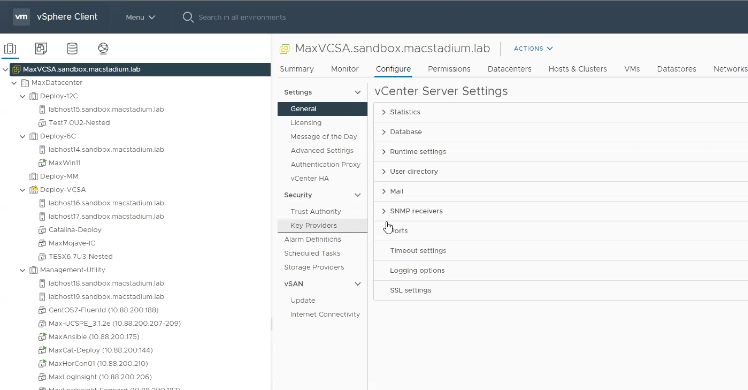
In your vSphere environment, you'll need to click on Configure, and select Key Providers in the drop-down menu.
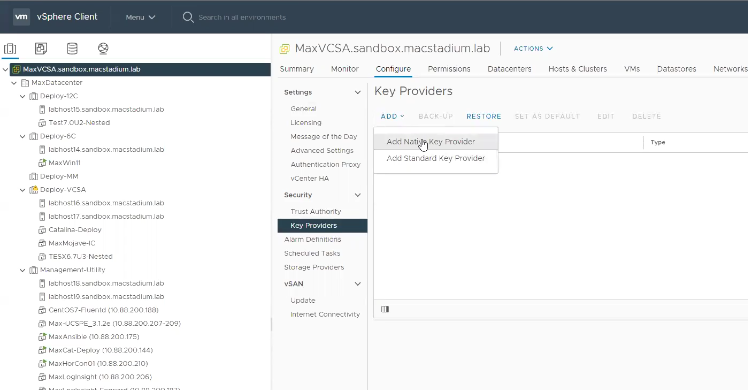
You'll then need to select Add Native Key Provider to manage the required encryption.
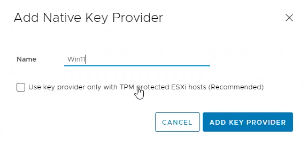
Next, you'll need to name your key provider.
NOTE: do not select the check box in the following view, as not all MacStadium hardware is equipped with this feature.
After clicking ADD KEY PROVIDER above, you will see the following view, where you will need to click the button labeled BACK UP.
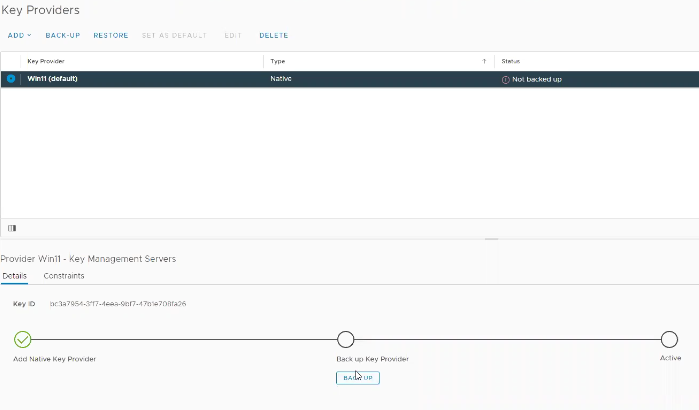
You will then have the option of adding a password to protect the Native Key Provider before you finalize the back up. Once the back up process is complete, you will see that your key provider is in an "Active" state.

Update existing VM to be compatible with Windows 11
In order to update an existing VMware 7.0.2+ VM such that it can run Windows 11, you'll need to navigate to Edit Settings on the VM.
NOTE: If you haven't yet updated the VM hardware on the existing VM you wish to install Windows 11 on, you can follow this guide in order to do so.
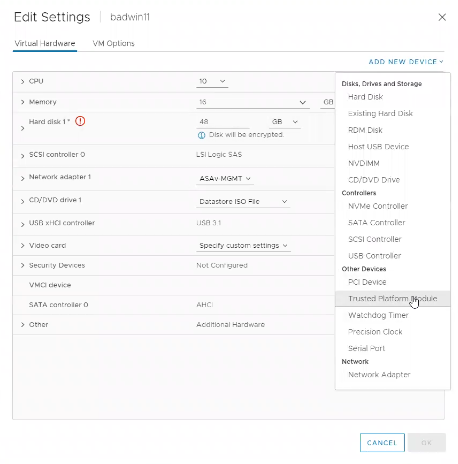
Then, click on the Add New Device drop-down menu and select Trusted Platform Module.
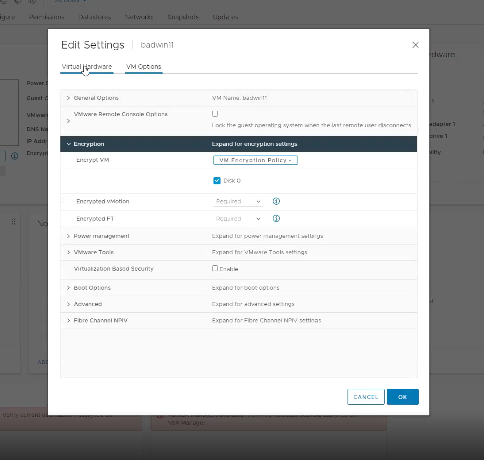
Finally, under the VM Options tab, update the Encryption value to VM Encryption Policy in order to also encrypt the VM configuration files.
Create a New VM that is compatible with Windows 11
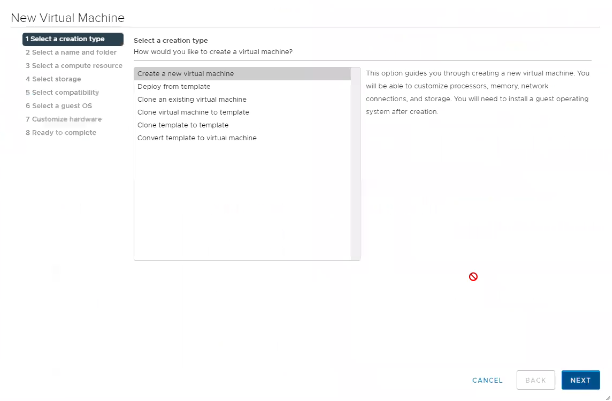
First, select Create a new virtual machine.
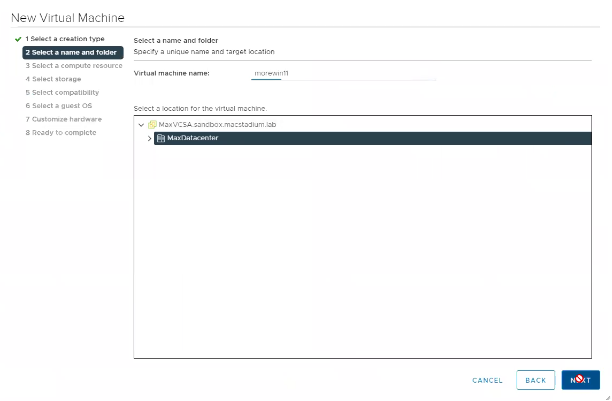
Next, name the new virtual machine, and designate its folder.
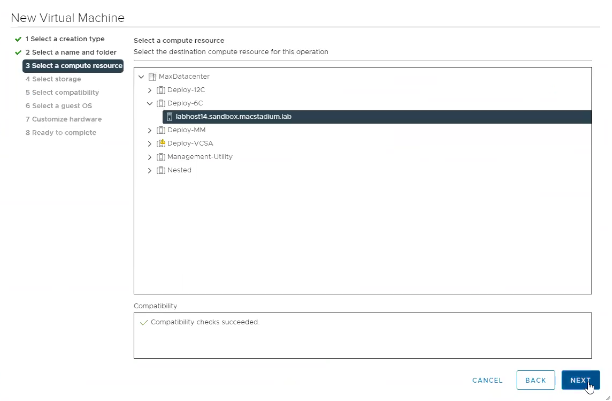
Then, you'll need to select a compute resource.
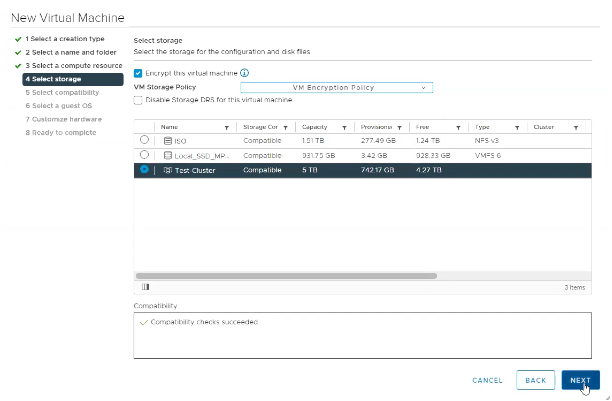
Then, in the Select Storage view, check Encrypt this virtual machine, and set the VM Storage Policy to VM Encryption Policy.
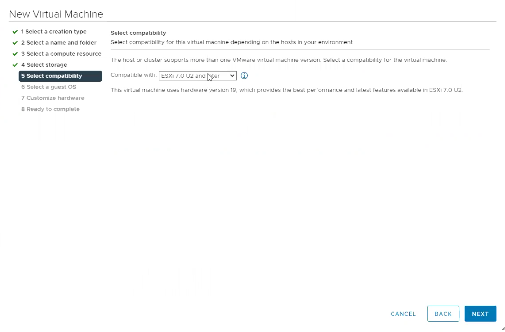
Select, at a minimum, VMware version 7.0.2
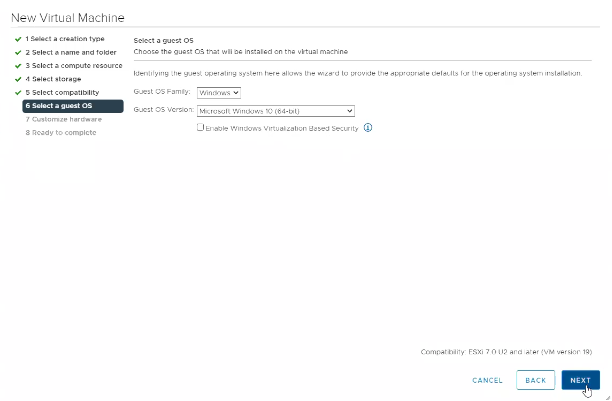
Select the guest OS.
NOTE: currently Windows 10 is the latest release listed. Selecting Windows 10 here will allow the successful installation of Windows 11.
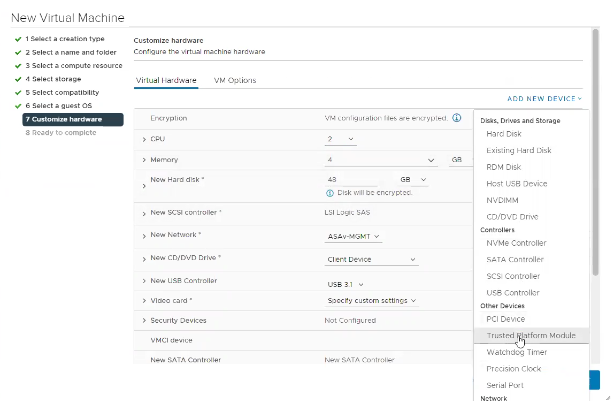
Finally, under the Add New Device drop down, select Trusted Platform Module.
Updated almost 4 years ago
