vSphere 6.7 Update
Login to your new VCSA environment using the information in your IP Plan. You can do this through either the Flash client or the new HTML5 client. The screen shots in this document were taken using the Flash client, but the steps are the same for either client version. If you have issues accessing the new environment, please let us know by creating a support ticket.
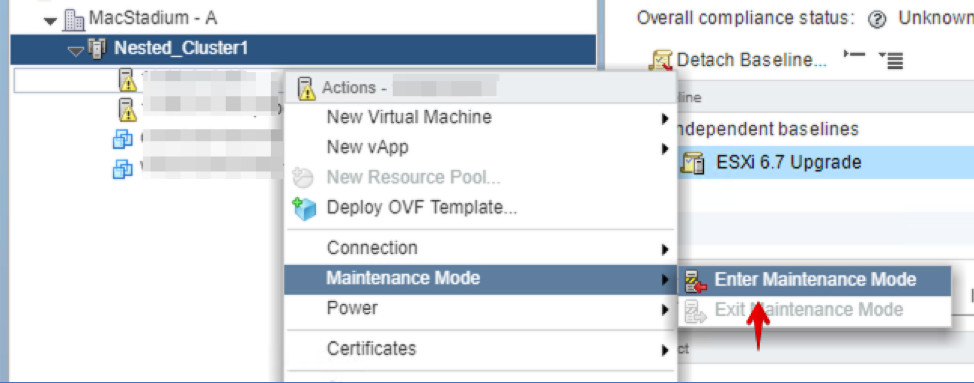
Prior to starting the upgrade, MacStadium recommends putting a host into maintenance mode. It is not required to put the host into maintenance mode prior to the upgrade as the built-in process will already do this. However, it is a good practice and gives you an opportunity to see what issues you may have with putting a host into maintenance mode. You can do this by right-clicking the host and selecting Maintenance Mode -> Enter Maintenance Mode.
Once you are logged in, select the cluster where you have hosts you want to upgrade. Once selected, go to the Update Manager tab in the vCenter. You should see a Baseline attached to the cluster named “ESXi 6.7 Upgrade.”

From here, click on the Baseline and select the Remediate option.

Accept the default configuration for the Baseline. If you did not select the Baseline before selecting remediate, you may need to select it here.
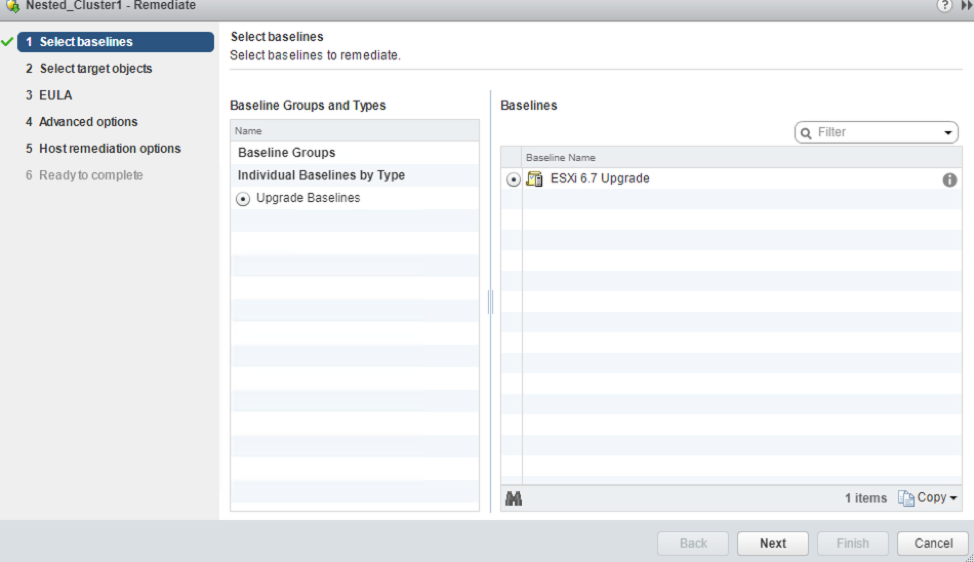
If you are using SAN storage and have multiple hosts, you should be able to select all hosts and remediate all of them at the same time. The process will put a host in maintenance mode one at a time and use vMotion to move your VMs around in the environment. This should not cause any downtime for your VM environment however you may see some performance impact depending on your utilization.
If you are using a single host or multiple hosts using local storage, you will need to power down all the VMs on the host prior to starting the upgrade process. No VMs can be running on the host during the upgrade and a reboot is required to complete it. Please plan accordingly and schedule during an acceptable maintenance window.
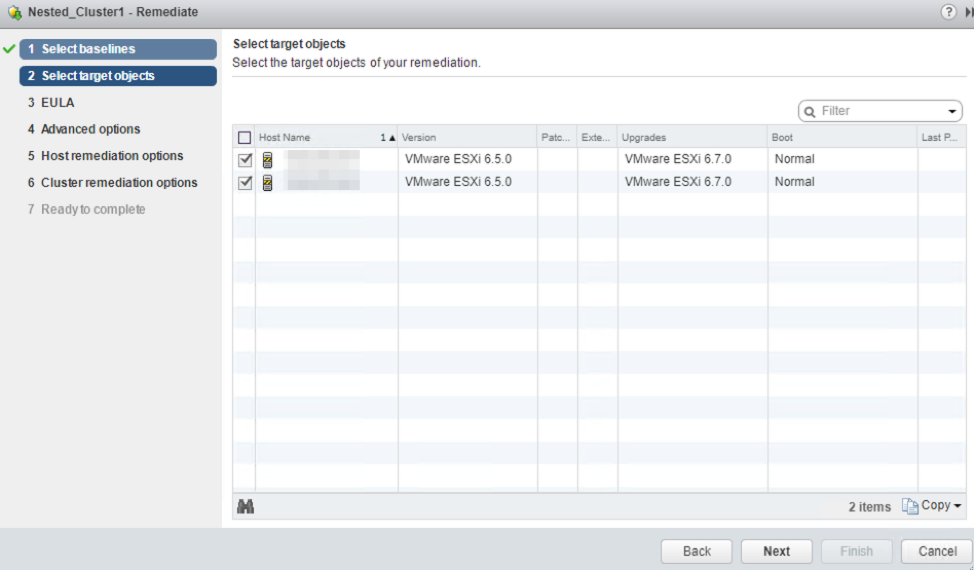
In the above scenario, we are using local storage. We will need to power down the VMs on both hosts before the upgrade can begin. First, select which hosts to upgrade, and then click Next.
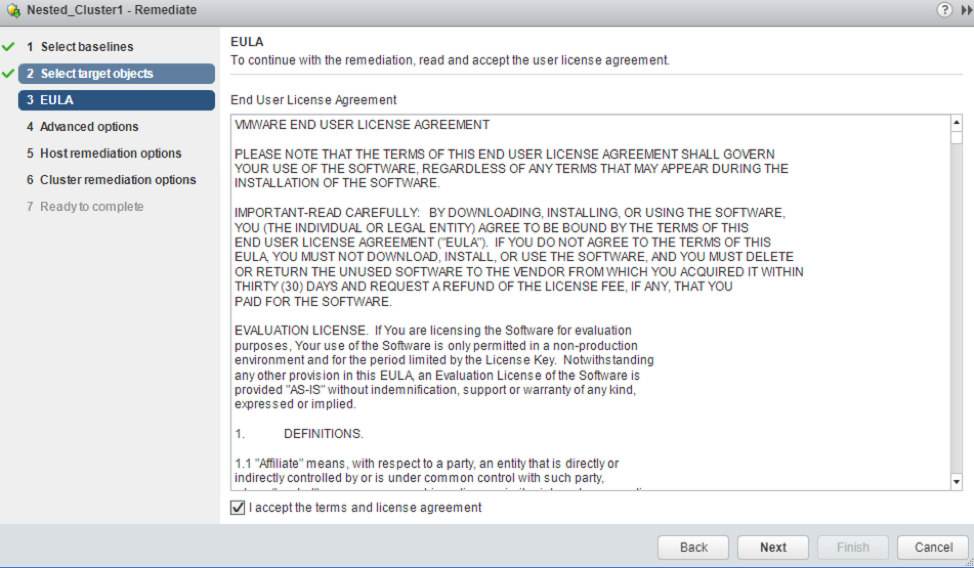
Check the box at the bottom to accept the EULA.
You can schedule the upgrade to run at a specific time. We recommend monitoring the upgrade to ensure the process ran correctly and to be able to respond to any issues that may occur.
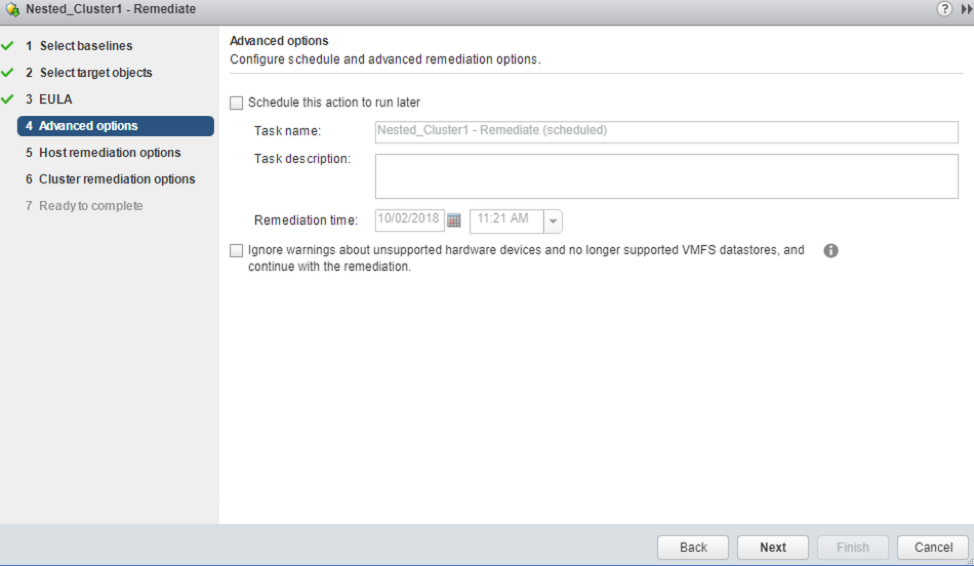
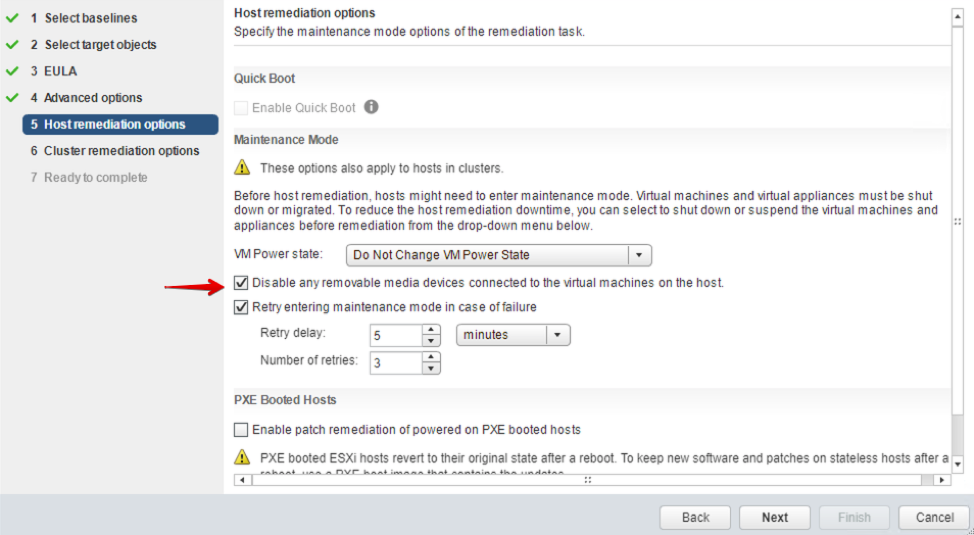
On the Host Remediation screen, you should check the “Disable any removable media devices…” box. This will ensure VMs are able to vMotion around on your hosts without issue if they have an ISO attached. Note that this is where the Update Manager process will attempt to put your host into maintenance mode. If this box is not checked, any hosts not in maintenance mode already will not upgrade. If it is not able to put a host in maintenance mode the process will terminate.
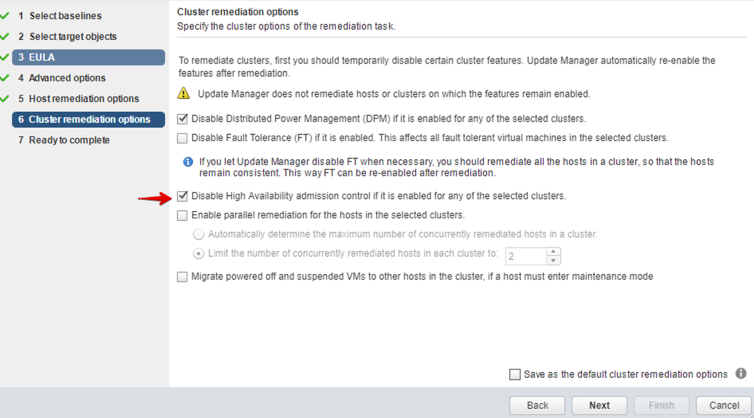
On the cluster screen, you will want to check the “Disable High Availability admission control” checkbox. This will ensure that VMs are able to vMotion correctly around in your cluster during the upgrade process. Leaving this unchecked may cause VMs to not be able to move around to other hosts and prevent the host from going into Maintenance Mode. Select Next.
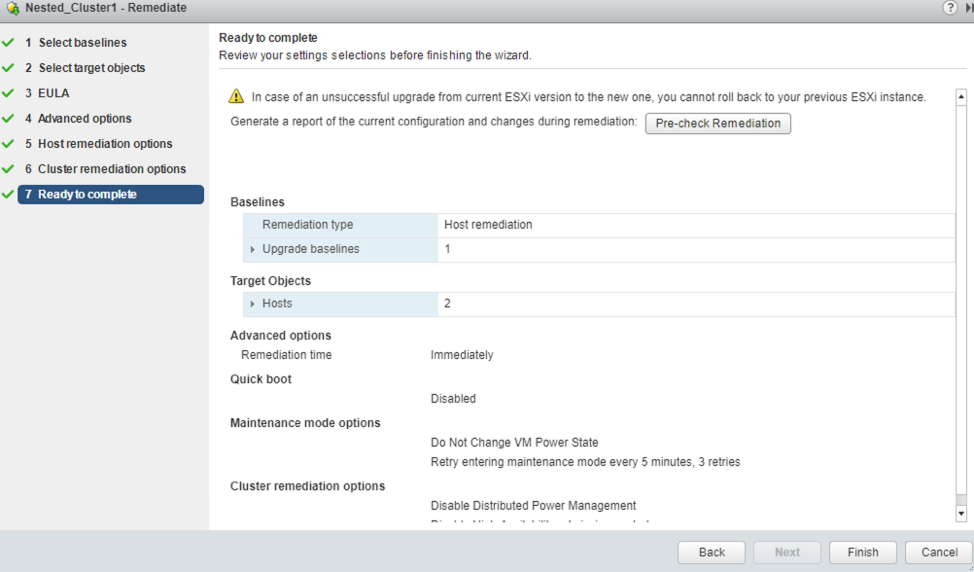
On the final screen, review your settings. You may select the “Pre-check Remediation” to validate your configuration before proceeding.
A remediation task should begin in the Recent Tasks section. Monitor this area to see the maintenance mode tasks, remediations, and reboots of the hosts. Some of these tasks may not start for a few minutes as the data is copied to the hosts.

The Remediate Entity task should be complete once all hosts have been upgraded. Select your hosts and check the Hypervisor version under Summary.

If you see the host version has not changed or the host has not come back online after 10 minutes, please open a support ticket and request someone inspect the host. Please provide the host IP in the ticket. If all your hosts are upgraded, take any hosts still in Maintenance Mode out of it and power on any VMs that were powered off.
VMware Tools and VM Hardware Upgrades
After your ESX host has been updated to 6.7, you have the option to upgrade your VMware Tools and VM hardware of your VMs. This process is well-documented by VMware. You can find more information here for VMware Tools and here is an article on how to upgrade your VM hardware. Be sure to upgrade VM Tools before doing the VM hardware upgrades. Upgrading VM hardware before VMware Tools can lead to corruption of your VMs. Also note that VM hardware upgrades require your VM to be powered off and cannot be rolled back after upgrading. You are not required to upgrade VMware Tools or VM hardware, however it is a recommendation from VMware to utilize the latest features and functions of version 6.7.
Updated over 5 years ago
